
The Infernal Hordes is a wave-based gameplay mode with survivor-like choices to be made between waves, culminating in a new boss encounter and rewards. It takes place in Hell and becomes available in World Tier 3 on both the Seasonal and Eternal realm where it will remain after Season 5 ends.

This content was available on the Diablo 4 PTR which began on Tuesday 25th June and ended on Tuesday 2nd July.
How to Get to The Infernal Hordes
- Be in World Tier 3
- Head to the Zarbinzet (Map) to investigate a disturbance in a new Questline called "The Eyes of the Enemy".
Once the Questline is complete you will have unlocked access for your entire account to the Infernal Hordes in Hell but you will first need The Infernal Hordes Compass which works the same way a Dungeon Sigil does for Nightmare Dungeons.
These can be found by:
- Endgame Bosses
- Helltide Chests
- Nightmare Dungeons
- Whispers
- Occultist - By crafting Sigil Dust
You'll get your first Infernal Hordes Compass as a reward for completing the The Eyes of the Enemy Questline in Zarbinzet.
You right-click on the Compass in your inventory and the map will pop up with the location of the Infernal Hordes highlighted and you click to teleport directly to The Abyssal Verge.

Infernal Compasses can be used at the following levels and World Tiers:
- Tier I
- Available at World Tier 3
- Tier II
- Requires World Tier 4
- Includes Bonus Affixes which increase crafting materials, and Legendary and Unique Drop rates!
- Tier III
- Available at Level 100
- Includes Bonus Affixes
- Includes Spoil of Greater Equipment
Upgrading an Infernal Compass
There are 8 Tiers of Infernal Compasses, which scale in difficulty and World Tier. Each Tier increases the number of waves starting at six for Tiers 1 - 3, increasing until a maximum of 10 waves with a Tier 8 Infernal Compass. It also increases the starting difficulty of Monsters, and increases the potency of your rewards while decreasing your number of revives.
Tiers 9 and 10 will be introduced mid way through Season 5.
There are two ways to upgrade your Compasses to a higher tier the easiest being to salvage them at the Occultist into Sigil Dust and craft higher tier ones. As Nightmare Dungeon Sigils also break down into Sigil Dust this gives you even more opportunities to collect materials.
| Crafting Costs of Infernal Compasses at the Occultist | |||
|---|---|---|---|
| Tier 1 | 125 x Sigil Powder 3 x Forgotten Soul 19,000 Gold |
Tier 2 | 190 x Sigil Powder 5 x Forgotten Soul 22,000 Gold |
| Tier 3 | 275 x Sigil Powder 73 x Forgotten Soul 26,000 Gold |
Tier 4 | 350 x Sigil Powder 9 x Forgotten Soul 30,000 Gold |
| Tier 5 | 375 x Sigil Powder 11 x Forgotten Soul 35,000 Gold |
Tier 6 | 400 x Sigil Powder 13 x Forgotten Soul 40,000 Gold |
| Tier 7 | 425 x Sigil Powder 15 x Forgotten Soul 45,000 Gold |
Tier 8 | 450 x Sigil Powder 17 x Forgotten Soul 50,000 Gold |
| Tier 9 | Not yet in the game. | Tier 10 | Not yet in the game. |
The other way is to collect Abyssal Scrolls which can be found and salvaged and used to upgrade your Infernal Compass by upgrading their Tier. Infernal Compasses will only drop at Tiers I-III; Abyssal Scrolls will be needed to increase their level to a Max of Tier VIII.
To upgrade an Infernal Compass right-click on the Abyssal Scroll in your Consumables tab and then left-click on the Compass you wish to upgrade.
| Upgrading an Infernal Compass |
|---|

How to get Abyssal Scrolls
At the Blacksmith you can:
- Salvage a Tier 1-3 Infernal Hordes Compass grants an Abyssal Scroll.
- Salvage Tier 4+ Infernal Hordes Compasses grants 1 extra Abyssal Scroll per Tier. (i.e. 6 Scrolls for Salvaging a Tier 8)
Abyssal Scrolls can be traded with other players.
Fighting The Infernal Hordes
Once you have teleported to The Abyssal Verge you begin fighting 60 seconds waves of monsters. Once the monsters from that wave are vanquished you must decide between 3 Infernal Offers each offering a Boon and a Bane. As the name suggests these make the fight a little more difficult but also sweeten it with rewards or boosts.


Infernal Offering
You must select one Infernal Offering and this will modify the next wave you face. You will get to choose up to 9 Offerings in total depending on what Teir dungeon you are on and the previous Offerings stay active throughout the waves, simply stacking the effects and increasing the challenge. Open your map to see which Offerings you have already activated.
All of the Infernal Offers are listed below.
| Infernal Offer | Bane | Boon |
|---|---|---|
| Common | ||
| Aether Rush | Normal monster damage +25% | Gathering Aether increases movement speed (8s) |
| Burning Hellborne | Hellfire now spawns Hellborne | Hellborne drop 2 additional Aether |
| Burning Rain | Hellfire rains upon you | At the end of each wave spawn 1-3 Aether |
| Bursting Masses | Masses deal unavoidable damage | Waves start, spawn an Aetheric Mass |
| Corrupting Spires | Soulspires empower nearby foes | Soulspires pull foes inward |
| Draining Spires | Soulspires drain Life from players in range | Soulspires grant 2 additional Aether |
| Exalted Elite | Elite damage +25% | Aether Fiends grant +2 Aether |
| Exalted Hordes | Normal monsters damage +25% | Killing them spawns Aether Events +50% faster |
| Exalted Masses | Aetheric Mass damage +25% | Aetheric Mass grants +2 Aether |
| Gorging Masses | Slaying Aetheric Mass slows you (8s) | While slowed this way, you have unlimited resources |
| Summoned Hellborne | Hellborn are hunting you | Hellborn grant +2 Aether |
| Rare | ||
| Bursting Fiends | Elite damage +25% | Aether Fiends explode and damage foes |
| Exalted Hellborn | Hellborn damage +25% | Hellborn grant +2 Aether |
| Insatiable Spires | Soulspires require 2x kills | Soulspires grant 2x Aether |
| Invigorating Hellborn | Hellborn damage +25% | Slaying Hellborn invigorates you |
| Summoned Lords | Aether Lords now spawn | They grant +3 Aether |
| Surging Elites | Chance for Elite to spawn is doubled | Aether Fiends grant +2 Aether |
| Teeming Masses | Masses spawn an Aether Lord on death | Aether Lords grant +3 Aether |
| Unstoppable Elites | Elites are Unstoppable | Aether Fiends grant +2 Aether |
| Legendary | ||
| Enfeebled Wanderer | Potion Cooldown is increased by 2 seconds | Defeating Fell Council grants +15 Aether |
| Exalted Council | Fell Council damage +50% | Defeating them grants +15 Aether |
| Exhausted Wanderer | Evade Cooldown is increased by 2 seconds | Defeating Fell Council grants +15 Aether |
| Withered Wanderer | -10% All Resistances | Defeating Fell Council grants +15 Aether |
| Unique | ||
| Stalking Devil | An Infernal Demon has your scent | Slay it to gain +25 Aether |
Anyone in a group can select an Infernal Offering, it doesn't matter who activated the Compass to go to The Abyssal Verge.
The Well of Hatred
Once the waves are vanquished you can progress to The Well of Hatred, the arena where you will face three of the five members of the Fell Council.
Originally meant to protect us from the Prime Evil Mephisto during the events in Diablo II, these noble priests were corrupted and became Champions of the very demon they swore to oppose.
As each one of the three dies the remaining members grow more powerful. They all have unique abilities and it's random which three you will face.
| Members of the Fell Council | |
|---|---|


Burning Aether
As you fight the waves in The Abyssal Verge and the Fell Council in The Well of Hatred Burning afterwards Burning Aether will drop. You can exchange these for loot and gold at the end of the fight.
The Rewards
There is no loot or gold dropped during the waves. After each wave, a small pile of gold, gems, and materials will drop.
After the final fight with the Council, three or four chests will appear which you can exchange Burning Aether to open:
- Spoils of Materials costs 20 Aether - Gems, Veiled Crystals, Abyssal Scrolls, Masterworking Materials
- Spoils of Equipment costs 20 Aether - Legendary, Unique or Mythic items.
- Spoils of Greater Equipment costs 60 Aether - Legendary, Unique or Mythic items. A guaranteed item with a Greater Affix.
- Spoils of Gold exchange all remaining Aether - Gold
Certain Unique Items can be target farmed in from the Spoils of Equipment chests in the Infernal Hordes, detailed below.
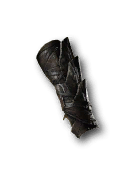
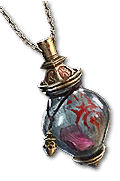
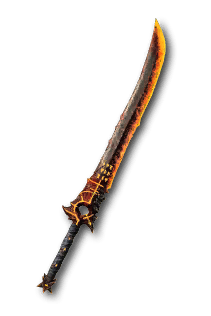
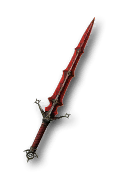
| Unique Item | Class | Type |
|---|---|---|
| Crown of Lucion | All Classes | Helm |
| Endurant Faith | All Classes | Gloves |
| Locran's Talisman | All Classes | Amulet |
| Rakanoth's Wake | All Classes | Boots |
| Shard of Verathiel | All Classes | 1H Sword |
| The Basilisk | Druid | Staff |
| The Third Blade | Barbarian | 1H Sword |
| The Mortacrux | Necromancer | Dagger |
| The Umbracrux | Rogue | Dagger |
| Vox Omnium | Sorcerer | Staff |
| + Expand to see the details of Uniques you can farm in the Infernal Hordes. | ||||||||||||||||||||||||||||||||
|---|---|---|---|---|---|---|---|---|---|---|---|---|---|---|---|---|---|---|---|---|---|---|---|---|---|---|---|---|---|---|---|---|
| ||||||||||||||||||||||||||||||||


The chests can be opened multiple times, as long as you have enough Aether.
There is also a Stash nearby.
| Spending Burning Aether |
|---|

Tips
Farming the Infernal Hordes can be one of the most effective ways to obtain crafting materials, and when you upgrade a compass to Tier 7+, it's extremely lucrative. Rob explains how this can work for you in this video.
Changes to Infernal Hordes
Patch 1.5.1, August 20, 2024
- The Spoils of Gold chest is now reuseable.
- The Following Infernal Offerings have been updated to increase their rewards:
- The Exalted Elite: Burning Aether amount increased from +1 to +2.
- The Surging Elite: Burning Aether amount increased from +1 to +2.
- The Unstoppable Elite: Burning Aether amount increased from +1 to +2.
- The Burning Rain: end of wave Burning Aether increased from 1-3 to 3-9.
Patch 1.5.0, August 6, 2024
- Added to the game.