No edit summary |
mNo edit summary |
||
| Line 5: | Line 5: | ||
[[File:Infernal Compass.jpg|alt=Infernal Compass|thumb|Infernal Compass]] | [[File:Infernal Compass.jpg|alt=Infernal Compass|thumb|Infernal Compass|450x450px]] | ||
== How to Get to The Infernal Hordes == | == How to Get to The Infernal Hordes == | ||
| Line 41: | Line 41: | ||
**Includes Spoil of Greater Equipment | **Includes Spoil of Greater Equipment | ||
To upgrade an Infernal Compass right-click on the Abyssal Scroll in your Consumables tab and then left-click on the Compass you wish to upgrade. | To upgrade an Infernal Compass right-click on the <span class="white">Abyssal Scroll</span> in your Consumables tab and then left-click on the Compass you wish to upgrade. | ||
===How to get Abyssal Scrolls=== | ===How to get Abyssal Scrolls === | ||
* | At the [[Blacksmith]] you can: | ||
* | |||
* Salvage a Tier 1-3 Infernal Hordes Compass grants an Abyssal Scroll. | |||
*Salvage Tier 4+ Infernal Hordes Compasses grants 1 extra Abyssal Scroll per Tier. (i.e. 6 Scrolls for Salvaging a Tier 8) | |||
Abyssal Scrolls can be traded with other players. | Abyssal Scrolls can be traded with other players. | ||
| Line 59: | Line 61: | ||
*<span class="fire">Hellfire rains upon you.</span> <span class="poison">At the end of each wave spawn 1-3 Aether.</span> | *<span class="fire">Hellfire rains upon you.</span> <span class="poison">At the end of each wave spawn 1-3 Aether.</span> | ||
*<span class="fire">Slaying Aetheric Masses slow you (8%).</span> <span class="poison">While slowed this way, you have unlimited resources.</span> | *<span class="fire">Slaying Aetheric Masses slow you (8%).</span> <span class="poison">While slowed this way, you have unlimited resources.</span> | ||
*<span class="fire">Masses spawn an Aether Lord of death.</span> <span class="poison">Aether Lrds grand +3 Aether.</span> | *<span class="fire">Masses spawn an Aether Lord of death.</span> <span class="poison">Aether Lrds grand +3 Aether.</span> | ||
Anyone in a group can select an Infernal Offering, it doesn't matter who activated the Compass to go to The Abyssal Verge. | Anyone in a group can select an Infernal Offering, it doesn't matter who activated the Compass to go to The Abyssal Verge. | ||
| Line 65: | Line 67: | ||
You must select one Offering and this will modify the next wave you face. You will get to choose 4 in total and most of the previous Offerings stay active throughout the waves, simply stacking the effects and increasing the challenge. | You must select one Offering and this will modify the next wave you face. You will get to choose 4 in total and most of the previous Offerings stay active throughout the waves, simply stacking the effects and increasing the challenge. | ||
===The Well of Hatred=== | === The Well of Hatred=== | ||
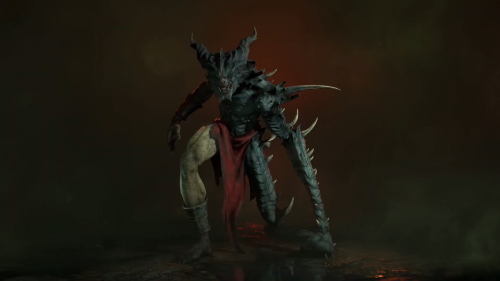
Once the 5 waves are vanquished you can progress on to The Well of Hatred, the arena where you will face three of the five members of the Fell Council. | Once the 5 waves are vanquished you can progress on to The Well of Hatred, the arena where you will face three of the five members of the Fell Council. | ||
| Line 74: | Line 76: | ||
{| class="skillfeatures" style="margin:auto;" | {| class="skillfeatures" style="margin:auto;" | ||
! colspan="2" |Members of the Fell Council | ! colspan="2" | Members of the Fell Council | ||
|- | |- | ||
|[[File:Fell Council member 1.png|alt=Fell Council member|thumb|center|500x500px]] | |[[File:Fell Council member 1.png|alt=Fell Council member|thumb|center|500x500px]] | ||
| Line 86: | Line 88: | ||
===Burning Aether=== | ===Burning Aether === | ||
As you fight the waves in The Abyssal Verge and the Fell Council afterwards in The Well of Hatred Burning Aether will drop. This is exchanged for loot and gold at the end of the fight. | As you fight the waves in The Abyssal Verge and the Fell Council afterwards in The Well of Hatred Burning Aether will drop. This is exchanged for loot and gold at the end of the fight. | ||
| Line 95: | Line 97: | ||
After the fight, three chests will appear which you can exchange Burning Aether to open: | After the fight, three chests will appear which you can exchange Burning Aether to open: | ||
*Spoils of Materials costs 25 Aether - Gems, Veiled Crystals | * Spoils of Materials costs 25 Aether - Gems, Veiled Crystals | ||
*Spoils of Equipment costs 25 Aether - <span class="legendary">Legendary</span> or <span class="unique">Unique</span> item | * Spoils of Equipment costs 25 Aether - <span class="legendary">Legendary</span> or <span class="unique">Unique</span> item | ||
*Spoils of Gold exchange all remaining Aether - Gold | *Spoils of Gold exchange all remaining Aether - Gold | ||
| Line 106: | Line 108: | ||
!Spending Burning Aether | !Spending Burning Aether | ||
|- | |- | ||
|[[File:Spoils of Materials and Equipment.jpg|alt=Spoils of Materials and Equipment chests - The Infernal Hordes Diablol 4|center|thumb|650x650px]] | |[[File:Spoils of Materials and Equipment.jpg|alt=Spoils of Materials and Equipment chests - The Infernal Hordes Diablol 4|center|thumb|650x650px]] | ||
|} | |} | ||
| Line 114: | Line 116: | ||
{{Patch Date Season 5}} | {{Patch Date Season 5}} | ||
* Added to the game. | *Added to the game. | ||
[[Category:Endgame]] | [[Category:Endgame]] | ||
Revision as of 10:13, 28 June 2024
The Infernal Hordes is a wave-based gameplay mode with survivor-like choices to be made between waves, culminating in a new boss encounter and rewards. It takes place in Hell and becomes available in World Tier 3 on both the Seasonal and Eternal realm where it will remain after Season 5 ends.
This content is available on the Diablo 4 PTR which began on Tuesday 25th June and runs until Tuesday 2nd July.
How to Get to The Infernal Hordes
- Be in World Tier 3
- Head to the Zarbinzet (Map) to investigate a disturbance in a new Questline called "The Eyes of the Enemy".
Once the Questline is complete you will have unlocked access for your entire account to the Infernal Hordes in Hell but you will first need The Infernal Hordes Compass which works the same way a Dungeon Sigil does for Nightmare Dungeons. These can be found by defeating
- Endgame Bosses
- Helltides
- Nightmare Dungeons
- Whispers
You'll get your first Infernal Hordes Compass as a reward for completing the Questline in Zarbinzet.
You right-click on the Compass in your inventory and the map will pop up with the location of the Infernal Hordes highlighted and you click to teleport directly to The Abyssal Verge.
Upgrading an Infernal Compass
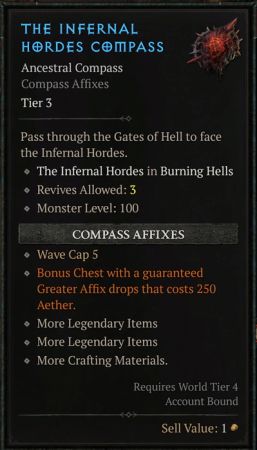
There are 8 Tiers of Infernal Compasses, which scale in difficulty and World Tier. Each Tier increases the number of waves starting at five for Tiers I-III, increasing until a maximum of 10 waves with a Tier VIII Infernal Compass. It also increases the starting difficulty of Monsters, and increases the potency of your rewards while decreasing your number of revives.
Abyssal Scrolls can be earned and used to upgrade your Infernal Compass by upgrading their Tier. Infernal Compasses will only drop at Tiers I-III; Abyssal Scrolls will be needed to increase their level to a Max of Tier VIII.
Infernal Compasses can be used at the following levels and World Tiers:
- Tier I
- Available at World Tier 3
- Tier II
- Requires World Tier 4
- Includes Bonus Affixes which increase crafting materials, and Legendary and Unique Drop rates!
- Tier III
- Available at Level 100
- Includes Bonus Affixes
- Includes Spoil of Greater Equipment
To upgrade an Infernal Compass right-click on the Abyssal Scroll in your Consumables tab and then left-click on the Compass you wish to upgrade.
How to get Abyssal Scrolls
At the Blacksmith you can:
- Salvage a Tier 1-3 Infernal Hordes Compass grants an Abyssal Scroll.
- Salvage Tier 4+ Infernal Hordes Compasses grants 1 extra Abyssal Scroll per Tier. (i.e. 6 Scrolls for Salvaging a Tier 8)
Abyssal Scrolls can be traded with other players.
Fighting The Infernal Hordes
Once you have teleported to The Abyssal Verge you begin fighting 90 seconds waves of monsters. Once the monsters from that wave are vanquished you must decide between 3 Infernal Offers each offering a Boon and a Bane. Some examples of Offers to choose from are:
- Elite damage +25%. Aether Fiends grant +1 Aether.
- Soulspires empower nearby foes. Soulspires pull foes
- Hellfire rains upon you. At the end of each wave spawn 1-3 Aether.
- Slaying Aetheric Masses slow you (8%). While slowed this way, you have unlimited resources.
- Masses spawn an Aether Lord of death. Aether Lrds grand +3 Aether.
Anyone in a group can select an Infernal Offering, it doesn't matter who activated the Compass to go to The Abyssal Verge.
You must select one Offering and this will modify the next wave you face. You will get to choose 4 in total and most of the previous Offerings stay active throughout the waves, simply stacking the effects and increasing the challenge.
The Well of Hatred
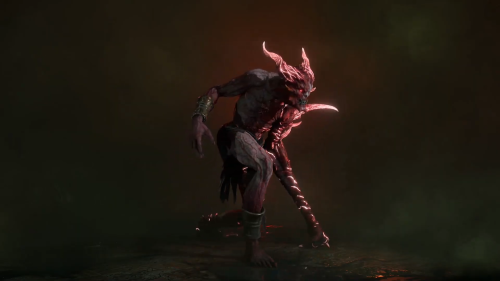
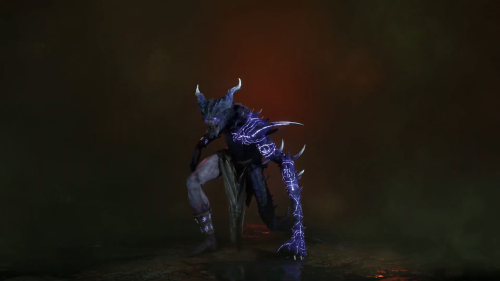
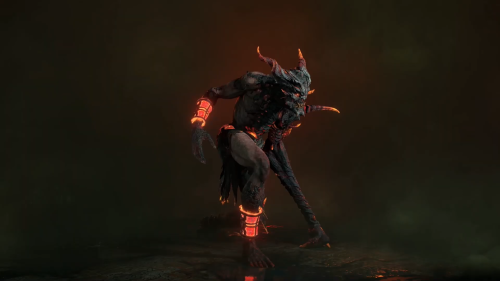
Once the 5 waves are vanquished you can progress on to The Well of Hatred, the arena where you will face three of the five members of the Fell Council.
Originally meant to protect us from the Prime Evil Mephisto during the events in Diablo II, these noble priests were corrupted and became Champions of the very demon they swore to oppose.
As each one of the three dies the remaining members grow more powerful. They all have unique abilities and it's random which three you will face.
| Members of the Fell Council | |
|---|---|
Burning Aether
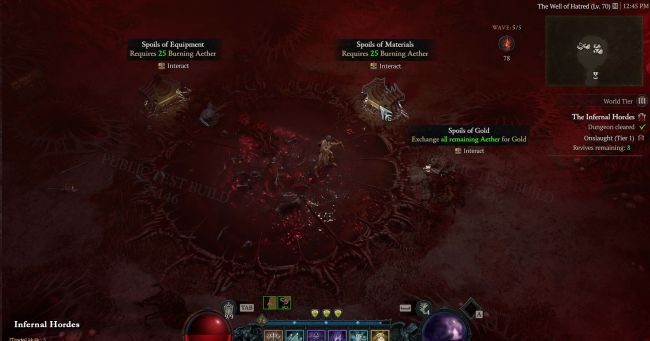
As you fight the waves in The Abyssal Verge and the Fell Council afterwards in The Well of Hatred Burning Aether will drop. This is exchanged for loot and gold at the end of the fight.
The Rewards
After the fight, three chests will appear which you can exchange Burning Aether to open:
- Spoils of Materials costs 25 Aether - Gems, Veiled Crystals
- Spoils of Equipment costs 25 Aether - Legendary or Unique item
- Spoils of Gold exchange all remaining Aether - Gold
The chests can be opened multiple times, as long as you have enough Aether.
There is also a Stash nearby.
| Spending Burning Aether |
|---|
Changes to Infernal Hordes
Patch 1.5.0, August 6, 2024
- Added to the game.

