Operation Death and Destruction (by Brak)

PhineasB

Well-known member
Guide Author
Mar 14, 2020
1,913
2,620
113
Thread originally posted by @Brak on November 19, 2011 and Sept completed May 2, 2018
I will streamline posts from others or without progress updates

Operation Death and Destruction
I remember way back when the Bnet only 1.10 runewords were released, I was perusing the new goodies and oogling pretty much everything. There were a lot of really uber things to get attached to, but one pairing really stuck with me. There they sat, perfectly next to eachother on the list as if Blizzard wanted them that way Death and Destruction.

Now at the time I was basically a pauper eyeballing the sweets in an upscale teahouse window. I'd never be able to make any of these things except an insight or Harmony. Until a few weeks ago, the highest runeword I had ever made was Wealth, and Um was the biggest rune I remember finding. But 1.13c changed things. And all kinds of people are rolling around in stupid rune wealth, myself included. So aptly, I decided to spend my runes stupidly and now have the centerpiece for my project, a pair of Colossus Blades put together from LK runs and some generous traders in the SPF community (special thanks to acake for the Ber to Jah trade).

So why spend Hoto, Grief and Enigma worth of runes on this? Well I will admit Destruction is a horrible runeword for its cost. It's almost as if the programmers accidentally swapped the mods for the pair and then added a Jah to the price tag. But there was a big selling point for me. I'm the world's biggest sucker for Molten Boulder :badteeth: I can’t wait to see how the CtC on Destruction plays in game.

So now that I have my pair of swords, I'm starting a Sept with them. My rules are pretty basic. The swords must be active at all times except prebuffing and perhaps in hairy situations. This means I'll be using Barb mercs. Prior to meeting the lvl requirements a pair of warm up swords will be used.
Code:
Oath
Superior Balrog Blade
'ShaelPulMalLum'
One-Hand Damage: 79 to 406
Two-Hand Damage: 297 to 642
Required Dexterity: 77
Required Strength: 175
Required Level: 53
Sword Class - Fastest Attack Speed
Indestructible
Item Version: 1.10+ Expansion
Item Level: 79
Fingerprint: 0xf74418fa
+10 to Energy
+255% Enhanced Damage
+8% Enhanced Damage
Increase Maximum Durability 10%
50% Increased Attack Speed
Prevent Monster Heal
75% Damage to Demons
+100 to Attack Rating against Demons
+12 Magic Absorb
Indestructible
30% Chance to cast Level 20 Bone Spirit on striking
Level 17 Iron Golem (14/14 Charges)
Level 16 Heart of Wolverine (20/20 Charges)
Ethereal (Cannot be Repaired), Socketed (4: 4 used)

Oath
Executioner Sword
'ShaelPulMalLum'
One-Hand Damage: 137 to 228
Two-Hand Damage: 266 to 457
Required Dexterity: 100
Required Strength: 160
Required Level: 49
Sword Class - Very Fast Attack Speed
Indestructible
Item Version: 1.10+ Expansion
Item Level: 85
Fingerprint: 0x9c840949
+10 to Energy
+281% Enhanced Damage
50% Increased Attack Speed
Prevent Monster Heal
75% Damage to Demons
+100 to Attack Rating against Demons
+12 Magic Absorb
Indestructible
30% Chance to cast Level 20 Bone Spirit on striking
Level 16 Heart of Wolverine (20/20 Charges)
Level 17 Iron Golem (14/14 Charges)
Ethereal (Cannot be Repaired), Socketed (4: 4 used)
I won't use Enigma or CTA as I feel that Teleport and BO are quintessential skills of the sorceress and barbarian respectively (that and I spent all my runes already:whistling. Other than that, anything goes.

And so I introduce you to the seven horsemen of the apocalypse. May they finally bring death and destruction to the hellspawn invading Sanctuary.

Re: Operation Death and Destruction

Cool -
One of the builds I really want to try is a fury-druid using destruction and phoenix. Fully synergized CtC moulten boulder/volcano/firestorm would be simply awesome. Maybe you'll beat me to it...
Re: Operation Death and Destruction

This Operation (both D&D and the 7 Horsemen) absolutely RADIATES style! I love it!

Please keep us up to date on progress!
Re: Operation Death and Destruction

Outstanding hero! That is absolutely the greatest advantage of 1.13. It is much easier to try out "silly"/inoptimal/underpowered rune words.

Great to see that SPFers spend HRs on other than MFO optimisations these days. Good luck with the project!
 
Re: Operation Death and Destruction

First up is War, largely because bashing faces with a puny little necromancer is crazy fun. War is inspired by InsaneWayne’s recent guardian, Sharp, in the Gold Diggers tournament. The basic idea is to have a big giant army to act as your soldiers. But I’m going to try doing it without using Corpse Explosion.

Obviously, I started out dumping points primarily into Skeleton and the Mastery. Early normal was simple. I twinked on a Rusthandle for some early monster bashing, and a Blood Crescent for triggering open wounds. Along the way I dropped a point into Skeletal Mages for some artillery fire. Act 1 was a breeze and Andy didn’t pose much trouble as she decided to focus on my Clay Golem. A few skellies died from the poison nova, but War and his Fire Rogue companion were fine.

In Act 2, I hired a Blessed Aim merc so that I might be able to hit things. And life changed significantly at level 24, when I twinked on a Bonesnap. This has to be my favorite twinking weapon of all time. Yeah I know haxored Ravenclaw is the bazooka of uber ownage, but the sound of face crushing is just too wonderful. It makes a fledgling necromancer giddy. And with the Twitchtroe that moved with it, I could actually get a swing in before my minions dispatched my target. This was the first time I felt like a meleemancer.

Another thing changed at level 24, I acquired Iron Golem. My plan was to mule on some big hurty stick to just destroy everything but that didn’t sound like much fun. I did try out Hwananin’s Justice, and the CtC Ice Blast was fun, but as I’ve read my Golem eventually poofed. So I’ve decided until Hell, I will just use the highest damage weapon I have on hand. He’s still doing pretty nice damage this way. All of this big changes came just in time for Duriel, and he was a pushover. I had Decripify by now and with all of the minions around he didn’t get off any charges. Most of my army made it intact.

Act 3 was a lot of fun for multiple reasons. Primarily I had my massive bonecrushing stick. I also moved an Insight stick over for my merc. But the best part was level 29. With a character named War, I just had to use this armor:
Code:
 Peace
Superior Breast Plate
'ShaelThulAmn'
Defense: 74
Durability: 46 of 50
Required Strength: 30
Required Level: 29
Item Version: 1.10+ Expansion
Item Level: 80
Fingerprint: 0xe568c91d
+8% Enhanced Defense
Cold Resist +30%
Attacker Takes Damage of 14
+2 to Amazon Skill Levels
+2 to Critical Strike
20% Faster Hit Recovery
2% Chance to cast Level 15 Valkyrie on striking
4% Chance to cast Level 5 Slow Missiles when struck
Socketed (3: 3 used)
I was really looking forward to adding the Valk, some say the ultimate tank, to my army. But as many of you know, CtC valk is really buggy if you don’t have a hard skill, which a necromancer obviously cannot do. There was just something unappealing about my pale scrawny friend that chased the golden goddess away.

From reading, previous experience and some more play I’m pretty sure I have the problem of the disappearing Valk down. From what I understand, the game periodically does a check to make sure nothing weird is going on, including you having summons that you aren’t supposed to like from a prebuff switch. When this check happens Valk goes poof. So the key is knowing what triggers this check. The list is long and is basically anything affecting your character so when you: drink a potion, receive healing from an NPC, assign skill or stat points the valk goes away. Also when the following things expire: curses, shrines, prebuffs like bone armor or holy shield and poison damaging you, she will also flee. For a while I made due without doing any of these things. But I decided against keeping Peace as my end game armor although that was the original plan. It does make a nice midlevel armor with the Critical Strike and FHR in there.

Anyway with this big giant posse, we quickly mowed through Act 3 like a bunch of army ants. There were no big hurdles along the way and Mephisto died easily.

Act 4 was even faster and less eventful. No gear additions and still just pumping Skeletons for skills. Hellforge was negligible. Diablo was tough as usual, especially as he liked frying my skelies and iron golem, but Decrepify and Clay Golem made him slow enough to handle.

Act 5 War was introduced to his companion for the rest of this journey, Hrothgar. That’s a cool name, but I just chose him because he was the highest level. Once I hired him, I gave him the hurtiest sword I had that he could equip, which happened to be Hexfire. This was a nice weapon because its quite fast, but the range was a big problem. With all of the minions around Hrothgar had a lot of trouble reaching anyone to slash. When he did reach something, he slayed in the blink of an eye. His attack speed is impressive and when he decides to go on a Stun/Bash string, enemies are totally immobilized. One complaint I do have about him, is that he only wants to take the shortest route from point A to thing Hrothgar can bash face in. So many times although there is plenty of space on the flank of an enemy, Hrothgar jumps about in place as if he needs to pee behind the skellie waiting his turn instead of going to the open space.

The other big change with the addition of the barb merc was the subtraction of Blessed Aim. War’s chance to hit plummeted below 50%. Some Iron charms were muled on in order to bump him up to 70%. I have a feeling this will end up a long term problem as he is slated to wield Death, which lacks the ITD of Destruction.

Act 5 was also simple. Ancients went down without getting near me. I made sure I had my Valk up and two of them were taken down with no intervention from me aside from a few choice words about their mother. I assume Korlic had the Iron Skin mod as he took quite some time to take down, but posed no real threat to anyone.

Then we mossied our way on down to the Throne Room. The waves were no problem aside from the nuisance of poison and Lister’s pack taking down a few of my skellies. I had to retreat out of Baal’s Decripify range, but after that, the battle was smooth. I even still had my Valk, who survived through the fight with Baal.
[/QUOTE]
Re: Operation Death and Destruction

excellent read 👍
Re: Operation Death and Destruction

I've wanted to make a meleemancer for a long time, and this is really making it sound good. Although I do have a Death CB, I would probably go one-handed.
Re: Operation Death and Destruction

Thanks for the support guys!

@bcoe-I'm still deciding on the druid build. I really want it to involve Armageddon, so I'm trying to see how I can match up the skill points needed for that, Fury and a summon. Druid prereqs are killer.

@SnickerSnack-So far I'm loving the meleemancer. I have a feeling that will change in Hell when I get 1 hit killed and whiff at everything. But we'll see.

I'll hopefully have a final update on War later to day to bring his progress up to date.
Re: Operation Death and Destruction

Very cool! This is what I love about 1.13! Look forward to seeing your progress.
Using Angelics set is always a pretty good option for a massive AR boost, and Death has an additional 20% AR, so that should help out some as well. There are a couple of other partial set bonuses to AR as well that may be worth checking out. I also am a fan of using LavaGout for the enchant proc, but you could use a Demon Limb on switch if you are not opposed to it.

And on a rather random note:
I haven't heard the 4 horseman mentioned in ages. And yet I read this thread yesterday, and then something on TV mentioned the 4 horseman (I think it was Family Guy, not sure). Pretty crazy how that happens!
Re: Operation Death and Destruction
This is one of the toughest and most respectable things I've seen done with those runes
 
Re: Operation Death and Destruction

So I finally got the two swords up and running , but let me step back and tell you how I got there.

My goal on leaving normal was to have my Hrothgar and War at level 43 minimum so that they could sport Treachery starting in nightmare. Thankfully they were both level 44 when Baal was defeated, so I didn’t have to worry about grinding out any levels before moving on. The twinking gear changed pretty significantly at this time since a number of exceptionals become available around lvl 42-45. So War got his Treachery Mage Plate, Aldur’s Advance, Ravenfrost and this blood ring.
Code:
 Beast Circle
Ring
Required Level: 40
Item Version: 1.10+ Expansion
Item Level: 84
Fingerprint: 0x86a926d4
+4 to Strength
+16 to Life
+38 to Mana
+102 to Attack Rating
Fire Resist +6%
7% Life stolen per hit
I was also able to upgrade some of his charms from Iron to Steel, this helped his AR a bit. Hrothgar got a matching Treachery Mage Plate, an Arreat’s Face and his sword was upgraded to Bing Sz Wang. It was the most damage I had for the level. Bonus was a much better range than Hexfire, so he was able to now reach over my minions. And to top it off, it comes with CtC Frozen Orb. The forshadowing of Destruction made me giddy every time an orb was fired off (that would have been a Molten Boulder :alright.


Act 1 flew by pretty quick, as I am skipping areas in Normal and Nightmare (hope to do a full clear in Hell). I did have my only death in the Jail while I was trying to take a screenshot. As I searched for the printscreen button, my palm hit the touchpad on my laptop. This caused War to wander into a room with a champion pack of Ghosts and a cursed boss pack of Dark Ones. I was dead before I got the screengrab. Didn’t realize the degree of difficulty photojournalism added to D2 play. Hopefully I get a better hang of this. Hrothgar hit level 49 and was upgraded to his Oath Executioner Sword before the end of Act 1 and used it to beat down Andariel. The battle was quite easy and while I lost a lot of skellies, they all died of poison after Andy was already passed away.

Act 2 was also rather simple. War doesn’t have the pain in the Maggot Lair that other summoners do since he can also kill things with a big stick from behind his skellies. I did drop the players setting down to make things a little more tolerable. But this normal bottleneck was no big deal. War was able to equip his Oath Balrog Blade upon hitting 53 somewhere around the Palace Cellar level. Unfortunately, he needed a bit of a strength boost to wield it since his Death Colossus Blade has a lower requirement. So he took of his Treachery in favor of this:
Code:
 Black Hades
Chaos Armor
Defense: 871
Durability: 70 of 70
Required Strength: 140
Required Level: 53
Item Version: 1.10+ Expansion
Item Level: 79
Fingerprint: 0x427d2ddd
+30 to Strength
+154% Enhanced Defense
-2 to Light Radius
Half Freeze Duration
47% Damage to Demons
+207 to Attack Rating against Demons
Socketed (3: 3 used)
The loss of IAS from Treachery was offset by the huge on weapon IAS of Oath compared to Bonesnap. This was a huge improvement as the damage from Bonesnap was starting to peter out. I could get back into the thick of things again.

This build really shines in large open spaces so minions can spread out and Hrothgar can just mow through anything in his path. Canyon of the Magi was tons of fun because of this. I cleared it twice and did a couple of false tombs before getting tired of undead and negative poison resistance. So we went and killed the big bug. It was ridiculously easy. I lost my Iron Golem and nothing else.

Act 2 also made me realize I hadn’t really decided what to do with the rest of my skill points. Once I maxed Raise Skeleton and Skeleton Mastery, I didn’t know what to do with them. I dropped a point into Revive and that has been useful for positioning minions and buffing up my army when needed. But after that I’m unsure. I put in the points to get Poison Explosion. I figure with the regen rates in Hell, my Skellies will probably have little if any effect. The duration on Nova is pretty miniscule, so pointless for this task, but the area on Poison Explosion is quite sad. Does anyone know if it gets bigger with skill level? It’s not listed as such on Arreat Summit, so I figure it’s stuck with the rather puny radius. I see two other options. The first is to get a beefed up Bone Armor. But this seems a bit of a waste. Basically trading 1 skill point for 15 points of life that only works on melee damage. The other option is to buff up another summon. Initially I had planned to have a really beefy Iron Golem and use Elite base Insights for Golem fodder. This still seems viable, but I’ll have to be more careful about keeping him alive. The other summon would be skeletal mages, but Hrothgar is already having enough trouble getting to his victims. I don’t think another 10 bodies in the way will be all that helpful. I have also dropped a point into Dim Vision but haven’t needed it yet. You don’t need crowd control when you’re the crowd (in Normal and Nightmare at least). Anyway, War is currently sitting on 16! skill points, so any suggestions are very much welcome.

Act 3 is where I had some of my first NDEs, two to be exact. Both involved him getting surrounded from careless play. The first came in the Flayer Dungeon. I rushed around a corner to avoid a pack of Shaman (their inferno is hurty) and ran right on top of a boss pack of Spectors. The whole pack was on top of me when a Flayer decided to run around the corner and box me in, there was water to the south, a wall to the east, a grating north and the Flayer directly west. I couldn’t move. I couldn’t target the Flayer because the Spectors were in the way. I managed to kill a Spector and Revive it hoping he would distract some of the minions going after me, but he just flew away. So I stood there drinking potions while I tried to get another body, but losing all hope. I had burned through 2 of my four healing pots and 5 of my 8 full rejuvs when suddenly Hrothgar came charging around the corner and killed the Flayer in one swipe of his sword. And I ran away like a little girl while he took care of the Spectors.

The second time was just me being careless in the Kurast Bazaar. I had an Experience Shrine and was trying to milk it for all it was worth. I charged towards a Heirophant to keep him from healing his pack when I got swarmed by swarms ironically enough. I didn’t notice how many there were because of them stacking on top of eachother, and the next thing I knew I couldn’t walk anymore. After swinging and chugging over half my belt, I killed enough to be able to move. This taught me that I should be really careful when straying out of my pack.

I went on through the rest of Act 3 without much of anything exciting happening. Of course I had to clear the entire Sewer to find Khalim’s Heart. The Travincal fight went surprisingly well. There was a little bit of extra mayhem on top of the norm for a meleemancer. In any given battle, about 80% of the time I have no idea what’s going on and I can’t even see what I’m trying to kill. I just know to stand behind the skellies and keep swinging. Like any melee build swining=leeching=living.

Mephisto was a pushover, though he also managed kill my Iron Golem. It was fun having Ghoul Lords drop meteors on his head for a change.

In the next installment, Death and Destruction unveiled.

EDIT:
@Kestegs, Thanks for the tip. I didn't want to trade two slots for AR using Angelics, but I had forgotten about Lava Gout. I've already got a trade thread up to get a pair (and it even made it to the right forum eventually)

@Corale, thanks for the kind words. But this project is ridiculously easy compared to a lot of things others have done on this forum. I am enjoying the eye candy though


Re: Operation Death and Destruction

Assuming you have a point in all curses (excluding Lower Resist), I'd definately put them into Golem Mastery. 20% boost in life per point is great return on investment and your Iron Golem will be quite sturdy.

So:
20-Summon Skeleton Warrior
20-Skeleton Mastery
20-Golem Mastery
1-rest of Summoning Tree(I would exclude Fire Golem)
1-all curses(excluding Lower Resist)

thats 75points, leaving 16(I think) spare points at lvl80 with completed skill quests.

Since you want to avoid CE, I guess from there you could pump Summon Resist? That or a few more hard points in the curses you want a little more radius out of isn't a terrible plan. I'm not sure how a maxed Bone Armor fares so I'd get a second opinion on that. Another option could be more Revives if thats your flavor.
Re: Operation Death and Destruction

I haven't played a necromancer in a while, but Ii remember extra points in dim vision being well worth the trouble. If you get a few more points in there, one click will usually shut down the entire screen (ridiculously useful around gloams). I suspect this will help your durability substantially more than slightly beefier summons.
 
Re: Operation Death and Destruction


War arrived in Act 4 about a half of a level from the magical 63 needed to equip Death. I was ready to stop playing, but I just had to test it out. The experience came a lot faster than expected and I was very quickly there. I have to say, Death is working better than expected. The 20% to AR is helping War land more hits, and the high CtC Glacial Spike is effective crowd control at least with no cold immunes around. I was also able to upgrade Hrothgar’s Oath from the Executioner Sword to the Balrog Blade and there was a noticeable increase in his damage output. Things were going so well I decided to clear through to the City of the Damned waypoint. Here I took a break to move over Laying of Hands to replace Bloodfists, a Shako to replace his Lore Bone Helm and Mara’s to replace a rare amulet with +59 life and some other mods when he would eventually make it to the level req. My Treachery Mage Plate was moved back over as I didn’t need the extra strength any longer.

When I came back to play I thought I’d have a half level to gain before 65 and Destruction, but I was already there. I had somehow gained an extra level playing with Death and didn’t even notice it, how exciting. I immediately muled on Destruction and ran down the steps like a kid on Christmas morning. I was so excited to watch Hrothgar beat things down with his new sword that I didn’t notice his life bar plummet in a matter of seconds. For the first time, Hrothgar had died. Apparently he was trying to face a pack of cursed extrastrong Doom Knights without any help. So I went back to town and talked Tyreal into bringing my friend back (he owed me a sword you know) and ran back down the stairs, this time being a little bit more cautious. Unfortunately, Hrothgar was even more afraid to go back down. He got stuck in town and wouldn’t move. I had to cast a TP and run down the stairs for a third time. Why do the Diablo Gods tease me so?

We finally made it down, and Hrothgar stayed in one piece this time as I was able to get a few Skellies up and running for him to whack over their shoulder blades. In the meantime Hrothgar had gotten off two volcanos and a handful of novas. I was smiling from ear to ear. This is going to be fun :badteeth:

With the extra damage of Destruction, Hrothgar is already mowing stuff down. The CtC skills are more of a laser light show at this point. Though it does seem that when volcanos go off under large creatures they melt significantly faster. We quickly cleared from the City of the Damned waypoint through all of the River of Flame. All of the spawns were large slow creatures for the most part and with the vast open spaces of Act 4, this build was really shining. When my army made it to the Smith, I had my reflexive retreat, but the minions were having none of it. The Smith was swarmed and swallowed up by my party. After casting Decrepify, I barely had time to get one swing of my sword in before the Smith was swallowed up by skeletons and bowled over by a series of boulders.

Everything else went smoothly. Typically scary bosspacks in the Chaos Sanctuary melted like butter. I was so cocky I kept it at players 8 for Diablo even though I was sporting negative lightning resists. This turned out to be not a great ideaTM. I ran into a serious problem with the Barb AI in this fight. In order to keep Hrothgar attacking Diablo, I had to stay in place. When a Necromancer stays in place, Diablo casts a bone cage on him and fries him for lunch. After my first experience in the cage, going through a row of rejuvs while I feverously hacked my way out, I decided I wasn’t going back inside one of those again. So I had to continue dancing around. But at best I could only get Hrothgar to take a couple swings at Diablo while running by him. It was frustrating. After a few trips to town to stock up on potions. I eventually found a sweet spot to hide while Diablo tried to cook me through a wall. The minions weren’t targeted and everything was happy again. And so we moved on to Act 5.

I have to admit, Act 5 in Nightmare and Hell is probably my least favorite part of the game. I really can’t stand the guest monsters here. Blizzard just took all of the annoying ranged characters, carpeted the place with them and made them about 4 times as powerful. Not my idea of fun and usually a big pain for most characters I’ve played. But War works like a dream here, in Nightmare at least. As long as I don’t stray out of my posse, things are great. Bloody Foothills spawned archers and demon imps. Demon imps are not threatening but just a big pain to track down, but my skellies do enough damage to get them in hit recovery, so they just die by randomly teleporting next to one of my army. The archers, which are usually quite painful, never fired an arrow at War as long as I stayed inside the skellie radius. I could see a mob coming because of the arrows drawn by my minions. And large packs where dealt with by keeping Decrepify on them. Easy area and Shenk went down before I even saw him on my screen. Hrothgar got off a firework display of his own during the battle. For my reward I socketed the giant peanut shell and put an Ort in it for some positive lightning res. Will probably switch to an Um for Hell.

Frigid Highlands were also nice and easy with archers again being the guest monsters. Moving on I ran into Slingers which are probably my favorite monsters to revive since they are fast and do ranged physical damage, which matches up nicely with Amp. So I kept as large a pack of these guys as I could. My playing around with Peace armor paid off here, because the same rules apply to extra summons from a switch. So Although I was only supposed to have 3 Revives, I manage to max out at 6 or 7 as long as I didn’t drink any potions, get cursed, poisoned, or use timered shrines. I can also use this to bump up my Skeleton army before a big fight.

My last stop was the Crystalline Passage. This area was also cleared easily running into Yeti and Cold Mages as a guest monster. So War is now waiting here to rescue Anya and he’s really looking forward to some more resists.

I still haven’t dumped his skill points into anything, but I’m leaning for the initial plan which was a big bad Iron Golem. I just had a quick question about the synergy with Fire Golem. Is the 6% ED added to the weapon damage or just the miniscule built in damage?

Thanks for reading!

Re: Operation Death and Destruction

So this was a bit of a jaw dropper.

For prosperities sake, Vex rune from a Gloam in Nightmare WSK
Guess the Diablo gods are happy I'm using one of their silly runewords.

EDIT: What a silly typo. I'll leave it there for posterity's sake.
Re: Operation Death and Destruction

posterity.
 
Re: Operation Death and Destruction

Sorry for the previous IFT-like post about finding the Vex rune. I couldn't contain my surprise at picking one up in Nightmare. Next time I'll save big finds for the progress updates as they're a lot more fun that way. I've decided I will use runes found by these guys on equipment for the Sept. So the Vex will go towards a HoTo that will be used as a prebuffing switch weapon along side a Spirit Monarch. Either that or re-rolling my already re-rolled crappy Death.

Progress has slowed a bit, but not because of any difficulties with playing War. I've decided to do full clears in Hell to be sure that we bring Death & Destruction to every nook and cranny of Sanctuary. So this is a bit more time consuming than my lightning quick pass through Normal and Nightmare. I've also started up my Druid Death. An update will be posted about him once he has reached Nightmare, but I will say he is oodles of fun as well. Finally, SUTC is just starting to get juicey, which means less time for non-tourney play.

So when we last left War, he was about to rescue Anya. This quest went quite easy. I don't remember any difficulties, but there were Serpent Maguses(?) Specters and Prowlers. No big issues aside from a cursed boss pack here and there. Anya was rescued, resists were increased, crappy necro head was regifted and there was much rejoicing.

During this play session I also decided to make the plunge and tweak out my Iron Golem. All my spare skill points were dumped into Fire Golem for the ED synergy. Then I muled on an Honor made in a Thresher for a new base. I excitedly strolled out into the Frigid Highlands to test him out. And he died within seconds. So yeah, might need a little bit more practice keeping him around. And my coworkers dont seem to perform so well when I'm excited. Wonder what that's about.

I did find my new favorite Revive in the caves of Act 5. Here I ran into the guest archer Rogues from act 1. I was not so excited to see them at first because theyre fast, run from my minions and they hurt when their arrows get through. Having not faced them with any sort of summons before, I was quite freaked out when my skelies and golem where frozen solid. Crap they have freezing arrow, a pack of these could be quite nasty, I thought. But then I killed one. And revived it. And realized I now had freezing arrow :badteeth: That's fun.

The next big step was the Ancients. I ended up finding the stairs up to them before getting the Waypoint. I was planning on taking a break after killing them, so I wanted to find the Waypoint first. So I ended up clearing almost the entire level before running back to the stairs. This lead to me losing my beloved Rogue archers and settling for a motley crew of quill rats and a couple Frenzytaurs I lucked out on. I took my ragtag crew up to the Ancients and prepared for the worst. But it was really an easy fight. Twinking on two high end elite runewords in Nightmare is just too overpowered to expect any difficulty no matter how unorthodoxed the build may be. I didn't catch the mods on them, but the thrower must have been Iron Skin because he actually took some time to kill. The others melted slowly to my minions. In the end I only lost a Skellie and one Mage. Life was good. And I had planned to stop after this, but you get that rush from facing the Ancients. I just had to play on.

One more waypoint right?

So this is where the Vex came into my life. I was just playing a couple more minutes, getting one more waypoint. Glad I did that:thumbsup:

The next session I quickly made my way down to the Throne room. Which was easily cleared. Night Lords were the guest monster. They were not a problem. Only difficult part was the Second wave and its pesky poison. Had to return to town for this. I mostly kept out of Decripify range. Casting Amp and taking down anything that made it past the front lines, which wasn't much.

For Baal, I forgot to put the players setting down, which mean he took foreeeeeeever to kill. But never really threatened me at all. Apparently it actually wasnt all that long because the remnants of Ventaurs pack were given a chance to redeem themselves and hadn't time out yet.

I moved on to Hell. Strode out onto the Moor and immediately turned down the players setting to 1. Everything melted. My merc was a stud, and I was even killing stuff. So I've bumped the players up to 3 and that's where I've been doing Hell.

The going hasn't been at all difficult so far. I've cleared out to the Stony Field waypoint and will take the Underground passage next. The only difficult spot was Coldcrow. She spawned a nasty Extra Strong, Cursed. Amazingly it took her pack a few second to take out the front three skellies. After which Hrothgar just melted instantaneously. I was really shocked and ran back to throw up a TP. Second time down I applied some dim vision so we could take out the foot soldiers (skeletons and zombies) that were distracting my minions. They then moved like a wall to take on Coldcrow's pack. And Hrothgar and War brought on the pain from a safe distance over their shoulders.

For skills, I have already maxed out Fire Golem and have dumped a point into Bone Armor. For remaining skills I am alternating across Golem Mastery for more IG life and Bone Wall for stronger Bone Armor. With the plus skills on my prebuff I get over 100 from Bone armor without the synergy, which has turned out quite useful.

His gear is also pretty much set. I could use to improve his boots and maybe his belt, but crafting has brought me no luck in either department. Current gear is:

Shako (Ort)
Treachery Mage Plate
String of Ears
Lava Gout
Aldur's Advance
Ravenfrost
Rare/Blood ring with 8%LL and resists
Mara's
and of course Death

Swith is Arm of King Leoric and a rare Necro head with +2 all.

Charms are mostly for AR, some life and filling in resists holes where possible. Fire and lightning are in the 30s. Cold is in the 10s and Poison is negative. Fade never really procs so I can't rely on that for resists. He's at about 900 life, so getting hit isn't such a fun experience.

Hope to have an update on Death next time, and perhaps get War into Lut Gholien.

Thanks for Reading!
 
Re: Operation Death and Destruction

When we last visited War he was in the Stony Field waiting to pass through the Underground Passage to rescue Cain in Tristram. The going was fairly simple with devilkin and skeleton archers making up the foes in here. The waypoint and scroll were quickly found and Cain was returned home. War and company then moved on to the Black Marsh were we found the Tower killed the Countess and were rewarded with an Io rune, exciting. But things did heat up down in the Hole, but War new he would be saved.

It turned out that the entrance to the Hole ended up being the most difficult situation War has faced in Hell. The entrance opened up into a loop. On the other side of the loop were two archer Rogue boss packs, two packs of regular Misshapen and a pack of Yetis for foot soldiers. Rounding the bend for the first time was quite a surprise and I was amazed to see my army being dwindled so quickly. There was so much ranged fire, I actually had to fall back and use some strategy for a change. Thankfully there was some wiggle room at the entrance. War left with two skeletons and his Golem. After losing most of my skeletons, I first had to town to bring back Hrothgar (he’s getting quite peeved about those lady archers killing him repeatedly btw) return to the Marsh and scavange some new skellies.

With about 8 skeletons strong we went back in. Thankfully, no one had creeped up towards the entrance. First step was taking out the foot soldiers. Yeti like to give chase, and this was good. They were brought back to the stairs and killed. Things were just slightly better without this distraction. I tried attacking from the right side, but there were too many archers here. It looked as if another pack was downstairs around the bend and joining in. So I tried my luck on the other side. I even had to use Dim Vision, but I still couldn’t shut down the archers firing from offscreen. While I was still losing skeletons, we eventually took down some new Misshapen to replenish the army. Intermediately a couple trips to town were needed to reposition Hrothgar any time he got out in front of the bones shields. But once we finally broke through to the archers things were easier they died a lot faster and make nice revives in these tight quarters. Clearing the rest of the Hole was fairly uneventful and no great loot was found, but at least we had a bit of a challenge.

The rest of Act 1 went pretty smooth. Somewhere along the way I found a 5 socket Thunder Maul, and an Honor was made in that. My second Honor Iron Golem is doing well and still with me in Act 2. The Smith was killed with ease, and Charsi was happy that we found her hammer…again. Interesting finds were had in the Jail levels of all places. I got my first (if memory serves me correct) self found Herald of Zakurum and my first Vipermagi since the restart.

We eventually made our way down to Andariel. A lot of Antidote potions were consumed as I had -33% poison resistance. And while I tried to kill off the front of her room before she was awakened, you really never can control your army the way you want to. So my army scattered and Andy was confronted by myself and Hrothgar with a couple skellies coming over to lend a hand part way through after they finished a Champion Misshapen. At least the crowds were kept busy. Oh, I also forgot to mention the revived Fallen. He tanked Andy through the entire fight. I have no idea how this worked, but he stood up to her unscathed the full length of the battle. This was a great bonus as he was only revived to prevent the Shaman from bringing back more foes. In the end Andy was easy and I think the volcano from Destruction was actually quite helpful here.

War then moved on to Act 2. He dispatched Radament and moved into the dessert. Most difficult part thus far has been the tombs with close quarters and Unravellers. Each doorway ends up being a long drawn out fight as the two skeleton armies jam themselves into the doorway and nobody dies. War works his way up to just behind the front lines and takes the skeletons down one by one swinging over the shoulders of his army. I have to be really careful not to step up to far because the damage from the skeletons and black missles takes War’s life down to half in a second or two. Poison Explosion has been really useful in the instances to get rid of corpses. Eventually we break through and Hrothgar gets in to open up a can of whoopass. But the breach of each doorway is a pretty slow process. He’s currently sitting in the Dry Hills WP with the Hall’s of the Dead being the last area cleared.

He is currently level 80 and about 100hp shy of 1000. For skills he has gotten Golem Mastery and Bone Wall up to 5 native points. The extra in Golem Mastery seems to be helping out survivability quite nicely, though I am hoping for a better base to upgrade the current IG.

Next up, an introduction to Death the Furygeddon Druid.

Thanks for reading!

Re: Operation Death and Destruction

If your Dim Vision has a large enough radius and the unravellers aren't champions or bosses, you ought to be able to shut them down by casting Dim Vision into their rooms. That ought to speed up those door-jams, as they won't be reviving any skeletons while blinded. (And maggots won't lay eggs while blinded. Something to keep in mind when you're not using Corpse Explosion.)

Your observations regarding the times when the game checks for too many summons are interesting. I used to summon too many revives with one necromancer, and then when I try it with another, who uses the same skills and tactics, the extra revives vanish much quicker. I'll pay closer attention to exactly what I'm doing when they disappear.
 
Re: Operation Death and Destruction

So, sorry for this project kind of dying. Real life had caught up with me. I've recently had a bit of time for gaming and seeing as D3 hasn't yet hit shelves, I figured I would pick this little project up where I left off (if I can remember all the builds). One slight change is that I've abandonded full clears as I just don't have the time for them.

So first step was loading up War. He personally plays very squishy, but thankfully has more tanks than you can shake a stick at. While the tanks do tend to slow things down because the merc loses access to foes, they greatly increase survivability. So I ended up running with 11 skellies, 3 mages and 0-9 revives depending on immediate danger of the situation and the appeal of the revived monsters.

Act II contained the two exceptions to the large posse rule. The maggot lair and the Arcance Sanctuary. Both areas were cleared with 4 skellies. Controlled one on one (from behind a skellie of course) encounters were very easy for War. The Arcane Sanctuary was also a great place to take advantage of Revived Specters. Act 2 went quite smoothly. As mentioned above the Tomb of Tal Rasha was sketchy, but only getting through the door. I figured out that reviving a couple foes that fell early on also helped make some room and draw some enemies away from the door.

The fight with Duriel was a swift one. The only casualty was, of course, my Iron Golem. This is the point where I finally gave up on the Iron Golem idea. I had to adjust to a much more defensive playstyle to make sure he didn't die, often running to town when he was poisoned. His damage also just wasn't noticeable above the death of a thousand cuts brought down by my skeletons. In the end Clay Golem was just more convenient, and a better choice for bosses anyway. So moving into Act 3 I said good buy to my loyal tin man and welcomed a new squishy face into the legions of doom. Oh and Duriel actually rewarded me with a perfect pair of Chance Guards.

Act 3 went surprisingly fast. I rolled one of those beloved maps where Spider Forest runs straight into the Flayer Jungle. My army of the undead made quick work of the flayers. I mostly just stood back, Amp'ed and cleared up log jams. At no point during Act 3 was I in any danger. The Council accounted for one of Hrothgar's rare deaths. I think he was first into the doorway and was surrounded by council while amped. I didn't have to return to town to resurrect him as my skellies and revived council members/dark lords were enough to finish off the job. Mephisto was also a set it and foget it type of fight. I parked my army and refreshed Decripfy while I cleared out the Dark Lords in the back of the room on my own. By the time I was done Mephisto was dead. He had killed 2 skeletons and Gumby died in the Pandemonium Fortress succumbing to his wounds during battle.

Act 4 was fun as usual. Who doesn't love Act 4? But it could have been better. Seemed spawners and maggots were everywhere. Not a big deal, but somewhat tedious. We killed Izual without event, and I had no clue what to do with the skill points as usual. I believe he sits right now with at least 4 skills points in the bank, and no idea what to do with them. The smith was problematic as he charged at us next to a double boss pack of spawners and a boss maggot. He also had Conviction, and my resists are not so good as it is. I could never really rely on Fade from Treachery because War was just too squishy to take enough hits to get it triggered. In the end the ranks had to use the Run Away, followed by the Run Away Further maneuver to isolate the Smith with his buddies lined up behind him on a narrowed walkway. After he was taken down and his Conviction gone, our Army tore through the rest of his comrades without haste. Hellforge was a disappointing Lem (or maybe Lum, they sound so similar).

The Chaos Sanctuary was fun. Yeah it's not so challenging without IM, but it also means I don't have to resurrect the merc every two seconds. The CS is great for an army because of all the Doom Knights. They make great revives in my hands and actually seem to hurt some of the other monsters. There were no issues with any of the bosses and Diablo was taken down with the reliable Gumby + Decrepify technique. I should probably mention that War's chance to hit Diablo was 46%...with Enchant. But he still swung that sword like a champ.

And finally I moved on to Act 5, to me usually the dreaded Act 5. Full of guest ranged attackers garaunteed to at the very least annoy you, and possibly kill you. It seemed that in all the spaces, I was never standing in the right place. No matter where I went the stray javelins would find me. Maybe this was just the down side of having an army so big, it triggered a lot of ranged attacks, and I guess my minions were just really good at dancing out of the way. Eventually I figured out that by hugging a skeleton really close I could avoid most incoming fire. And of course the best part of loads of ranged physical attackers is, they can play on your team too. Bone Archers, Slingers, Corrupted Rogues, Serpent Magi, even Carver Shaman are great fun to have following you around. One time I revived an entire pack of Bone Archers at once and, although they followed me quite slowly, absolutely melted anything that got within range. It was great fun. Anya was rescued, My resists neared 50%, there was much rejoicing.

And then came Hell Ancients, one of the hardest battles in the game. In Ancient's Way I battled Twisted lightning spitters, Rogue Lancers, and carvers with their Glacial Spike shooting Shaman. By the time I was at the entrance, there were no Rogue corpses to be found, one Twisted and couple Shaman and a pile of dead carvers. The only unit of my army not to lose anyone in the battle was the carvers. I swear if you want to beat a boss, go revive a bunch of Fallen type monsters, they are awesome. In actuality, the Ancients did not put up much of a challenge. I didn't look at their mods. I was lucky in that no obvious evil spawned on them. There was no powerful aura, and I don't remember being cursed. Madawc may have been Physical Immune, but I believe he was broken by Amp Damage. Overall, I first separated the three, then tried to get the bulk of my units to focus on Korlic to keep him from using his big leaps. He went toe to toe with my merc and some undead while I kept all three Decrepified. Talic was next, and Gumby seemed to help keep him from whirling too much and getting around. He was already at low health by the time Hrothgar made his way over and was quickly dispatched. Madawc took some time, but posed no threat. I believe a couple revives went down, but from timer expiration as they were attacking from range. And with that entry to the Worldstone Keep was gained.

This had to have been one of the easiest monster rolls ever for me. I don't remember all the levels, but the highlight was, Demon Imps, Stranglers and Flayers with blowdarts only. I had no Burning Souls. In fact I avoided them in Act 3, 4 and 5. That was a relief with 40some lightning resist after the Anya quest.

Baal's waves were not too difficult. The only required town trip was for Poison removal after wave 2, and to res Hrothgar after Lister's wave. While Lister's buddies were powerful, my skellies could stand toe to toe with them long enough for me to kill one of them. By the time they were able to remove one skellie, I killed a minion and made another. This balance was slightly in their favor, but in the end I was left with 7 skeletons and a dead Lister. Baal was easy with the boss killer of Decrepify and Gumby. Really glad I ditched the Iron Golem in the end. Baal dropped nothing of interest.

With their leader gone, War no longer needed to be waged against Hell's demons and he was retired. My thoughts were that he was just too squishy to play as a serious meleemancer. And his army was too comfortable a hiding place to risk leaving their protection. He basically played as a slow Fishymancer. Only without a merc to give more damage to skeletons. His melee damage was really only needed to clear up log jams. Other than that, he could have very easily never even swung his sword. Yeah I could have built a more successful meleemancer with a not ridiculously slow weapon and with a CTA to make him less squishy. But at least I got to watch all the pretty pretty fireworks.

Here are pics of his final stats without
[Picture lost]
and with Enchant activated
[Picture lost]

Gear:
Shako (Ort)
Treachery Dusk Shroud
Mara's 27
Raven Frost
Aldur's Advance
String of Ears
Lava Gout
Arm of King Leoric on Switch
Rare ring
Code:
Death Grasp
Ring
Required Level: 65
Item Version: 1.10+ Expansion
Item Level: 80
Fingerprint: 0x5ac40667
+17 to Maximum Stamina
+4 to Minimum Damage
Fire Resist +7%
Lightning Resist +34%
Cold Resist +7%
Poison Resist +7%
+50 poison damage over 3 seconds
8% Life stolen per hit
Rare head on switch
Code:
Imp Badge
Gargoyle Head
Defense: 14
Chance to Block: 40%
Durability: 60 of 60
(Necromancer Only)
Required Strength: 20
Required Level: 42
Item Version: 1.10+ Expansion
Item Level: 79
Fingerprint: 0xb781b361
+16 to Life
+10% Increased Chance of Blocking
Fire Resist +23%
Adds 12-28 poison damage over 4 seconds
+2 to Necromancer Skill Levels
15% Faster Block Rate
+2 to Bone Spirit (Necromancer Only)
+3 to Bone Spear (Necromancer Only)
12% Damage Taken Goes to Mana

Various Charms:
Code:
4: Steel Small Charm of Anthrax
Keep in Inventory to Gain Bonus
Required Level: 49
Item Version: 1.10+ Expansion
Item Level: 80
Fingerprint: 0x2ba7d327
+31 to Attack Rating
+50 poison damage over 6 seconds

5: Small Charm of Vita
Keep in Inventory to Gain Bonus
Required Level: 39
Item Version: 1.10+ Expansion
Item Level: 80
Fingerprint: 0x39037a91
+20 to Life

6: Steel Large Charm
Keep in Inventory to Gain Bonus
Required Level: 44
Item Version: 1.10+ Expansion
Item Level: **
Fingerprint: 0xcd44c3a
+76 to Attack Rating

7: Steel Grand Charm of Sustenance
Keep in Inventory to Gain Bonus
Required Level: 53
Item Version: 1.10+ Expansion
Item Level: 80
Fingerprint: 0x747669f
+32 to Life
+111 to Attack Rating

10: Sapphire Small Charm of Vita
Keep in Inventory to Gain Bonus
Required Level: 39
Item Version: 1.10+ Expansion
Item Level: 80
Fingerprint: 0x1ebc445b
+20 to Life
Cold Resist +11%

14: Steel Grand Charm of Vita
Keep in Inventory to Gain Bonus
Required Level: 69
Item Version: 1.10+ Expansion
Item Level: 80
Fingerprint: 0x43b11530
+37 to Life
+113 to Attack Rating

16: Shimmering Large Charm of Incineration
Keep in Inventory to Gain Bonus
Required Level: 26
Item Version: 1.10+ Expansion
Item Level: 80
Fingerprint: 0xe261e512
All Resistances +8
Adds 7-16 fire damage

17: Amber Small Charm of Sustenance
Keep in Inventory to Gain Bonus
Required Level: 32
Item Version: 1.10+ Expansion
Item Level: 80
Fingerprint: 0xf85c5b14
+13 to Life
Lightning Resist +10%

18: Iron Large Charm of Sustenance
Keep in Inventory to Gain Bonus
Required Level: 34
Item Version: 1.10+ Expansion
Item Level: 80
Fingerprint: 0x617f921f
+21 to Life
+50 to Attack Rating

19: Shimmering Small Charm of the Icicle
Keep in Inventory to Gain Bonus
Required Level: 25
Item Version: 1.10+ Expansion
Item Level: 80
Fingerprint: 0x8bf39a09
All Resistances +4
Adds 2-4 cold damage over 1 seconds

24: Steel Grand Charm of Life
Keep in Inventory to Gain Bonus
Required Level: 41
Item Version: 1.10+ Expansion
Item Level: 80
Fingerprint: 0x1508e910
+15 to Life
+123 to Attack Rating

27: Steel Small Charm of Dexterity
Keep in Inventory to Gain Bonus
Required Level: 49
Item Version: 1.10+ Expansion
Item Level: 80
Fingerprint: 0x2f5de7fe
+1 to Dexterity
+32 to Attack Rating

29: Steel Large Charm of Inertia
Keep in Inventory to Gain Bonus
Required Level: 36
Item Version: 1.10+ Expansion
Item Level: 80
Fingerprint: 0xf7a2913
+64 to Attack Rating
5% Faster Run/Walk

30: Steel Small Charm of Dexterity
Keep in Inventory to Gain Bonus
Required Level: 49
Item Version: 1.10+ Expansion
Item Level: 80
Fingerprint: 0x6d51176d
+2 to Dexterity
+28 to Attack Rating

31: Steel Small Charm of Balance
Keep in Inventory to Gain Bonus
Required Level: 49
Item Version: 1.10+ Expansion
Item Level: 85
Fingerprint: 0xc7c30b73
+25 to Attack Rating
5% Faster Hit Recovery

32: Steel Small Charm of Dexterity
Keep in Inventory to Gain Bonus
Required Level: 49
Item Version: 1.10+ Expansion
Item Level: 80
Fingerprint: 0xa5840afa
+1 to Dexterity
+36 to Attack Rating

33: Emerald Small Charm of Sustenance
Keep in Inventory to Gain Bonus
Required Level: 32
Item Version: 1.10+ Expansion
Item Level: 80
Fingerprint: 0x6bf094d2
+13 to Life
Poison Resist +11%
 
Re: Operation Death and Destruction

And now, the long promised introduction to Death, the Fury Druid. Death actually started out before this project began as a Rabies Druid that I had not enjoyed playing. He was respeced in early normal to a Molten Boulder Druid (have I mentioned how much fun that skill is yet?). Molten Boulder being a synergy for Volcano and Armageddon fit in wonderfully for this build. So in late normal, as Molten Boulder began to lose it's luster he got infected by the werewolf bug and has morphed into a Fury Druid.

Unfortunately, I don't really remember much of his play in Normal and Early Nightmare, it being so long ago. I know once he got Fury going he was a beast. And after the addition of Oath he was basically invinceable. One toy I've never used before is a Delirium helm. I really love this thing as the crowd control is ridiculous. A whole screen radius of confuse. I was fortunate enough to trade for a Blood Spirit with +3 Armageddon, +2 HoW and +1 Grizzly. So in addition to pumping by AoE skill, I get a small damage boost for me and Hrothgar (yeah I hired the same merc again, I'm sure he won't a few more trips through Sanctuary). And I absolutely love the audio touches for Grizzly. The giant footfalls and the low grumbling vocalizations.

The other caveat of Delirium that I was not aware of, is as a Lycanthrope, you cannot transform into a fetish, you a forced back to human form. This lead to Death's only death thus far, as in the chaos of the Travincal hydras, I failed to notice his transformation back to human form. He is quite squishy in this state losing almost 2/3 of his life and a lot of movement speed. He succumbed to the fire damage. The rest of Act 3 was fairly easy. In the Durance of Hate level 2 he reach the first milestone, lvl 63 enough to equip Death. While I was excited to try out the new hurtystick, I couldn't believe the difference in attack speed. I think he dropped from about a 5 frame attack to 10. Groups of dolls became a bit dangerous as popping a full 5 could lead to a precarious life bulb. This also means, he's standing in place for a good two seconds per Fury. May be problematic in the future. But he dispatched Mephisto using only one potion nonetheless.

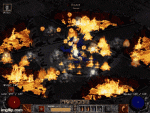
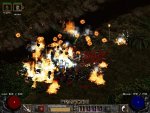
Onward to Act 4. For this endevour the beautiful place where Destruction finally get's tested. And my god, it is soooooo much fun. I was very worried that ctc Volcanos would lead to the 4 second cooldown. Luckily they trigger about a 0.5-1 second cooldown. So unless it triggers with the final Fury attack, I barely notice it given my pitiful attack speed (hey maybe that's a feature and not a bug in this case). My current record is four simultaneous Volcanos, I tried to grab a screenie here, but I think one is just disappearing.

Smith was no problem, in fact I didn't even notice I was fighting him as I was too busy trying to grab screenshots.

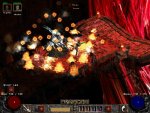
Then in the Chaos Sanctuary I was able to get all the effects at once.
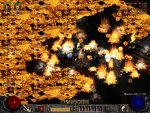
I just barely missed capturing a Molten Boulder before it exploded. But you can see two Molten Boulder fire trails, a fading Nova ring, an active Volcano and a meteorite coming down from Armageddon.

I originally hadn't planned to fight Diablo until I moved over some charms, but I figured things were going so smoothly, so what if I have -2 Lightning Resists? Yeah, so that actually worked out. I gave him a nice big bear hug and stood inside his lightning hose. Swung away for a short time while he stood on my volcanos and everything went smooth. Imagine that.

I have a feeling this is going to be a really fun character to play with. I've also just recently upgraded his gloves with Laying of Hands. With the ctc Holy Bolt, Delirium and Destruction, he feels like some weird ctc wolf build. Which is fine by me.

Current Gear:
Delirium Pelt
Treachery Dusk Shroud
Nosferatu's Coil
Shaman's Amulet of the Whale
Laying of Hands
Rare boots with rw Cold and Fire res
Raven Frost
Crafted ring with LL and minor mods
Switch: Dark Clan Crusher and Sigons

Skills:
Maxed Fury
Pretty even split between:
Lycanthropy
Armageddon
Molten Boulder

Re: Operation Death and Destruction

You should try the weapon earthshifter. It might be good for this kind of build.
Re: Operation Death and Destruction

These characters are part of a themed set, so he's always using his Death or Destruction sword
soooooo

I'm kinda doing this again. After a computer upgrade and combing through my old harddrive, I found all my save files and ATMA stashes. Then I got that itch. I guess it's true that you can never really get away from Diablo.

I've decided I'll upload video of the Cow Level each time I complete a character. So here is War with his merc Hrothgar the burninator.

sorry for the shoddy game play. It's been a while
 
So I haven't been keeping as detailed logs on progress, but Death is progressing well. When I dusted him off, he was in late Act V Nightmare apparently having just rescued Anya. While my play was clumsy Death and his companion Wulf (apparently I couldnt resist changing mercs as Wulf just seemed so aptly named, dont remember this at all) cruised through Act V. Ancients were no problem. This build so far performs just as well with large open spaces where many volcanoes can be triggered, or in tighter hallways where enemies can be taken on a few at a time.

Death did experience his own death against Lister's pack. I had forgotten about the quirk with Delirium where instead of being transformed into transformed into a fetish, shapeshifted players go back to their human form. I first couldnt figure out why Fury wasn't working. Then noticed I was holding a sword for some reason. By the time this all registered I had a sliver of health left. I tried running and chugging rejuvs, but got stun locked on my escape. Body recovery was exciting, but I eventually lured everyone out of the Throneroom and circled around to my corpse.

The Baal fight was also a surprising challenge. My weak low level summons were dying in essentially one hit. Which put all the attention on me and Wulf. The merc, without cover, really didnt stand up very well to Baal. I think Hrothgar looked like such a stud due to all the distractions he had available with War's army. After a few merc res's, I finally realized that Death could easily tank Baal without any help from his merc or woodland creatures, and the battle was won, nothing useful dropped and there was much rejoicing.

Wulf's challenges with Baal have carried over to Hell difficulty. I finally gave up on the attack speed bonus from Treachery and moved over a Skin of the Flayed on for more life leech. This helped slightly, but he was still dying often. So I moved over to a Shaftshop, which is a bit more versatile since it helps against unleachables. I'm hoping to try out a Vampgaze, but noticed I dont have one in my stashes, so I've got my Sorc farming NM Meph for now.

Hell has not been so hard on Death himself. Since the Delirium death, I've gotten much better at listening for a change from the werewolf hurty voice to the squishy human hurty voice and am quick to react. Act 1 was fairly straightforward, but I did have to park a bosspack in the Jails. It was a specter with might aura, cursed and extra strong. Not touching that with a 10 foot pole. Specters as a whole were surprisingly not too difficult. The elemental damage from a large number of well synergized volcanoes topped with the magic damage on Destruction took care of them relatively quickly, although the mana burn could be annoying. Also too, the Arcane Sanctuary was a bit hurty because it is difficult to get volcanoes to spawn. Fortunately I chose the correct arm from the start.

Act II was another story. All the unleachable undeads were a huge PITA. Just the Radament quest took forever. I kept wishing I had Dracul's Grasp. Even tried regearing my LK running sorc for some MF runs, but that was hopeless. Then by the time I had made it to Canyon of the Maji, I found all my old trading stashes and realized I had them the whole time. Once they replaced Laying of Hands, undead were no longer a problem. In the end Duriel died, but killed my merc the last swipe of his claw just to annoy me (admittedly I shouldnt have been too cheap to use a rejuv).

And then we've arrived in our current placement Act III. Ah ActIII, the part of the game I love to hate. Unlike War, Death didn't get a quick map with a wormhole to the Flayer Jungle, and instead had one of those long rambling maps with lots of double backs. And unlike War who faced no Gloams in his entire romp through the game, Death has already faced them once in the Great Marsh. So far things still haven't gotten very dangerous. The two major concerns are the forced reversion to human form, and getting swarmed due to the super long duration of the Fury attack (this will be even more of a concern for the eventual zealot). Exploding dolls were also a lot more hurty that I expected, so I am not at all looking forward to the Durance of Hate.

Death currently waits in Upper Kurast having just secured the final piece of Khalim's body. He still has to venture after the magical Tome before continuing on. I'm currently running at either players 3 or 5 depending on how much time I have. 5 isn't really much more dangerous, but it can get slow with the wrong monster rolls.

* * *

Setting up the Sorc for this project is still giving me conniptions

Does anyone know if Sorc's Fire Mastery will do anything to volcano/moulten boulder?

EDIT: Also I know about the Enchant + Exploding Arrow bug, can this carry over to other fire skills?

* * *

Death has made his way into Act IV, but with some troubles along the way.


We last had him clearing out Temples. And this started well. For example this stair trap was quickly taken care of and the doorways covered with the merc and the bear jamming the lower door and Death clogging the upper. But then he ran into the worst stair trap I've ever encountered. It was a triple boss pack of spiders, corrupted rouges and Yeti. The spider pack was might enchanted and extra strong, the rouges had extra fast and extra strong while I dont think the Yeti had anything to harmful (I think I caught LE, FE). I think the biggest problem I had was actually the poison from the spiders. With negative resists I had gotten hit previously and had to bail out to town because the drain was so swift. So I thought that with my confuse proc from Delirium I had gotten a good foothold enough to take this screenshot, but as you might guess I didnt live very long after.

To add to the embarrassment, I had no chance of recovering my corpse after this. I had to save and exit to complete the quest. I can't remember the last time I've had something like this happen. I'll blame it on rust and the dangers of photojournalism in Sanctuary.

Travincal was a bit challenging. Thankfully I switched out from Dracul's Grasp back to Laying of Hands for the fire resists and damage to demons. While I could feel the loss of life leech, I also rolled a champion pack of ghoul lords who were dropping meteors on my head in addition to the surprisingly hurty hydras.

The Durance was not bad at all. Only troubles were the dolls that cook off roughly 1/4-1/3 of life bulb when exploding (so I tried to leave them for the merc) and a Holy Freeze Urdar pack that had to be separated across roughly 5 rooms. Death is already attacking so slow, when under Holy Freeze I could check my email during each Fury cycle.

Mephisto also put me in a bit of a pickle. When clearing out Wyand Voidbringer's room, I ran into a double boss pack of ghoul lords. One extra strong, extra fast. During this scrum for some reason Mephisto wandered in even though I never really made it much past the doorway. All I can figure is that my merc strayed off chasing an extra fast lord and mayhaps one of his glacial spikes poked Mephisto into action. Anyway, that got hairy pretty fast as I was had been covered on ~3 sides by the ghoul lords, then Mephisto took up the rest of the perimeter so I had nowhere to go. I had switched back to Dracul's, but couldnt get a Life Tap proc. finally was able to make some room to get out of it, then get to town and res Wulf. From there it was a lot easier as we looped around from the other side and had a lot more control of the situation.

Mephisto was kind and dropped a 12% Crown of Thieves. I'm currently testing it out on Wulf as it doubles his life leech, but he loses some survivability with the loss of a about 20 res C/L/P, the FHR and slight decrease in his stun duration. I am also out of hole poking quests, so his attack speed has dropped since he's running armor and helm without any fervor jewels.

I had to run out to Act IV because I really like playing this build there. I also grabbed a quick gameplay video of Death bringing the Pandemonium out of the Fortress. If you watch closely you can even catch Delirium making him squishy for a few seconds.


Great project. I only just now got a chance to read through all of it. There is something about the Destruction Runeword that is quite alluring: you are right, it's almost as though the mods were switched on the RWs.
 
So Act IV took a bit longer than usual. I had gotten through two arms of the Chaos Sanctuary when my computer locked up. Then had to redo that section.

But backing up, the open areas were pretty straight forward. No gloams (yay). Downside was Knights and Venom Lords, which are both fire immune, so this took out my secondary damage source. Had leapers along with them, which are more just an annoyance to target. I got corpse spitters in the Outer Steppes/City of the damned and they seem to have higher physical res to begin with. Ran into a loooottttt of physical immune bosses. They were mostly not too bad until this guy. I eventually remembered I had the rabies prerequisite and he finally died after running through a few mana potions.

Izual came and went and I honestly didnt even notice I was fighting him. Hephasto, on the other hand, got my attention...when he died. Hellforge was an Um.

Got Urdars, more Venom Lords and bugs in the River of Flame. Rolled a couple more tough bosses. One Venom Lord was dual immune and Magic Resistant. So without the tertiary magic damage from my sword, it was a good 3-5 minutes to kill him with Rabies and Glacial Spike. Finally had an Urdar boss that hit pretty hard. Went through a row of purples on him.

Chaos Sanctuary was not a big deal the second time through. Infector of Souls came out Multishot, and with the rest of his packs infernos, they were surprisingly painful. Granted my fire res is standing somewhere in the 20s.

I landed a nice pair of shrines for the Diablo fight. And switched from Drac's to LoH. They were likely entirely overkill as this was he easiest part of the playing session. I don't do a lot of melee characters, so I wasn't so aware of the lightning hose being so absurdly far away in Hell Diff. I thought he was launching some new projectile at first.

I played on into Act V to get another socket quest. I'm about 3 behind schedule from messing around with other stuff that probably wasn't needed along the way. God I find Act V annoying. And it seems to know how much I loathe it. I got Javelin Slingers and Quill rats, my poison res is -11. There were 4 boss packs right outside the door. 3 were mana burn. Even though these guys are leechable, they have so little life. I kept losing my mana before I could reach anything. Eventually chipped away enough via running back to Mala for mana refills. After this spot, I think there was only one more boss on the way to Shenk, who was also quite simple.

So I got my socket quest. Made some armor
[picture broken]
And I'll be trying it out next session.

* * *

Before I get started on the update, I just wanted to say I didn't notice the perfectly bad roll on my Fortitude above until after posting it. I don't know why, but I have terrible luck with runewords. I've rolled my Death twice, and both times landed with ED at 31X%, now I've got a matching perfectly bad vit roll on my Fort.


That being said, the combination of Highlord's and Fortitude has vastly improved Death's killing power. I noticed my error in attack speed calculation somewhere in Act III, but didn't have Highlord's and a Lo would have meant cubing up from Ist, wiping out most of my runes. I ended up trading for the Highlord's (thanks BBS) and lucked out on an Ohm from a Superchst. As a holdover I had just switched out Nos' Coil for String of Ears to get the damage reduction. But the new gear made p3 feel like p1.

Even with the extra damage, I didn't expect to get through Act V quite so fast. But it was just one of those play sessions where I could never find any waypoints. I'd wander around for a bit and then realize that if the waypoint existed, I'd have a hell of a trek on restart, so I moved on. Even the Frozen River entrance was right at the stairs. In the end I didn't find a single waypoint between the Frigid Highlands and the Throne of Destruction.

I started in the Frigid Highlands, and was greeted with Fire Archers (boooo), but these were accompanied by Urdars and corrupted rogues, two reasonably easy leechables. Arreat Plateau was even easier, rolling Demon Imps, Lashers and javelin Huntresses as the most difficult part of the group. Crystalline Passage had about the hardest roll but even this wasn't bad, Ice Mages, Serpent Magi and the Cold breathing guys were here. I did die in this level to a Delirium induced morph. I tried getting back to wolf form, but a boss pack of Serpents had already launched a number of bone spears at me. Yes I had to walk all the way back from the Frigid Highlands to get my body (sadface).

Anya was rescued without problems. More Serpent Magi, Succubi and Rotting Corpses here. By now I was really hoping to find a waypoint, but nope. Doubled back to the Glacial Trail entrance I found before the Frozen River. Here I ended up creating a double boss pack via Molten Boulder. This is the only really annoying thing about Destruction. Whenever you are trying to single out a ranged enemy or a boss, a Boulder can trigger and just push it all the way across the screen. In this instance I was fighting a Holy Freeze bat boss. I'm already attacking absurdly slow with something like 9/9/9/9/16 (the fastest it gets btw). Do you have any idea how slow a cycle is with Holy Freeze? So mid cycle, a boulder triggers and by the time I'm done swinging he's pushed down the hallway and completely off screen. Once I reached him in the other room, he found a buddy Skeleton Mage sporting the same aura. They were both pretty harmless elsewise.

Then on to the Frozen Tundra. Another easyish roll here. Imps, Goats and Skellie Archers. Here you can see the upside of Delerium keeping an entire screen of archers busy. So couldn't find the waypoint here either (thought its usually at the entrance or exit, but wandered around here for a while with no luck). Then I planned on taking a rest at the Ancients. Maybe muling on some purples. Ancients way itself was simple. Had Carvers, Quill Rats and maybe Demon Imps. After wandering all the way across the level I found the way up to the Ancients, before the waypoint. retracing the map, I had to go all the way back to an early fork for the branch where the waypoint could be. So we pressed on.

I got a really really favorable roll (actually all areas were great so far). The only 'bad' mod was Korlic, who spawned with our favorite, Holy Freeze. Madawc was tossing axes into Wulf's back, while Talic whirled back and forth across my party. I fed Wulf enough purples to take out Korlic and his massive slowing blue cloud. But Wulf died from Korlic's cold enchanted blast, but his services were no longer needed. Keeping Korlic engaged also kept him from leaping, which was a good thing. I then split off Madawc, and went toe to toe with him while throwing up bears to absorb axes when convenient. He was not a problem. Finally ran up to take on Talic. His whirling around let me get off some separated volcanoes, but they were mostly for show as he is Fire Immune. Even with the extra strong mod, he didnt take much off my life bulb, certainly not more than I could leech back. In the end, I went through only 3 purples, two for Wulf and one for Death.

Welp, no waypoint up here, guess there's only one more stop. I don't even know what rolled on ToD lvl 1, becuase the stairs down to 2 were one turn away. I finally got a bad role here, Explodey guys, Poison Mages (-11 PR) and Gloams. I was surprised by how much the Gloams didn't hurt me. Thankfully, my lightning res is the highest, roughly 72 with the Anya quest, though I died before I received the Hell reward, so no clue what my actual resists were. The Mages were the most annoying from a hurty perspective, while dealing with so many unleachables were overall annoying until I could get a Life Tap proc. Here again I couldn't find the frigging waypoint. I had to clear the entire level finding the stairs down just before the waypoint in the very last arm. Here I called it a night, and Death has one short stretch left in his journey.

post #28 has beautiful picture.
 
Death has made quick work of the rest of his journey. I tentatively clicked on the stairs down to the final level, anxiously awaiting a stair trap, but Death had plenty of leg room. "We're still flying first class" I thought. I didn't even encounter a monster in the opening square. I eventually found one to fight at the first intersection north with the left side chamber. A small pack of Ghoul Lords. Eh, not too bad. After I cleared them out, turned left and was greeted with lightning. Great gloams. But they still weren't too bad. There were times where I wondered if it was worth waking them up. But in the end I just cleared out everything in case I needed the breathing room. In this case I had a Champ pack of Ghoul Lords and a boss pack of Gloams. This took a bit of retreating to spread them out, but in the end we cleared the left side.

Strangely, there were only two monster types on the left. Wondering what my last enemy would be, I strode confidently to the right arm and got swarmed by a doll pack. Seemed my monster rolling luck didn't turn out so great on this level. But I went all of Act V without any Frenzytaurs, probably the scariest foe for this build. After War made it through Act V without any gloams, I think I'm having pretty good luck with the monster rolls.

On one of the trips to town, I switched Wulf back to his Arreat's Face for the extra res as life leech wasn't a big deal with all the undead. And finally we were ready for the Throne Room.

I tried being super aggressive with Baal's minions because that's really how I feel safest with this build. But the Decrepify was really really problematic given Death's swing speeds. I made it through the first two waves in slow motion, but this wasn't sustainable. For 3-5 I fell back out of Decrep range and everything was smooth. I tried switching to Laying of Hands for waves 3 and 4 since my fire res was in the 20s, but the life tap proc's from Drac's were providing more help than I had realized. Strategically placed myself and recast bears to keep Death and Wulf from being surrounded by Lister and they were taken without retreating past the doorway.

Onward to Baal. This fight was literally, hold down the left mouse button. I didn't want to recast grizzly or HoW, as this would drop my damage output without reason. And, the Life Tap from Drac's Grasp was enough to keep Wulf alive through the fight. Baal never cloned and he died without fanfare, or a decent drop.

Overall I found the build relatively fun to play. If I had known about the issues with Delirium and shapeshifting, I probably would have put it on the merc and went with something like Ravenlore to max out the fire damage potential, and get some passive crowd control with the Ravens. I'm also not sure if Fury was the best idea for an attack skill. It was likely not the fastest achievable attack speed for the Druid, and having to sit through the cycle was quite dangerous at times.

I also wouldnt have made Fortitude in a Superior armor. Death was already bleeding money because of the steep repair costs on Destruction, but with the Fortitude he had repairs over 200k. I'm not looking forward to my other characters using it

The volcano damage seemed to be significant. At least it sped up the death of non fire immunes. I found it pretty hard to get numbers for volcano, but from what I found the estimated damage was what Arreat Summit lists x4 / second. This means level 15 volcano puts out 204-212 physical and 224-232 fire damage per second. I ended up synergizing this with level 14 Molten Boulder, lvl 6 Fissure and lvl 20 Armageddon. so my final damage should be in the range of 546-568 physical and 922-955 fire per second. Keep in mind that I could get stacks of 4 (traditionally you can barely stack two) with continuous attacking and the volcanoes have a sort of area of effect damage on the falling rocks, I don't think it ends up completely insignificant. The strategy might be a lot more viable with a faster weapon base, but the lack of IAS on Destruction itself really limits how quickly you can get it swinging *sadface*

Anyway I've got to head out now.
I'll put up an info Dump for Death with his Cow video.

Then we can start talking about the Amazon Doc, who currently sits in Nightmare Act 1!

* * *

Welp this little update took a lot longer than expected. It turns out that this character is terrible at the Cow level. I tried pretty much everything I could think of to get through it, but ultimately gave up. This included, swapping weapons with the merc, not casting ancillary spells/summons, swapping out Drac's Grasp to keep Confuse from getting overridden, players 1, rerolling map for a more defensible entryway (War lucked out on his run). But in the end, no matter what I did, Death just ended up completely surrounded by cows. Once the Confuse proc wore off, it was game over. I posted my most valiant attempt where he nearly just got a foothold, but Delirium swapped him back into bag of meat form and running around to recover the corpse woke up too many cows.


I guess Death was a fairly apt name for this character. Just not in the way I had intended. He was supposed to be bringing death to the demons of hell, but I've never died so much with anything I've ever played. Not looking forward to the even more vulnerable melee classes to come.

Skills:
Heart of the Wolverine: 0/9
Grizzly: 0/8

Lycanthropy: 20/27
Werewolf: 3/10 (to reach final breakpoint with 30 IAS)
Feral Rage: 1/8
Rabies: 1/8
Werebear: 1/8
Maul: 1/8
Fireclaws: 1/8
Hunger: 1/8 (Yeah these are wasted points from when i restarted the character and forgot what the hell I was doing)
Fury: 20/23

All the air stuff: 1/8
Firestorm: 1/8
Molten Boulder: 14/21
Fissure: 6/13
Volcano: 1/8
Armageddon: 20/30

Stats:
(with gear)
str-202
dex-121
vit-228
eng-20

Fire-25
Cold-55
Lightning-71
poison-4

Life-2065
Fury dmg 3127-6033
Fury AR 4185 (90% to hit Fallen)
weapon speed - 9/9/9/9/16

Gear:
Delirium pelt, +3 Armageddon, +2 HoW, +1 Grizzly
Highlords
Fortitude
Drac's
Ravenfrost
Nos Coil
Rare Ring (4min dmg, 50 psn, 8%ll, 34 LR, 7 res all)
Rare boots (20%frw, 30CR, 34FR) probly should have gotten some crushing blow in here
Dark Clan Crusher and Spirit Monarch on the switch

charms to make up the difference mostly to reach 4 frame FHR, and fill in resistances and life when possible.

Not really sure where to improve his skill/gear allocation. But moving the Delirium to the merc would have made a huge difference. And I probably neglected crushing blow when trying to stretch his gear for some decent Res. Also looking back at the AR, that could have been a major problem. I likely should have been running a different ring, and mayhaps squeezed in a few AR charms, although War was hoarding them all when Death got started.

anyways, thanks for reading. Currently working on Doc, the Passive zon. Gameplay is totally different from War and Death. Curious to see how things shape up moving up in the difficulties.
I swear Ill have an update on Doc the passive Zon soon. Been a bit busy, and also took on a new D2 project that is eating into my sparse free time.

I just wanted to pop in to say I noticed the homage she pays to Steven Q. Urkel after killing Shenk in Act V. I've never noticed this before since I dont do too many Zons, and it actually had me laughing outloud last night.
 
So finally an update on Doc. She is a rather straightforward passive Zon. I played her untwinked until level 24ish as I find twinking can get a bit boring since the rolls of the RNG mean nothing, its just playing to move forward and nothing else. At 24 I got a bit tired of the slow play and moved over things like Bonesnap, Twitchthroe and a hurty stick for the merc. Between the twinking and the eventual addition of Valkyrie (she is so OP), normal was very much a breeze. By Act V, I had tired of my prayer merc. Yeah he could be insightful at times, but he also tended to lag behind and was often more intent in engaging in conversation with Hell's minions than killing them. Seriously though, after getting used to Barb mercs, their AI is miles above Act II mercs. Why did they make all the cool aura runewords on polearms?

But Gorm wasn't always the bravest of companions either. When rescuing Cain, he pretty much refused to acknowledge Griswold's existence. And when beginning or foray outside of Lut Gholein, we were greeted by a triple boss pack. The two of us decided to chat in town while the valk mopped up everything. He even got a level hiding away in town!

But aside from these occasions, Gorm has actually been quite courageous. And maybe a bit overconfident. When looking through my screen grabs, I've noticed a trend. He's never alive after boss fights, ever (note the epic Duriel drop). In fact I'm resurrecting him a lot more than either Death or War ever had to. I think this is largely because with the Valk as an ultimate tank, I'm a lot less dependent on him. I've also gone a bit more aggressive with his gear, running Guiliamme's Face from the point he could equip it, and have just swapped of for Arreat's to avoid to sound of gold being sucked out of my stash. It has helped a bit in Hell at least.

I've also learned my lessons from playing War and Death. For War I wanted to save stat points (who knows why) and get more fireworks, so my weak Necro had the hurty weapon and my merc had the underpowered Destruction. With Death, I wanted to boost up the Volcano synergies so he weilded the weaker Destruction although he had better damage modifiers than the merc. With Doc, I've forgone some of the fireworks so that the merc can dish out more damage with Death and Doc is wielding Destruction. Overall this has helped quite a bit making the merc more powerful. And It makes strategizing physical immunes a bit easier, since I am holding the elemental/magic damage stick.

I have to say, gameplay was a bit boring until Act V nightmare. Here there was a diffinitive shift in difficulty, and I clearly had to start playing with strategy. Dropping decoys at the right places. Advancing agressively in some situations instead of just watching my two companions kill everything and mopping up the stragglers as I had previously. Overall, the experience got a lot more fun. Suprisingly situations like this and this arent really that hard because of the ultimate tank I have. It's more ranged characters and ressurecters that make things tricky. At the end of Nightmare, Baal was killed (along with Gorm) and then Tyreal decided to troll us and make the portal unclickable.

We've managed to progress into late Act I Hell and have survived a few sticky situations along the way. This was a double archer boss pack next to a flayer boss pack.

Some corrupted rogues also came in from above. I tried to use the flayers as little rejuv potions while quickly refreshing the Decoy. Thanks to the valk, I don't have to worry about half the screen. I tried to position the Decoy around Gorm, but he's always bashing enemies around and ends up chasing them into an exposed spot, so you'll notice he's an ex-mercenary here. His bashing (and Molten Boulder) are quite annoying against physical immunes, as they die fastest when standing directly on top of my volcanoes. For a couple of ghost packs, I've just let him die so that I can kill them faster. I have died once to pure stubborness against a single Dark One. I was fighting him one on one and missed 5 times in a row preventing me from leeching anything. I refused to drink a potion because I should be able to hit a regular Dark One at least once before it kills me. Apparently, I was wrong.

Not too many great finds along the way. I wish I could get drops like this in Hell Lower Kurast. 4 runes from one chest is p awesome. Oh and I did score a Vex from a lowly Flayer in the Underground Passage. Almost didnt notice it drop.

Skills are pretty straightfoward. Have Valk and Decoy maxed. Maxing penetrate, and Critical strike is up to point of diminishing returns. Have about 5 or 6 in Dodge and Avoid. Will alternate points here after penetrate is maxed. Gear is quite non-optimized. Haven't even looked at my charms since level 50 something. I will probably switch to Drac's soon to help with the merc, definitely by act 2 with all the undead. I've just been too lazy for this because it means 4 more square of my stash taken up for Valk prebuff (currently buffing her to about level 35 I think).

And that is Doc for now. She started out kinda boring, but has certainly started to be a lot more enjoyable in Hell.

Since you're still around, I can tell you that the past tense of "slay" is "slew".
what if there was snow involved?
Finally decided to reroll my Death
Bumped that sorry 318% roll all the way up to 315%

*shakes fist at Diablo gods*

Anyway, not having enough continuous time for single pass full clear right now, so I'm back to this project for a while. Hope to push through my Ama cause I'm pretty excited about getting to my Pali up next. Will update on Doc once I get anywhere new.
Holy crap. Apparently the Diablo gods decided to reward my sacrifice

Was having trouble finding the City of the Damned waypoint. Glad I made that right turn at Albequerque
[picture lost]
 
So I've been playing Doc very sporadically. When we last visited her (aside from the OMG rune drop) she was in Act I Hell rescuing Cain. I don't have a great memory of pushing her through, and it seems my screengrabs are random assortments of PI boss fights. I did recall this corner room on the way down the Catacombs that was packed full of Shaman, but I couldn't get a great screenie of the full contents given my angle of observation. We continued downward, killed Andariel (and Gorm) on our way to Act 2. I'll assume there wasn't a notable drop here.

In Act 2, I remember Radament being an especially painful battle. The PI made him unleechable and the extra fast made his minions quite annoying especially without a way of corpse disposal. I ended up leaving the Decoy between us and the minions to soak up all of their projectiles, and I had to put myself opposite Gorm to prevent him Bashing Radament off of my volcanos. Inventory was filled up with Antidotes to keep Gorm alive during the battle as I needed the elemental damage he provided to make the fight less tedious.

Arcane Sanctuary was not a great time with the PI Spectres. For parts of the romp I would just leave Gorm dead as my Valk is such a boss, and then PI enemies would be left alone on my firey death traps (ok more like firey slightly hurty things that when added on top of eachother 10-40 times eventually whittled down their health, but death trap is just more catchy). Duriel wasn't much of a problem, in fact I don't even have pictoral evidence of ever fighting him.

Onward to Act 3, ran into some annoying dual immunes the worst were PI/FI as volcano doesn't do much to them. It was during the time wandering aimlessly through the jungle that I decided I had played a passivezon enough to get the gist. They were highly survivable, had an awesome tank and a hugely durable Decoy. D/A/E helped keep them alive further, and all the things that made me stronger also applied to the Valk. But my appreciation of their gameplay was waning. So I swapped the players setting to p1 and started more of a sprint through the game. (my lack of playing time also contributed to this decision). The other annoying dual immune was PI/PI because lacking OW, I had way to then block regen. This guy also had the handy Spectral Hit making the Cold and Fire bonuses from Death and Destruction pretty impotent. In the end Grief Grumble slowly faded away due to the magic damage on Destruction. Mephisto was a surprising pushover. I think even Gorm survived as only the Valk was targeted. p1 and all of our Crushingblow made quick work of things.

Act IV went fast as usual. We even skipped Izual as Doc was pretty lacking in desire to allocate more Skill points. Amazingly even when whipping through Act IV on p1 we found the Jah rune upthread. Her rune luck continued on the Forge scoring an Ist. Seriously this was the rune luckiest character I've ever playing getting Ist/Vex/Jah on single pass, nowhere near full clear and p3/p1 play through most of Hell. Diablo was weak and couldn't even manage to kill Gorm before getting consumed by our pain train. His drop was mostly useless, but he did give us this Dagger that although piquing my interest, was more annoying for it's grand slam of useless mods after a pretty sweet damage roll.

Act V was probably the fastest runthrough I've ever had in Hell. First I got pretty great monster rolls with Imps Imps Imps all over the place. Where I did run into the normal PITAs like skellie archers, they were easily handled with a leading Decoy to absorb the maximum amount of damage while the crew got into position. The last thing that made it goes so fast was that I could never find any waypoints, so I just kept moving instead of hunting around (after the Jah, I probably should have kept looking). So I basically completed Act V in about 3 20 minute playing sessions. The only detour I took was to rescue Anya for the extra resists. The Ancients were probably the most challenging part of Act V. I tried quite a few times, but just couldn't get them completely separated. So, after at least parking Korlic down in the corner we took on Madawc and Talic 2 vs 3. Madawc must have spawned with some really nice weapons because he was extra hurty without any noticeably dangerous mods. I tried to keep him entertained with a Decoy, but I was having nothing of it. Gorm sacrificed himself while delivering a killing blow to Talic, so it ended up me and the Valk vs Madawc and then Korlic down below. Madawc also didnt care at all about the Valk and was incessantly throwing axes at my head. Fortunately, although he was smart enough to avoid my Decoy and Valk, he seemed oblivious of architecture. So I parked myself behind a giant pillar while he attempted to throw his axes through it. Meanwhile, my Valk poked him to death. He would occasionally realize his error, but then I could play ring around the rosey for a while until he started chucking at stones again. Without this I glitch, I doubt I could have defeated them on this go. After Madawc finally died, we went down to Korlic. Although he was LE, I was able to tank him largely by dodging the lightning bolts shooting out from him endlessly due to the volcanoes.

Fitting with the rest of Act V, the WSK rolled almost prefectly with very easy routes to the stairs, WPs. Guest monsters were not too bad, and gloams were a lot less dangerous than expected because of D/A/Eing their bolts. Worst roll was probably Unravellers with OKs and Vampires on the final level. But I would just lay a Decoy next to the Unravellers to direct their poison breath and charge them from the other side hoping Gorm and the Valk would have my back. Waves were a bit of a challenge, and Lister & Co even managed to kill my Valk. But after a quick retreat and stringing them out, we were able to pick them off easily 1 or 2 at a time. Baal himself wasn't too bad. Only annoying thing was he really decided to go crazy with the tentacles which meant Doc actually had to do some work. But in the end we showed him who the true lord of Destruction was.

I don't know when I will have a block of time to try recording the Cow level, but I definitely want to give it a go after the rune luck this character has had, I don't want to retire her just yet. Also after quitting on the cows with Death, I'd really like to make it work again. If I haven't said it enough I was really impressed with this characters survivability even given their very limited investments into Vitality. The Valk is just crazy and Decoy works wonders in scouting and removing about a half to a quarter of all threats at any given time. That said, the playstyle was just too repetitive, even for me (maybe if I could hork with an Amazon I would have been more entertained).

Here equipment dump is here:
Code:
Character name  : Doc
Character type  : Amazon
Character level : 84
Character exp   : 1029856976

Strength        : 187
Energy          : 15
Dexterity       : 96
Vitality        : 197
Stat Points Rem : 15
Skill Points Rem: 0

Life            : 1000 / 807
Mana            : 133 / 139
Stamina         : 368 / 344

Gold (Inventory): 13999
Gold (Stash)    : 2009167

Number of Items : 44

1: Horadric Cube

2: Acrobatic Grand Charm of Quality
Keep in Inventory to Gain Bonus
Required Level: 42
Item Version: 1.10+ Expansion
Item Level: 80
Fingerprint: 0x2c0cde67
+2 to Maximum Damage
+1 to Passive and Magic Skills (Amazon Only)

3: Tome of Identify
Quantity: 10

4: Tome of Town Portal
Quantity: 17

5: Shimmering Large Charm of Incineration
Keep in Inventory to Gain Bonus
Required Level: 26
Item Version: 1.10+ Expansion
Item Level: 80
Fingerprint: 0xe261e512
All Resistances +8
Adds 7-16 fire damage

6: Shimmering Small Charm of the Icicle
Keep in Inventory to Gain Bonus
Required Level: 25
Item Version: 1.10+ Expansion
Item Level: 80
Fingerprint: 0x8bf39a09
All Resistances +4
Adds 2-4 cold damage over 1 seconds

7: Key
Quantity: 12

8: Amber Small Charm of Strength
Keep in Inventory to Gain Bonus
Required Level: 32
Item Version: 1.10+ Expansion
Item Level: **
Fingerprint: 0xaf5aeb71
+1 to Strength
Lightning Resist +11%

9: Amber Small Charm of Sustenance
Keep in Inventory to Gain Bonus
Required Level: 32
Item Version: 1.10+ Expansion
Item Level: 80
Fingerprint: 0xf85c5b14
+13 to Life
Lightning Resist +10%

10: Harlequin Crest
Shako
'Ort'
Defense: 98
Durability: 11 of 12
Required Strength: 50
Required Level: 62
Item Version: 1.10+ Expansion
Item Level: 85
Fingerprint: 0x2c6ee74d
+2 to Strength
+2 to Energy
+2 to Dexterity
+2 to Vitality
Damage Reduced by 10%
Lightning Resist +30%
50% Better Chance of Getting Magic Items
+2 to All Skill Levels
+126 to Life (Based on Character Level)
+126 to Mana (Based on Character Level)
Socketed (1: 1 used)

Ort Rune
Inserted into a Shako

Lightning Resist +30%

Required Level: 21
Item Version: 1.10+ Expansion

11: Mara's Kaleidoscope
Amulet
Required Level: 67
Item Version: 1.10+ Expansion
Item Level: **
Fingerprint: 0xc663bf72
+5 to Strength
+5 to Energy
+5 to Dexterity
+5 to Vitality
All Resistances +27
+2 to All Skill Levels

12: Raven Frost
Ring
Required Level: 45
Item Version: 1.10+ Expansion
Item Level: 85
Fingerprint: 0xec37e90d
+18 to Dexterity
+40 to Mana
+241 to Attack Rating
Adds 15-45 cold damage over 4 seconds
20% Cold Absorb
Cannot Be Frozen

13: Death Grasp
Ring
Required Level: 65
Item Version: 1.10+ Expansion
Item Level: 80
Fingerprint: 0x5ac40667
+17 to Maximum Stamina
+4 to Minimum Damage
Fire Resist +7%
Lightning Resist +34%
Cold Resist +7%
Poison Resist +7%
+50 poison damage over 3 seconds
8% Life stolen per hit

14: String of Ears
Demonhide Sash
Defense: 112
Durability: 22 of 22
Required Strength: 20
Required Level: 29
Item Version: 1.10+ Expansion
Item Level: 80
Fingerprint: 0xb1bd6870
+178% Enhanced Defense
+15 Defense
Magic Damage Reduced by 10
Damage Reduced by 15%
7% Life stolen per hit
+10 Maximum Durability

15: Storm Greaves
Battle Boots
Defense: 47
Durability: 15 of 18
Required Strength: 95
Required Level: 37
Item Version: 1.10+ Expansion
Item Level: 86
Fingerprint: 0x1267a91f
Fire Resist +34%
Cold Resist +30%
Adds 1-20 lightning damage
20% Faster Run/Walk
Half Freeze Duration

16: Ort Rune
Can be Inserted into Socketed Items

Weapons: Adds 1-50 lightning damage
Helms: Lightning Resist +30%
Armor: Lightning Resist +30%
Shields: Lightning Resist +35%

Required Level: 21
Item Version: 1.10+ Expansion

17: Ort Rune
Can be Inserted into Socketed Items

Weapons: Adds 1-50 lightning damage
Helms: Lightning Resist +30%
Armor: Lightning Resist +30%
Shields: Lightning Resist +35%

Required Level: 21
Item Version: 1.10+ Expansion

18: Shimmering Grand Charm of Pestilence
Keep in Inventory to Gain Bonus
Required Level: 27
Item Version: 1.10+ Expansion
Item Level: 80
Fingerprint: 0x37c6ee34
All Resistances +13
+25 poison damage over 5 seconds

19: Sapphire Small Charm of Vita
Keep in Inventory to Gain Bonus
Required Level: 39
Item Version: 1.10+ Expansion
Item Level: 80
Fingerprint: 0x1ebc445b
+20 to Life
Cold Resist +11%

20: Ruby Small Charm of Strength
Keep in Inventory to Gain Bonus
Required Level: 32
Item Version: 1.10+ Expansion
Item Level: 80
Fingerprint: 0x53a00560
+2 to Strength
Fire Resist +11%

21: Ruby Small Charm of Inertia
Keep in Inventory to Gain Bonus
Required Level: 32
Item Version: 1.10+ Expansion
Item Level: 80
Fingerprint: 0x7d4509d8
Fire Resist +10%
3% Faster Run/Walk

22: Ruby Small Charm
Keep in Inventory to Gain Bonus
Required Level: 32
Item Version: 1.10+ Expansion
Item Level: 85
Fingerprint: 0x7f0e68bd
Fire Resist +11%

23: Emerald Small Charm of Dexterity
Keep in Inventory to Gain Bonus
Required Level: 32
Item Version: 1.10+ Expansion
Item Level: 80
Fingerprint: 0xfee9108f
+1 to Dexterity
Poison Resist +11%

24: Amber Small Charm of the Glacier
Keep in Inventory to Gain Bonus
Required Level: 32
Item Version: 1.10+ Expansion
Item Level: 80
Fingerprint: 0x5e4d2193
Lightning Resist +11%
Adds 3-6 cold damage over 1 seconds

25: Emerald Small Charm of Sustenance
Keep in Inventory to Gain Bonus
Required Level: 32
Item Version: 1.10+ Expansion
Item Level: 80
Fingerprint: 0x6bf094d2
+13 to Life
Poison Resist +11%

26: Sapphire Grand Charm of Balance
Keep in Inventory to Gain Bonus
Required Level: 22
Item Version: 1.10+ Expansion
Item Level: 85
Fingerprint: 0x539b6c5c
Cold Resist +27%
12% Faster Hit Recovery

27: Treachery
Dusk Shroud
'ShaelThulLem'
Defense: 429
Durability: 16 of 20
Required Strength: 77
Required Level: 49
Item Version: 1.10+ Expansion
Item Level: 85
Fingerprint: 0x4e99db06
Cold Resist +30%
50% Extra Gold from Monsters
+2 to Assassin Skill Levels
45% Increased Attack Speed
20% Faster Hit Recovery
25% Chance to cast Level 15 Venom on striking
5% Chance to cast Level 15 Fade when struck
Socketed (3: 3 used)

Shael Rune
Inserted into a Dusk Shroud

20% Faster Hit Recovery

Required Level: 29
Item Version: 1.10+ Expansion

Thul Rune
Inserted into a Dusk Shroud

Cold Resist +30%

Required Level: 23
Item Version: 1.10+ Expansion

Lem Rune
Inserted into a Dusk Shroud

50% Extra Gold from Monsters

Required Level: 43
Item Version: 1.10+ Expansion

28: Peace
Superior Breast Plate
'ShaelThulAmn'
Defense: 74
Durability: 46 of 50
Required Strength: 30
Required Level: 29
Item Version: 1.10+ Expansion
Item Level: 80
Fingerprint: 0xe568c91d
+8% Enhanced Defense
Cold Resist +30%
Attacker Takes Damage of 14
+2 to Amazon Skill Levels
+2 to Critical Strike
20% Faster Hit Recovery
2% Chance to cast Level 15 Valkyrie on striking
4% Chance to cast Level 5 Slow Missiles when struck
Socketed (3: 3 used)

Shael Rune
Inserted into a Breast Plate

20% Faster Hit Recovery

Required Level: 29
Item Version: 1.10+ Expansion

Thul Rune
Inserted into a Breast Plate

Cold Resist +30%

Required Level: 23
Item Version: 1.10+ Expansion

Amn Rune
Inserted into a Breast Plate

Attacker Takes Damage of 14

Required Level: 25
Item Version: 1.10+ Expansion

29: Dracul's Grasp
Vampirebone Gloves
Defense: 130
Durability: 10 of 14
Required Strength: 50
Required Level: 76
Item Version: 1.10+ Expansion
Item Level: 99
Fingerprint: 0xc7a4fbae
+15 to Strength
+97% Enhanced Defense
9% Life stolen per hit
+10 Life after each Kill
25% Chance of Open Wounds
5% Chance to cast Level 10 Life Tap on striking

30: Athletic Gauntlets of Alacrity
Defense: 13
Durability: 22 of 24
Required Strength: 60
Required Level: 45
Item Version: 1.10+ Expansion
Item Level: 94
Fingerprint: 0x59f696df
20% Increased Attack Speed
+3 to Passive and Magic Skills (Amazon Only)

31: Acrobatic Grand Charm
Keep in Inventory to Gain Bonus
Required Level: 42
Item Version: 1.10+ Expansion
Item Level: 80
Fingerprint: 0x5a8af553
+1 to Passive and Magic Skills (Amazon Only)

32: Acrobatic Grand Charm
Keep in Inventory to Gain Bonus
Required Level: 42
Item Version: 1.10+ Expansion
Item Level: 80
Fingerprint: 0xf2bd20ad
+1 to Passive and Magic Skills (Amazon Only)

33: Acrobatic Grand Charm of Craftmanship
Keep in Inventory to Gain Bonus
Required Level: 42
Item Version: 1.10+ Expansion
Item Level: 80
Fingerprint: 0x50135e76
+1 to Maximum Damage
+1 to Passive and Magic Skills (Amazon Only)

34: Spirit
Crystal Sword
'TalThulOrtAmn'
One-Hand Damage: 5 to 15
Durability: 20 of 20
Required Strength: 43
Required Level: 25
Sword Class - Normal Attack Speed
Item Version: 1.10+ Expansion
Item Level: **
Fingerprint: 0x1b5cf9dc
+22 to Vitality
+99 to Mana
+250 Defense vs. Missile
Adds 1-50 lightning damage
Adds 3-14 cold damage over 3 seconds
+75 poison damage over 5 seconds
7% Life stolen per hit
55% Faster Hit Recovery
28% Faster Cast Rate
+2 to All Skill Levels
+7 Magic Absorb
Socketed (4: 4 used)

Tal Rune
Inserted into a Crystal Sword

+75 poison damage over 5 seconds

Required Level: 17
Item Version: 1.10+ Expansion

Thul Rune
Inserted into a Crystal Sword

Adds 3-14 cold damage over 3 seconds

Required Level: 23
Item Version: 1.10+ Expansion

Ort Rune
Inserted into a Crystal Sword

Adds 1-50 lightning damage

Required Level: 21
Item Version: 1.10+ Expansion

Amn Rune
Inserted into a Crystal Sword

7% Life stolen per hit

Required Level: 25
Item Version: 1.10+ Expansion

35: Spirit
Monarch
'TalThulOrtAmn'
Defense: 140
Chance to Block:  47%
Durability: 86 of 86
Required Strength: 156
Required Level: 54
Item Version: 1.10+ Expansion
Item Level: 80
Fingerprint: 0x688e91ae
+22 to Vitality
+104 to Mana
+250 Defense vs. Missile
Lightning Resist +35%
Cold Resist +35%
Poison Resist +35%
Attacker Takes Damage of 14
55% Faster Hit Recovery
26% Faster Cast Rate
+2 to All Skill Levels
+6 Magic Absorb
Socketed (4: 4 used)

Tal Rune
Inserted into a Monarch

Poison Resist +35%

Required Level: 17
Item Version: 1.10+ Expansion

Thul Rune
Inserted into a Monarch

Cold Resist +35%

Required Level: 23
Item Version: 1.10+ Expansion

Ort Rune
Inserted into a Monarch

Lightning Resist +35%

Required Level: 21
Item Version: 1.10+ Expansion

Amn Rune
Inserted into a Monarch

Attacker Takes Damage of 14

Required Level: 25
Item Version: 1.10+ Expansion

36: Super Healing Potion
Points: 300

37: Full Rejuvenation Potion
Heals 100% Life and Mana

38: Full Rejuvenation Potion
Heals 100% Life and Mana

39: Full Rejuvenation Potion
Heals 100% Life and Mana

40: Full Rejuvenation Potion
Heals 100% Life and Mana

41: Full Rejuvenation Potion
Heals 100% Life and Mana

42: Full Rejuvenation Potion
Heals 100% Life and Mana

43: Full Rejuvenation Potion
Heals 100% Life and Mana

44: Destruction
Colossus Blade
'VexLoBerJahKo'
One-Hand Damage: 112 to 292
Two-Hand Damage: 261 to 517
Durability: 16 of 50
Required Dexterity: 110
Required Strength: 189
Required Level: 65
Sword Class - Normal Attack Speed
Item Version: 1.10+ Expansion
Item Level: 86
Fingerprint: 0x49cbedbf
+10 to Dexterity
+350% Enhanced Damage
Adds 100-180 magic damage
7% Mana stolen per hit
Ignore Target Defense
Prevent Monster Heal
20% Chance of Crushing Blow
20% Deadly Strike
15% Chance to cast Level 22 Nova on attack
100% Chance to cast Level 45 Meteor When You Die
5% Chance to cast Level 23 Molten Boulder on striking
23% Chance to cast Level 12 Volcano on striking
Socketed (5: 5 used)

Vex Rune
Inserted into a Colossus Blade

7% Mana stolen per hit

Required Level: 55
Item Version: 1.10+ Expansion

Lo Rune
Inserted into a Colossus Blade

20% Deadly Strike

Required Level: 59
Item Version: 1.10+ Expansion

Ber Rune
Inserted into a Colossus Blade

20% Chance of Crushing Blow

Required Level: 63
Item Version: 1.10+ Expansion

Jah Rune
Inserted into a Colossus Blade

Ignore Target Defense

Required Level: 65
Item Version: 1.10+ Expansion

Ko Rune
Inserted into a Colossus Blade

+10 to Dexterity

Required Level: 39
Item Version: 1.10+ Expansion

Mercenary Items :

1: Fortitude
Superior Dusk Shroud
'ElSolDolLo'
Defense: 1489
Durability: 11 of 20
Required Strength: 77
Required Level: 59
Item Version: 1.10+ Expansion
Item Level: 80
Fingerprint: 0x9372e96
+200% Enhanced Defense
+15% Enhanced Defense
+300% Enhanced Damage
+15 Defense
Damage Reduced by 7
Fire Resist +28%
Lightning Resist +28%
+5% to Maximum Lightning Resist
Cold Resist +28%
Poison Resist +28%
Replenish Life +7
+1 to Light Radius
25% Faster Cast Rate
12% Damage Taken Goes to Mana
20% Chance to cast Level 15 Chilling Armor when struck
+84 to Life (Based on Character Level)
Socketed (4: 4 used)

El Rune
Inserted into a Dusk Shroud

+15 Defense
+1 to Light Radius

Required Level: 11
Item Version: 1.10+ Expansion

Sol Rune
Inserted into a Dusk Shroud

Damage Reduced by 7

Required Level: 27
Item Version: 1.10+ Expansion

Dol Rune
Inserted into a Dusk Shroud

Replenish Life +7

Required Level: 31
Item Version: 1.10+ Expansion

Lo Rune
Inserted into a Dusk Shroud

+5% to Maximum Lightning Resist

Required Level: 59
Item Version: 1.10+ Expansion

2: Arreat's Face
Slayer Guard
Defense: 310
Durability: 55 of 55
(Barbarian Only)
Required Strength: 118
Required Level: 42
Item Version: 1.10+ Expansion
Item Level: **
Fingerprint: 0xf97d7834
+20 to Strength
+20 to Dexterity
+157% Enhanced Defense
+6 to Maximum Damage
All Resistances +30
6% Life stolen per hit
+2 to Barbarian Skill Levels
15% Increased Attack Speed
30% Faster Hit Recovery
20% Bonus to Attack Rating
+2 to Combat Skills (Barbarian Only)
Socketed (1: 1 used)

Carmine Jewel of Fervor
Required Level: 31
Item Version: 1.10+ Expansion
Item Level: 80
Fingerprint: 0xe15d80ee
+6 to Maximum Damage
15% Increased Attack Speed

3: Death
Colossus Blade
'HelElVexOrtGul'
One-Hand Damage: 153 to 402
Two-Hand Damage: 361 to 713
Required Dexterity: 78
Required Strength: 141
Required Level: 63
Sword Class - Normal Attack Speed
Indestructible
Item Version: 1.10+ Expansion
Item Level: 86
Fingerprint: 0xec06ee43
+315% Enhanced Damage
+50 to Attack Rating
Adds 1-50 lightning damage
7% Mana stolen per hit
+1 to Light Radius
Requirements -20%
20% Bonus to Attack Rating
50% Chance of Crushing Blow
Indestructible
25% Chance to cast Level 18 Glacial Spike on attack
100% Chance to cast Level 44 Chain Lightning When You Die
Level 22 Blood Golem (15/15 Charges)
42% Deadly Strike (Based on Character Level)
Ethereal (Cannot be Repaired), Socketed (5: 5 used)

Hel Rune
Inserted into a Colossus Blade

Requirements -20%
Item Version: 1.10+ Expansion

El Rune
Inserted into a Colossus Blade

+50 to Attack Rating
+1 to Light Radius

Required Level: 11
Item Version: 1.10+ Expansion

Vex Rune
Inserted into a Colossus Blade

7% Mana stolen per hit

Required Level: 55
Item Version: 1.10+ Expansion

Ort Rune
Inserted into a Colossus Blade

Adds 1-50 lightning damage

Required Level: 21
Item Version: 1.10+ Expansion

Gul Rune
Inserted into a Colossus Blade

20% Bonus to Attack Rating

Required Level: 53
Item Version: 1.10+ Expansion
Skills/stats are pretty self explanatory. Valk was prebuffed to lvl 37

I'm gonna try continuing this, but as of now my only play time is about averaging 15 min a day on a train with no mouse. So I'm not sure what I'm gonna do once the game gets hard. Furthest character along right now is Pestilence the kicksin. She will probably be my next feature once she can get going.

Thanks for reading along (assuming you made it this far)

Grats. Very well done !!!

Quick kicksin question. I had planned to use some heavy elemental weapon damage for my mid-twink gear (ie. Lawbringer) but the added elemental damage from the weapon isn't showing up on the LCS, and the character power seems to be about the same as without the weapon. But I am seeing cold damage effects getting transfered. Is there something weird here I don't know about. Could not find much info about on weapon non-physical damage in relation to kicking. This will be a bit annoying as I had hoped to get the magic damage transferred from Destruction later on.

TIA

Surprisingly, Doc was able to clear the Cows at p1. Likely because the Valk is just a beast. I could leave her udderly surrounded by cows and she would take minutes to die, if at all. I did leave the King alive just in case I want to respec to a javazon once this is all said and done. Unfortunately no juicy runes, but she's already done well enough.


From the bible of all Kicksin guides (not entirely sure if it's completely updated; I'd refer to the version on the Amazon Basin forums, but they are still down):

So elemental damage should work, but isn't displayed on the lcs.
 
Thanks a lot for the help. I was pretty sure this was the case but it doesn't feel that way in game. With Ginther's Rift I could definitely feel more power from the magic damage though. It might be because the kick cycle is much slower with the two-hander. I've just moved to Bonesnap for now and that seems quite good with the on board IAS and Crushing Blow. Will probably keep this setup until I hit requisite level for Destruction. I also socketed an IAS jewel into Guilleame's Face and am sporting Treachery until Venom and Fade get above the autocast levels (pushing Shadow to 17 first) then move over to Fortitude.

Gear is still very much up in the air, I need to hit a lot of breakpoints, +skills and for this will need a pair of MA/Ias gloves that I haven't been able to craft yet. This will likely mean I'm falling back onto Drac's as usual and missing out on the last 58ias breakpoint for my slow slow weapon.

She is fun to play though. The ability to just hold down the RMB and wander around while everything dies is a nice change from the click click click of basic attack over my minions shoulders.

* * *

Might post some details of her travels later, but Pestilence has reached lvl 65 and equipped Destruction. It's great to see fields of volcanoes again after the relative peace of playing Doc and her slow and infrequent attacks. They are a bit just for show since her kicks have inherent knockback and all.
Screenshot341.jpg
Not sure what to do with her skills to some extent. Plan on maxing Venom and Master then pumping more into Fade. I guess either more shots for Death Sentry, or Blade Shield for the extra duration?

* * *

I'm remembering why I started this project now
She's more fun than Death to be honest
Though Hell is going to slow down as I'll likely have to swap out Burst of speed for Fade. I am going to look into gear tweaks that might let me keep using BoS though, cause I'm just having too much fun spewing volcanoes and boulders and novas. Oh my

lol
I just respeced Doc to a javazon for cow running, and it appears I can't create a portal. I guess she accidentally killed the King.

Is there anything else to do with a javazon by any chance?
I've run Pit with javazon and she's great there. And then there's baal runs obviously.
Agree with Grape. That's what my Javazon does too.
I did a bit of the pit, but for me the Light immune archers were pesky and the density of bosses wasn't so exciting. I'm currently trying out Shenk, Eldritch, Pindle runs. They aren't too bad, ran them from 84.5 to 86 without getting anything of note.

Overall i've never been a huge MF fan, so I'm not sure how much time she'll get.
 
So I haven't gotten around to introducing Pestilence although I have jumped the gun and posted some gameplay for her. I only have time for a brief update, but I'll get to the rest later on.

I haven't done much with Sins in the past and I only remember trying to make a BFsin. I especially have never touched the MA tree because my terrible gaming skills couldn't keep up with the charge ups and releases. So aside from Dragon Flight, I've never really used much there.

As an assassin she has points all over the place because there are so many useful 1 point wonders. Her leveling up was mostly beefing up Dragon Talon. Think I started by getting it to 18 with some points spread around to get things like Mind Blast, Blade Fury, Burst of Speed, Fade, Shadow Warrior, Death Sentry, Venom etc. I was kind of tired of twinking, so I played her untwinked through most of normal, and she never really ran into too much trouble. She really didn't kick a lot for lack of mana leech until later one when I believe she came across a Manald Heal. She lucked into an early Crushflange as well, so unlike most untwinked character boss fights were a cakewalk whereas dealing with lots of little targets was a pain. Duriel melted so fast with Burst of Speed and a Crushflange that I thought I might have set it to players 1 by accident. But then the Flayer Jungle was a major pain.

One thing I am a little sad about is the inherent knockback of Dragon Talon. While it helps with survival when getting surrounded, I'm not super happy about it in its final state with Volcanoes from Destruction. But we'll get to that later.

The other plan that I had was to use a Shadow Warrior instead of Master to be a little bit different. The idea was set RMB to Death Sentry and then I'd get free Death Sentries all the time. But after playing around with the Warrior, I realized her AI doesn't really allow for this to be useful. She only lays traps when monsters are not in close range. That means before engaging she'll lay down 2 or so sentries that all splurt out Lightning charges before anything dies and there is very little of corpse exploding goodness that the skill is good for unsynergized. She completely ignores the skill thereafter. So I've moved over to the Master, and I have to say, she fits the theme of the project much better anyway (ie utter chaos). With the Master I was able to get pretty screenshots like this well before any of my later fireworks producing gear would be added.

Everything went very smooth up until the end of the Chaos Sanctuary. I accidently left Diablo at players 8, though I didn't think it would be a problem with my Crushflange and how amazingly fast the other three act bosses had died with BoS and my kicks. I was very very wrong. This was a long drawn out fight. Even with Fade, I could not stand and kick Diablo without getting fried or grilled. I tend to not have much life in Normal because I am hoarding stat points to be able to use Colossus Blades ASAP, she also wasn't twinked so no Bloodfists or other big life boosters I would usually have. The merc died so fast, I didn't bother to resurrect him. So I just recast Shadow Master as a decoy and hurled Blade Furies from as far away as possible. Once mana was gone, port back to town and repeat. This took at least 20 town trips, but then Diablo was no more, and he dropped not much useful.

After that experience, I decided to start the twinkathon with a Ginther's Rift and some other shinies. But I'm out of time for now. I'll get her up to date next time hopefully.

* * *

So I started twinking Pestilence in Act V and things moved way way faster from here. First upgrades were rather simple, Ginther's Rift, Rhyme Shield, Guillaume's Face, IK Pillar, and some other odds and ends mostly to get leeching so I could play as a pure kicker. Once Pestilence was kicking full time things went very smooth. After rescuing the Barbarians, the Act II Merc was swapped out for a Barb so we could schwing our swords together. We went with Hygelac, because his name sounds pretty similar to someone choking to death. He was given a Bloodletter/Headstriker/Bing Sz Wang as he leveled. Rest of the Act went smoothly, and Baal was dispatched without much trouble to Pestilence, but he did kill both the Shadow and Hygelac.

17jivj.gif

Onward to Nightmare. At this point I felt bad about the Sword and Board, so I swapped over to a Bonesnap in the spirit of two handedness. Then I felt bad about not using a sword, so I gathered a 3 Socket Legend Sword and made a Lawbringer. Then the Lawbringer didn't seem to be working so well, so I opted back to the Bonesnap. Then retried Lawbringer with Treachery and changed my mind again until finally Destruction. On a whole, things were quite easy, we mowed through everything as is normal for heavily twinked Nightmare.

I don't have a ton of pics of her journey and as always I waited just a tad too long to write up for fresh memories.
I made documentation of Duriel's demise and apparently didn't think much of Mephisto to bother.

As usual in Act IV I got Destruction up and running. As I've already spoiled that fun, I will reiterate that it is magnificent on a kicker. As usual, Diablo didn't pose much of a challenge in Nightmare with the ability to stand inside his lightning hose. But I still took him on with Fade activated just to be safe.
17jy8d.gif

Act V was a breeze. The usually annoying ranged monsters were of no bother as I could telebomb them with Dragon Flight usually dropping a Nova/Volcano or Molten Boulder on their heads in the process. Something amazing happened on the way down to the Throne Room. WSK3 spawned Abyss Knights, Demon Imps, and Flayers. The monster density was astounding. Fireworks were just constantly going off. And I eventually got the whole floor carpeted with fire.
Screenshot346.jpg
That's really been my main problem. I'm just wandering around with the right mouse button held down and have almost no idea what's going on.

The final level of the keep rolled quite challenging, thankfully we were on Nightmare. We had Gloams, Knights and Unravelers. Wasn't too bad with Dragon Flight to take out the Unravelers as needed. I'm p sure my lightning res was heavily stacked by this point with Fortitude, so the Gloams were of no worry. We then took on Baal. Kicked him where it hurts
Screenshot351.jpg
and as per usual, he dropped not much.

Moving on to Hell is where things always get less loltastic and more of a challenge. This is Pestilence after arriving in Hell before any charm tweaking. You can see we're now having to give up Burst of Speed for Fade. I also just don't have quite the right gear to optimize her. I'm missing on getting enough IAS to hit the last breakpoint I can feasibly reach with this slow sword, +MA skills to his 24 needed for a fifth kick. and getting all the Crushing Blow, Life Leech and resists needed for being a kicker and being an alive kicker.

Very quickly in Hell I realized how much of a glass cannon she is. She died to the second random Zombie mob on the Blood Moor. Basically, she goes from melting everything to dead very quickly. I think this mostly happens when I've lost autotargeting in the middle of a mob and she stops attacking, but I don't quite notice it. The other major issue is Physical Immunes. Basically the merc dies quickly, Shadow is off doing who knows what, and Pestilence is left tanking for herself while she can't leech.

In Act II, I finally just swapped over to Drac's because Hygelac was just dying too often. I even skipped Radamant because I didn't need the skill points. DT, Venom and Master are max'ed, Fade is reasonable and I've decided to dump remainders into Death Sentry for bigger area.

I've actually just hit a bit of a wall in the Arcane Sanctuary. She already has some trouble with Physical Immunes, but between the Venom, the Magic damage on Destruction, the Cold damage on Death and Volcanos, its usually no big deal. But the knockback of Dragon Talon along with the lack of walls makes Specters a huge pain in the ass. I've given it two goes so far and have just stopped out of annoyance. I'm considering just using normal attack my next go through to see if this helps.

Awesome stuff! Especially enjoyed this part:

Seriously though, great writeup, fun read!
Great writeup. And love the pictures, tremendous fireworks going on. Euh off. Well ...

Melee Assassins are hard to play, and kickers are no difference. You tend to try and tank like a Barb or Paladin, only to find out you can't. Using MB and CoS helps a lot. As does picking your enemies and fights carefully, instead of just wading in. IIRC my Dancer didn't have too much troubles anymore staying alive in the end, when she had all her endgame gear, but still I had to be careful. And use Dracul's for sure !!! And as a Dancer, she didn't have to go toe to toe.
So you're saying I have to do more than hold down the RMB and watch everything blow up *sadface*
BTW is Fortitude really the way to go? Should I consider Treachery for the IAS, Skills and FHR? I could hit the next IAS BP and the extra kick by swapping armors, but I lose the ED, life and @res. Not sure how profound the ED effect is for a kicker.

@Pb_pal I've had to play with the sound off a lot lately, so I imagine every time he dies there's this loud gutteral Hygggggelac! sound emitted.
Yeah, there's definitely a lot more to it than holding down RMB. Unfortunately, because that's what you'll do (and what I did at first) if you are used to playing Barbs and ... oh no, not Paladins, that's still LMF clickfest. But it's also a good thing once you get used to it, because having to do more than just hold down RMB and actually use tactics is quite satisfying .

Fortitude vs Treachery? I guess it depends on where the majority of your damage comes from. My Dancer was using a Stormlash on her kick switch, combined with Gore Riders. So she mainly was trying to apply Static and CB as fast as possible, so she benefited more from Treachery (I think, I never did the calculations, but didn't even have a Fortitude at the time to begin with). Fortitude might be a better option if you go for pure damage, although from what I've read about Kickers, I'd think that you would want to rely on CB a lot anyway and Treachery comes back into play. Even more so because that extra fhr, attack speed breakpoint, +skills and as a consequence extra kick can also increase your survivability.

I definitely recommend reading Ilkori's guide to Kickers and Dancers, as it's a wonderful resource to anything related to Assassin kicking skills. As you can see in that guide, the ED% on Fortitude should work. DS / CS don't work, so don't equip a Highlord's for that property (although it still makes a very good kicker amulet).

I don't know how much CB you have on your current gear, but if you still lack some, there still is the Duress runeword as body armor: some CB, great fhr, res all, some ED%, OW and cold damage make it a very good armor.
Thanks for the link. I think I'll give Treachery another shot. I don't think the CTC lower skill level Fade or Venom override from what I've read. And giving the merc my Forti will probably help keep Hygelac from choking so often.
Feel like I'm falling back on the usual gear again, but switching over to Treachery has just opened up so many gear improvements. It was just a domino effect. With the IAS, I could reach a higher breakpoint while swapping out Highlord's for Mara's giving an extra +skill and all res. Then String went in for Nos Coil, adding a bit of PDR. With all the +skills of Treachery and Mara's I could then hit an extra kick without either of my plain skillers. This opened up charm slots for hitting the next FHR breakpoint and fill in some resist holes, get a bit of life/ar/elemental damage. In the end, I feel like I'm doing more damage with the extra kicks that come faster, and surviving better with more resists and hitting two or three frame faster FHR. The merc's also doing better with the Forti armor. Just wish I wasn't always using near identical gear for each character like a crutch. But I guess with a slow weapon that has no IAS, life leech, res or skills, its bound to happen.
I'm convinced the Diablo Gods hate this project.

My first Death was 318 ED. So I rerolled it and got 315.
I've piled up some runes from RoF running so decided to reroll again and got an amazing 317.

At least they owe me some runes now. Hopefully I'll finally get that Sur I've been waiting on.

EDIT: also does anyone know where to shop a Vigor/Redemption scepter?
 
When we left Pestilence she was struggling to get through the Arcane Sanctuary. I finally just dropped the players setting to 1, and this did the trick. I mostly used normal attack on Specters to avoid the knockback of DTalon and conserve some mana. Once we got through The Sanctuary, rest of Act II wasn't difficult. Although we had a giant maze through the True Tomb to eventually get to Duriel. It wasn't a fun trek given the monster roll also included Specters again. But once we got to Duriel, he was a pushover, as most bosses are and he dropped something relatively useful.

Act III, was less annoying than I anticipated. While in NM, the Flayers were such a pain, my new liberal use of Death Sentry was great for wiping out large mobs of weak foes. The other great things about large monster densities is great screen grabs.
Screenshot383.jpg
In the end, I don't remember any trouble with Act III aside from Dolls because of my tiny tiny life ball. But the flexibility of the assassin really shines here as you can Dragon Flight to bomb onto important targets, mind blast to control crowds, and death sentry can take big chunks of life from most everyone. The only painful part was the Itchies of Upper Kurast/Bazaar as physical immunes are just the bane of this characters existence since she relies so heavily on Crushing Blow. In the end, we made it through to Mephisto surprisingly easily and he went down so fast they Hygelac survived at full heatlh.

Act IV wasn't too bad. Monster spawns weren't so favorable with Gloams, and spawners being frequent. But spawners also allow for lots of procing. We by chance came across Izual and killed him much less annoyingly than usual, dumping the skill points into our Death Sentry radius. Unlike Doc, Pestilence found the City of the Damned waypoint straight away, which probably explains why she didn't find any Jah runes. Actually her rune luck was terrible. I think Fal may have been her best find.

Hephasto was rather challening because he spawned Immune to Physical. While I attempted wedging him into a corner so that the volcanoes could do there thing, he just hit way way too hard and was decimating me, Hygelac and the Shadow. I eventually figured out it was much safer, although slower, to just attack him with a knockback chain keeping him out of reach. His drop probably explained why he was physical immune. The Hell Forge on the other hand, not worth the trouble *sadface*.

Chaos Sanctuary was a challenge, but not too bad. Basically the OK's were really messing up my groove cursing at me and making me weak, or slow or whatever. It was super tempting to just telestomp them, but that would wake up a whole new group of foot soldiers that we'd have to cut through, which was deadly when amp'd. Just had to play it patient and draw their goons out away from them a few at a time. Diablo was not too bad as most act bosses with all this crushing blow. He did alsmost get me when I was standing in an unfortunate spot during a firestorm attack. But Hygelac and I watched him shrivel in the end.

Act V went quick. Mostly because I went quick whenever there were unleechable ranged characters around, which was just about everywhere. Anya rescue was rather harrowing, as I found Gloams down there with Succubi, but we brought her the hot chocolate, and were happy to have some charm space free up for life/damage. Ancients Way was fun because we rolled carvers which spawn in large numbers. Ancients were only a challenge because the Whirler spawned Mana Burn. After a very long time, I eventually got them split up (seriously try kiting anything with a Barb merc and a Shadow Master, they were just born to fight) killing the Leaper and Thrower as a pair, then the three of us finished off the mana vampire.

The keep was hard. We got tough spawns like Harpies (physical immune and painful from far away), Gloams, Poison Mages, OK packs. I had to dial down to players 1 because of the Harpies. It basically took me a mana bulb to kill two at players 1 even. Once I got a body, it wasnt too bad because of Death Sentry, but this still had much less effectiveness on them. Throne Room was not difficult. Although we got stair trapped by Gloams, once we had room we were sailing smooth. Rolled Ghoul Lords, and the non-PI minotaurs. Waves were easy aside from Lister, who we eventually drew out and picked off Benny Hill styles running circles in the hallway. The Shadow would tank the main pack whlie me and Hygelac picked off stragglers.

Baal was a pushover, but he did give me a Wizspike, so I can at least be happy about that.

Stat and Skill placement pics with relevant gear when casting are here:
Screenshot351.jpgScreenshot410.jpgScreenshot411.jpg

Finally I took on cows at P1. Probably should have gone higher as they are pretty managable for this build. But I was afraid of the Shadow throwing a big party and inviting lots of cows.

Things I liked about Pestilence.
-So many procs! I think i had a few attacks with 4 or 5 novas in one kick cycle. Not sure about the mechanics, but this felt much way more 'procy' than Death the Fury Druid.
-Versatility. Lots of things to do when playing this character. Not just highlight and click.
-NO KEYS!
-Summon that just doesn't care about you. It wants blood and nothing else.

Code:
Character name  : Pestilence
Character type  : Assassin
Character level : 83
Character exp   : 907738427

Strength        : 165
Energy          : 25
Dexterity       : 100
Vitality        : 200
Stat Points Rem : 20
Skill Points Rem: 0

Life            : 914 / 814
Mana            : 169 / 148
Stamina         : 445 / 422

Gold (Inventory): 32202
Gold (Stash)    : 622884

Number of Items : 44

1: Tome of Identify
Quantity: 13

2: Tome of Town Portal
Quantity: 14

3: Glowing Small Charm of Vita
Keep in Inventory to Gain Bonus
Required Level: 39
Item Version: 1.10+ Expansion
Item Level: 87
Fingerprint: 0xe026f5f6
+20 to Life
Adds 1-13 lightning damage

4: Mentalist's Grand Charm of Sustenance
Keep in Inventory to Gain Bonus
Required Level: 53
Item Version: 1.10+ Expansion
Item Level: 80
Fingerprint: 0xa492ff69
+31 to Life
+1 to Shadow Discipline Skills (Assassin Only)

5: Guillaume's Face
Winged Helm
Defense: 217
Durability: 29 of 40
Required Strength: 115
Required Level: 34
Item Version: 1.10+ Expansion
Item Level: 80
Fingerprint: 0xd7b212ef
+15 to Strength
+120% Enhanced Defense
15% Increased Attack Speed
30% Faster Hit Recovery
35% Chance of Crushing Blow
15% Deadly Strike
Socketed (1: 1 used)

Jewel of Fervor
Required Level: 31
Item Version: 1.10+ Expansion
Item Level: 59
Fingerprint: 0x31d8d4e8
15% Increased Attack Speed

6: Raven Frost
Ring
Required Level: 45
Item Version: 1.10+ Expansion
Item Level: 85
Fingerprint: 0xec37e90d
+18 to Dexterity
+40 to Mana
+241 to Attack Rating
Adds 15-45 cold damage over 4 seconds
20% Cold Absorb
Cannot Be Frozen

7: Death Grasp
Ring
Required Level: 65
Item Version: 1.10+ Expansion
Item Level: 80
Fingerprint: 0x5ac40667
+17 to Maximum Stamina
+4 to Minimum Damage
Fire Resist +7%
Lightning Resist +34%
Cold Resist +7%
Poison Resist +7%
+50 poison damage over 3 seconds
8% Life stolen per hit

8: Goblin Toe
Mirrored Boots
Defense: 119
Durability: 11 of 18
Kick Damage: 50 to 145
Required Strength: 163
Required Level: 72
Item Version: 1.10+ Expansion
Item Level: 59
Fingerprint: 0xe4a6670f
+60% Enhanced Defense
+15 Defense
Damage Reduced by 1
Magic Damage Reduced by 1
-1 to Light Radius
Required Level +12
25% Chance of Crushing Blow

9: Dracul's Grasp
Vampirebone Gloves
Defense: 130
Durability: 6 of 14
Required Strength: 50
Required Level: 76
Item Version: 1.10+ Expansion
Item Level: 99
Fingerprint: 0xc7a4fbae
+15 to Strength
+97% Enhanced Defense
9% Life stolen per hit
+10 Life after each Kill
25% Chance of Open Wounds
5% Chance to cast Level 10 Life Tap on striking

10: Mara's Kaleidoscope
Amulet
Required Level: 67
Item Version: 1.10+ Expansion
Item Level: **
Fingerprint: 0xc663bf72
+5 to Strength
+5 to Energy
+5 to Dexterity
+5 to Vitality
All Resistances +27
+2 to All Skill Levels

11: String of Ears
Demonhide Sash
Defense: 112
Durability: 16 of 22
Required Strength: 20
Required Level: 29
Item Version: 1.10+ Expansion
Item Level: 80
Fingerprint: 0xb1bd6870
+178% Enhanced Defense
+15 Defense
Magic Damage Reduced by 10
Damage Reduced by 15%
7% Life stolen per hit
+10 Maximum Durability

12: Glowing Small Charm of Vita
Keep in Inventory to Gain Bonus
Required Level: 39
Item Version: 1.10+ Expansion
Item Level: 80
Fingerprint: 0x94c449ac
+18 to Life
Adds 1-15 lightning damage

13: Arcing Large Charm of Balance
Keep in Inventory to Gain Bonus
Required Level: 40
Item Version: 1.10+ Expansion
Item Level: 64
Fingerprint: 0xa2de7304
Adds 1-35 lightning damage
8% Faster Hit Recovery

14: Emerald Small Charm of Sustenance
Keep in Inventory to Gain Bonus
Required Level: 32
Item Version: 1.10+ Expansion
Item Level: 80
Fingerprint: 0x6bf094d2
+13 to Life
Poison Resist +11%

15: Steel Large Charm of Balance
Keep in Inventory to Gain Bonus
Required Level: 44
Item Version: 1.10+ Expansion
Item Level: 85
Fingerprint: 0xaa0c527d
+73 to Attack Rating
8% Faster Hit Recovery

16: Emerald Small Charm of Dexterity
Keep in Inventory to Gain Bonus
Required Level: 32
Item Version: 1.10+ Expansion
Item Level: 80
Fingerprint: 0xfee9108f
+1 to Dexterity
Poison Resist +11%

17: Russet Small Charm of Sustenance
Keep in Inventory to Gain Bonus
Required Level: 17
Item Version: 1.10+ Expansion
Item Level: 39
Fingerprint: 0xaee17033
+14 to Life
Fire Resist +7%

18: Ruby Small Charm of Inertia
Keep in Inventory to Gain Bonus
Required Level: 32
Item Version: 1.10+ Expansion
Item Level: 80
Fingerprint: 0x7d4509d8
Fire Resist +10%
3% Faster Run/Walk

19: Ruby Small Charm of Storms
Keep in Inventory to Gain Bonus
Required Level: 37
Item Version: 1.10+ Expansion
Item Level: 80
Fingerprint: 0x31cdb6fe
Fire Resist +10%
Adds 1-28 lightning damage

20: Shimmering Small Charm of the Icicle
Keep in Inventory to Gain Bonus
Required Level: 25
Item Version: 1.10+ Expansion
Item Level: 80
Fingerprint: 0x8bf39a09
All Resistances +4
Adds 2-4 cold damage over 1 seconds

21: Shimmering Grand Charm of Pestilence
Keep in Inventory to Gain Bonus
Required Level: 27
Item Version: 1.10+ Expansion
Item Level: 80
Fingerprint: 0x37c6ee34
All Resistances +13
+25 poison damage over 5 seconds

22: Treachery
Dusk Shroud
'ShaelThulLem'
Defense: 429
Durability: 7 of 20
Required Strength: 77
Required Level: 49
Item Version: 1.10+ Expansion
Item Level: 85
Fingerprint: 0x4e99db06
Cold Resist +30%
50% Extra Gold from Monsters
+2 to Assassin Skill Levels
45% Increased Attack Speed
20% Faster Hit Recovery
25% Chance to cast Level 15 Venom on striking
5% Chance to cast Level 15 Fade when struck
Socketed (3: 3 used)

Shael Rune
Inserted into a Dusk Shroud

20% Faster Hit Recovery

Required Level: 29
Item Version: 1.10+ Expansion

Thul Rune
Inserted into a Dusk Shroud

Cold Resist +30%

Required Level: 23
Item Version: 1.10+ Expansion

Lem Rune
Inserted into a Dusk Shroud

50% Extra Gold from Monsters

Required Level: 43
Item Version: 1.10+ Expansion

23: Sapphire Small Charm of Vita
Keep in Inventory to Gain Bonus
Required Level: 39
Item Version: 1.10+ Expansion
Item Level: 80
Fingerprint: 0x1ebc445b
+20 to Life
Cold Resist +11%

24: Coral Grand Charm of Balance
Keep in Inventory to Gain Bonus
Required Level: 15
Item Version: 1.10+ Expansion
Item Level: 80
Fingerprint: 0xa3424b77
Lightning Resist +23%
12% Faster Hit Recovery

25: Super Healing Potion
Points: 300

26: Super Healing Potion
Points: 300

27: Super Healing Potion
Points: 300

28: Super Healing Potion
Points: 300

29: Full Rejuvenation Potion
Heals 100% Life and Mana

30: Full Rejuvenation Potion
Heals 100% Life and Mana

31: Full Rejuvenation Potion
Heals 100% Life and Mana

32: Full Rejuvenation Potion
Heals 100% Life and Mana

33: Horadric Cube

34: Full Rejuvenation Potion
Heals 100% Life and Mana

35: Full Rejuvenation Potion
Heals 100% Life and Mana

36: Full Rejuvenation Potion
Heals 100% Life and Mana

37: Full Rejuvenation Potion
Heals 100% Life and Mana

38: Super Healing Potion
Points: 300

39: Super Healing Potion
Points: 300

40: Super Healing Potion
Points: 300

41: Super Healing Potion
Points: 300

42: Destruction
Colossus Blade
'VexLoBerJahKo'
One-Hand Damage: 112 to 292
Two-Hand Damage: 261 to 517
Durability: 35 of 50
Required Dexterity: 110
Required Strength: 189
Required Level: 65
Sword Class - Normal Attack Speed
Item Version: 1.10+ Expansion
Item Level: 86
Fingerprint: 0x49cbedbf
+10 to Dexterity
+350% Enhanced Damage
Adds 100-180 magic damage
7% Mana stolen per hit
Ignore Target Defense
Prevent Monster Heal
20% Chance of Crushing Blow
20% Deadly Strike
15% Chance to cast Level 22 Nova on attack
100% Chance to cast Level 45 Meteor When You Die
5% Chance to cast Level 23 Molten Boulder on striking
23% Chance to cast Level 12 Volcano on striking
Socketed (5: 5 used)

Vex Rune
Inserted into a Colossus Blade

7% Mana stolen per hit

Required Level: 55
Item Version: 1.10+ Expansion

Lo Rune
Inserted into a Colossus Blade

20% Deadly Strike

Required Level: 59
Item Version: 1.10+ Expansion

Ber Rune
Inserted into a Colossus Blade

20% Chance of Crushing Blow

Required Level: 63
Item Version: 1.10+ Expansion

Jah Rune
Inserted into a Colossus Blade

Ignore Target Defense

Required Level: 65
Item Version: 1.10+ Expansion

Ko Rune
Inserted into a Colossus Blade

+10 to Dexterity

Required Level: 39
Item Version: 1.10+ Expansion

43: Shadow Blade Talons
One-Hand Damage: 10 to 14
Durability: 69 of 69
(Assassin Only)
Required Dexterity: 50
Required Strength: 50
Required Level: 45
Claw Class - Fast Attack Speed
Item Version: 1.10+ Expansion
Item Level: 95
Fingerprint: 0x4aee8e2b
+3 to Shadow Discipline Skills (Assassin Only)

44: Shadow Scissors Suwayyah
One-Hand Damage: 40 to 51
Durability: 68 of 68
(Assassin Only)
Required Dexterity: 118
Required Strength: 118
Required Level: 64
Claw Class - Normal Attack Speed
Item Version: 1.10+ Expansion
Item Level: 95
Fingerprint: 0x1632ef21
+3 to Shadow Discipline Skills (Assassin Only)

Mercenary Items :

1: Arreat's Face
Slayer Guard
Defense: 310
Durability: 55 of 55
(Barbarian Only)
Required Strength: 118
Required Level: 42
Item Version: 1.10+ Expansion
Item Level: **
Fingerprint: 0xf97d7834
+20 to Strength
+20 to Dexterity
+157% Enhanced Defense
+6 to Maximum Damage
All Resistances +30
6% Life stolen per hit
+2 to Barbarian Skill Levels
15% Increased Attack Speed
30% Faster Hit Recovery
20% Bonus to Attack Rating
+2 to Combat Skills (Barbarian Only)
Socketed (1: 1 used)

Carmine Jewel of Fervor
Required Level: 31
Item Version: 1.10+ Expansion
Item Level: 80
Fingerprint: 0xe15d80ee
+6 to Maximum Damage
15% Increased Attack Speed

2: Fortitude
Superior Dusk Shroud
'ElSolDolLo'
Defense: 1489
Durability: 12 of 20
Required Strength: 77
Required Level: 59
Item Version: 1.10+ Expansion
Item Level: 80
Fingerprint: 0x9372e96
+200% Enhanced Defense
+15% Enhanced Defense
+300% Enhanced Damage
+15 Defense
Damage Reduced by 7
Fire Resist +28%
Lightning Resist +28%
+5% to Maximum Lightning Resist
Cold Resist +28%
Poison Resist +28%
Replenish Life +7
+1 to Light Radius
25% Faster Cast Rate
12% Damage Taken Goes to Mana
20% Chance to cast Level 15 Chilling Armor when struck
+83 to Life (Based on Character Level)
Socketed (4: 4 used)

El Rune
Inserted into a Dusk Shroud

+15 Defense
+1 to Light Radius

Required Level: 11
Item Version: 1.10+ Expansion

Sol Rune
Inserted into a Dusk Shroud

Damage Reduced by 7

Required Level: 27
Item Version: 1.10+ Expansion

Dol Rune
Inserted into a Dusk Shroud

Replenish Life +7

Required Level: 31
Item Version: 1.10+ Expansion

Lo Rune
Inserted into a Dusk Shroud

+5% to Maximum Lightning Resist

Required Level: 59
Item Version: 1.10+ Expansion

3: Death
Colossus Blade
'HelElVexOrtGul'
One-Hand Damage: 154 to 404
Two-Hand Damage: 362 to 717
Required Dexterity: 78
Required Strength: 141
Required Level: 63
Sword Class - Normal Attack Speed
Indestructible
Item Version: 1.10+ Expansion
Item Level: 86
Fingerprint: 0xec06ee43
+317% Enhanced Damage
+50 to Attack Rating
Adds 1-50 lightning damage
7% Mana stolen per hit
+1 to Light Radius
Requirements -20%
20% Bonus to Attack Rating
50% Chance of Crushing Blow
Indestructible
25% Chance to cast Level 18 Glacial Spike on attack
100% Chance to cast Level 44 Chain Lightning When You Die
Level 22 Blood Golem (15/15 Charges)
41% Deadly Strike (Based on Character Level)
Ethereal (Cannot be Repaired), Socketed (5: 5 used)

Hel Rune
Inserted into a Colossus Blade

Requirements -20%
Item Version: 1.10+ Expansion

El Rune
Inserted into a Colossus Blade

+50 to Attack Rating
+1 to Light Radius

Required Level: 11
Item Version: 1.10+ Expansion

Vex Rune
Inserted into a Colossus Blade

7% Mana stolen per hit

Required Level: 55
Item Version: 1.10+ Expansion

Ort Rune
Inserted into a Colossus Blade

Adds 1-50 lightning damage

Required Level: 21
Item Version: 1.10+ Expansion

Gul Rune
Inserted into a Colossus Blade

20% Bonus to Attack Rating

Required Level: 53
Item Version: 1.10+ Expansion


Anyway, Grumpy is up next. He's changed about form the planning stages, but as with most twinked NM, he is full of ownage.

Congrats !!! Well done .

Good luck with Grumpy.
Before we get to Grumpy, I need to ask for some advice on Famine, the sorceress. I'm really not sure how to build her and have been tossing around a few ideas in my head, none of which really work. The main concern is that she will have a teeny tiny life pool which will make fighting anything up close incredibly dangerous. She also has little in the way of crowd control skills (merc will likely wear a Delirium helm) so basically I have to either turn her into a tank or play as a caster hybrid.

The tank options would be using ES or Beast. ES would be ok for a caster since they can keep distance from mana burn monsters and packs, but for tanking this seems like a disaster waiting to happen. The big problem with Beast is that her weapon is SO SLOW that she will attack less than once a second in Bear form pretty much regardless of IAS from gear. To me that puts the Beast right out cause the whole point of Sorcbear is tons of elemental damage dealt out at a silly rate. I guess I would also be doing it at a silly rate, but a different kind of silly.

For the hybrid options, I can try this with and without ES. The problem about with ES is I won't have enough skill points for a secondary attack. ES takes up about 35 or more, while Enchant is 60. Firewall makes the most sense as it shares synergy and mastery with enchant, is powerful and can support melee well, but here I'd have to either have a non-optimal ES, a weak Firewall or a weak Enchant. So a non-ES caster 'hybrid' would forgo the points in ES and I would probably pump Static Field after finishing up the Fire skills. I'm just mostly worried such a character isn't really going to get into the thick of things and will likely never swing her sword. Why did they have to make Enchant such a crazy skill point investment?
Glacial Spike and Frost Nova should provide some decent crowd control, except versus cold immunes. Not sure what you usually use on switch, but if that slot is still available, you could use lawbringer there for some great crowd control. You definitely don't want to go Bear form indeed with such a slow weapon.

Fully synergized Enchant would be great if you have the skill points to spare. But a 20 point Enchant alone should give you decent AR, while maxed Fire Mastery should boost the Destruction procs a lot. Assuming you use Destruction, not Death, on your merc.
thats actually an interesting suggestion. I think I can do Max Enchant & Synergies with strong cold skill and Firewall in the end.
 
So I've been playing Grumpy in spurts here and there for quite some time. He's developed into a really fun character, and a nice change of pace from the other entrants to this project. He was originally slated to be a Fanat/Conviction Zealot wielding Destruction. But after Pestilence, I had had enough of that and figured I should pair Conviction with its more logical partner, Vengeance. I'd also done zealots before, and have never made an Avenger, so this was a great excuse.

I twinked him a bit different deciding only to use two handed swords throughout. So started with things like Soulflay, Blacktongue and the Patriarch. Up to Bing Sz Wang, and then inherited Pestilence's Lawbringer before eventually moving up to Honor. For other gear, this is the first time I've twinked with three piece Sigon's and I have to say, I don't know what took me so long. I ended up sticking with it until his theoretical end game gear became viable. He also wore a Lore helm for quite a while and Twitchroe up until Treachery. I can't remember if I've upgraded his jewelry yet, and charms fill out resists and then elemental damage where possible.

Skill progression was pretty straightforward using Asmodeous' guide. I started pumping Resist Fire and later Resist Lightning, while running Holy Fire as it gave decent damage with the synergy boost, then moved to might once my Act II merc had a Savage weapon equiped. Either used normal attack or 1 point Zeal when things got a little hairy. Stuck 1 point in Vengeance when it became available, but refrained from pumping it as mana suckage was a problem already. Once Conviction came into play everything was pretty much a cakewalk. I have Res Fire and Lightning around 15 or so as I've refrained from Cold synergy for now because it is the less useful of the passive bonuses and Death carries decent cold damage on its own. Conviction is now maxed and I've got Vengeance around lvl 12 or so.

Gameplay has been pretty easy with the twinking. I am missing the set it and forget it gameplay of RMB attacks, and am often missing foes especially the tiny guys. The earliest shots I have are from normal Duriel's carcass. By then, I had already gotten some damage going with Vengeance and he was easily squished, I think I fed the merc a red pot or two. Mephisto was similarly defeated. Soon into Act 4, Conviction became available and it was a lot of fun. I really enjoy how it highlights my enemies for me, especially nice with disappearing Gloams. I felt so powerful I ended up quickly finding one of the few weaknesses of this character, lots of little enemies can easily overwhelm you. While Gulzar didn't survive this fight, Grumpy fortunately did after a few pots. I learned my lesson about overzealousness and carefully took on Diablo with Resist Lightning active instead of Conviction. This took a little bit longer, but everyone lived to tell their tales and Big D gave me a nice little staff for the trouble.

Then Act V came. It was time to select our companion for the rest of this quest. Since the Paladin always reminded me of just a normal guy picking his kids up from Soccer practice, I decided it was fitting his companion would be aptly named Bill, just a regular guy who might be a manager at a local office supply shop, or a desk jockey at some nearby law firm. So Bill and Grumpy made their way through Act 5 with little resistance and slew Baal without trouble.

They have gotten deep into Nightmare, but I'll have to tell that story another time.

* * *

Somewhere around the start of Nightmare I finally optimized my charms. Think it was around the time Nos Coil became available. Then I switched out the Sigon's for Aldur's, Hellmouth and Nos Coil. Things went quite smoothly. I breezed through Act I and II killing Duriel on the way. My only Act II issue was Beetles because I was relying on Fade procing to max out my resists. But I get hit so infrequently it often isn't active. This still remains a problem in Hell, so I've kept things a bit overstacked with resists around 40 preFade.

I thought Act III was going just as easily, but then towards the end of the Mephi fight I grabbed this image. The image grab froze my computer so I repeatedly tapped my rejuv button hoping it would register before my bulb ticked down. Thankfully it did and all was well. I can only guess that my Fade ran out in the middle of a poison cloud and possibly while receiving a lightning attack face first.

Act IV Nightmare is fun time. This is when the big swords become available and I picked up Death and went out for a stroll. Everything died even faster. Then at level 65, I decided to do something fun with that Jah rune.

Screenshot411.jpg

Roll wasn't too atrocious, just above average. Was hoping for more to make up for my three crappy Deaths. I got the helm on just in time to slay Hephasto. It only took a couple chops for him to fall. Everything else was fairly simple aside from a double pack of Unique and Champion Oblivion Knights in the Sanctuary. Diablo was eaten by one of Bill's volcanoes, and he dropped a Hone Sundan. I have to say giving Bill the proc stick has be a bit easier on the eyes, which is really necessary now that I'm targeting everything one at a time. Also I'm surprised at the defensive utility of Death with the Glacial Spike proc, it really comes in handy.

Act V was one of those sprints where I couldn't find many Waypoints and just kept running through. Frozen River was a bit hectic with Gloams, Serpents, Harpees and Lancers, but alas we got Anya out of her ice boots. It seemed every open area had Skeleton Archers, so I was really happy with the protection afforded by Dream via Confuse procs. This really took a good amount of heat off when needed. Also Redemption on switch is great vs Undead as I can top off between battles without worry. Ancients surprised me as they were really hard to kill. After the fight I noticed I had Town Portal on the RMB instead of Conviction . I new I would do that eventually, they look really similar out of my peripheral vision.

On the way down to Baal, we got a roll that Pestilence would have loved, but I found myself getting physically angry every time it had to click the mouse button to kill one of these little twerps. Baal and his waves were amazingly easy. Like his brother Baal was swallowed by one of Bill's volcanoes. He actually dropped some really useful gear had this been single pass.

So after a brief pitstop to optimize and finalize charms we took our test run out on the Moor. I wish I could say it had gone better, but everything dies in one or two swings at players 3, even champs and uniques. I'm considering respecing him since he has dumped a bunch of unneeded stat points into Str and Dex. His life bulb just drops way too fast in hairy situations, the extra vit could be a help. I'm also trying to get a bit better about keeping Fade active.

Character Dump
Code:
Name:       Grumpy
Class:      Paladin
Experience: 389660708
Level:      73

            Naked/Gear
Strength:   163/186
Dexterity:  100/123
Vitality:   157/172
Energy:     15/20
HP:         635/837
Mana:       123/208
Stamina:    293/490
Defense:    25/1070
AR:         485/19320

Fire:       188/148/**
Cold:       183/143/83
Lightning:  166/126/66
Poison:     156/116/56

MF:         15       Block:      22
GF:         50
FR/W:       40
FHR:        57
IAS:        75
FCR:        0

Sacrifice: 1/3
Smite: 0/0
Holy Bolt: 0/0
Zeal: 1/3
Charge: 0/0
Vengeance: 20/22
Blessed Hammer: 0/0
Conversion: 0/0
Holy Shield: 0/0
Fist of the Heavens: 0/0

Might: 1/3
Holy Fire: 1/3
Thorns: 1/3
Blessed Aim: 0/0
Concentration: 0/0
Holy Freeze: 1/3
Holy Shock: 0/0
Sanctuary: 1/3
Fanaticism: 0/0
Conviction: 20/22

Prayer: 0/0
Resist Fire: 15/17
Defiance: 0/0
Resist Cold: 1/3
Cleansing: 0/0
Resist Lightning: 17/19
Vigor: 0/0
Meditation: 0/0
Redemption: 0/0
Salvation: 1/3

Tome of Identify
Fingerprint: 0xfa95561f
Item Level: 10
Version: Expansion 1.10+

Tome of Town Portal
Fingerprint: 0xe878d468
Item Level: 10
Version: Expansion 1.10+

Horadric Cube
Fingerprint: 0x3fe721c7
Item Level: 13
Version: Expansion 1.10+

Skin of the Flayed One
Demonhide Armor
Defense: 360
Durability: 58 of 58
Required Level: 31
Required Strength: 50
Fingerprint: 0x6b94c2d0
Item Level: 85
Version: Expansion 1.10+
+15% Increased Attack Speed
7% Life stolen per hit
+157% Enhanced Defense
+8 Defense
Replenish Life +17
Attacker Takes Damage of 15
Repairs 1 Durability in 10 Seconds
+30 Maximum Durability
1 Sockets (1 used)
Socketed: Blanched Jewel of Fervor

Blanched Jewel of Fervor
Jewel
Required Level: 31
Fingerprint: 0x8a3a9ef
Item Level: 80
Version: Expansion 1.10+
+15% Increased Attack Speed
+8 Defense

Delirium
Superior Savage Helmet
LemIstIo
Defense: 368
Durability: 50 of 50
Required Level: 51
Required Strength: 103
Fingerprint: 0x78edf45d
Item Level: 87
Version: Expansion
1% Chance to cast level 50 Delirium when struck
6% Chance to cast level 14 Mind Blast when struck
14% Chance to cast level 13 Terror when struck
11% Chance to cast level 18 Confuse on striking
+2 to All Skills
+3 to Stun (Barbarian Only)
+2 to Taunt (Barbarian Only)
+9% Enhanced Defense
+261 Defense
+10 to Vitality
50% Extra Gold from Monsters
25% Better Chance of Getting Magic Items
Level 17 Attract (60/60 Charges)
3 Sockets (3 used)
Socketed: Lem Rune
Socketed: Ist Rune
Socketed: Io Rune

Lem Rune
Required Level: 43
Version: Expansion 1.10+
Weapons: 75% Extra Gold from Monsters
Armor: 50% Extra Gold from Monsters
Shields: 50% Extra Gold from Monsters

Ist Rune
Required Level: 51
Version: Expansion 1.10+
Weapons: 30% Better Chance of Getting Magic Items
Armor: 25% Better Chance of Getting Magic Items
Shields: 25% Better Chance of Getting Magic Items

Io Rune
Required Level: 35
Version: Expansion 1.10+
Weapons: +10 to Vitality
Armor: +10 to Vitality
Shields: +10 to Vitality

Garnet Small Charm of Vita
Small Charm
Required Level: 39
Fingerprint: 0x7d11bf15
Item Level: 80
Version: Expansion 1.10+
+17 to Life
Fire Resist +8%

Emerald Grand Charm of Sustenance
Grand Charm
Required Level: 37
Fingerprint: 0x88c10c62
Item Level: 80
Version: Expansion 1.10+
+27 to Life
Poison Resist +30%

Glowing Small Charm of Vita
Small Charm
Required Level: 39
Fingerprint: 0xe026f5f6
Item Level: 87
Version: Expansion 1.10+
Adds 1 - 13 Lightning Damage
+20 to Life

Full Rejuvenation Potion
Version: Expansion 1.10+
Replenishes Mana 100%
Replenishes Health 100%

Key
Fingerprint: 0x9913daa
Item Level: 68
Version: Expansion 1.10+

Full Rejuvenation Potion
Version: Expansion 1.10+
Replenishes Mana 100%
Replenishes Health 100%

Full Rejuvenation Potion
Version: Expansion 1.10+
Replenishes Mana 100%
Replenishes Health 100%

Full Rejuvenation Potion
Version: Expansion 1.10+
Replenishes Mana 100%
Replenishes Health 100%

Full Rejuvenation Potion
Version: Expansion 1.10+
Replenishes Mana 100%
Replenishes Health 100%

Full Rejuvenation Potion
Version: Expansion 1.10+
Replenishes Mana 100%
Replenishes Health 100%

Full Rejuvenation Potion
Version: Expansion 1.10+
Replenishes Mana 100%
Replenishes Health 100%

Sapphire Grand Charm of Balance
Grand Charm
Required Level: 22
Fingerprint: 0x539b6c5c
Item Level: 85
Version: Expansion 1.10+
+12% Faster Hit Recovery
Cold Resist +27%

Sapphire Small Charm of Vita
Small Charm
Required Level: 39
Fingerprint: 0x1ebc445b
Item Level: 80
Version: Expansion 1.10+
+20 to Life
Cold Resist +11%

Shocking Large Charm of Strength
Large Charm
Required Level: 60
Fingerprint: 0x891b9efe
Item Level: 85
Version: Expansion 1.10+
Adds 1 - 80 Lightning Damage
+3 to Strength

Coral Grand Charm of Sustenance
Grand Charm
Required Level: 53
Fingerprint: 0x4df628c1
Item Level: 80
Version: Expansion 1.10+
+32 to Life
Lightning Resist +24%

Emerald Small Charm of Sustenance
Small Charm
Required Level: 32
Fingerprint: 0x6bf094d2
Item Level: 80
Version: Expansion 1.10+
+13 to Life
Poison Resist +11%

Shimmering Large Charm of Incineration
Large Charm
Required Level: 26
Fingerprint: 0xe261e512
Item Level: 80
Version: Expansion 1.10+
Adds 7 - 16 Fire Damage
All Resistances +8

Arcing Small Charm
Small Charm
Required Level: 57
Fingerprint: 0x3585c8e8
Item Level: 85
Version: Expansion 1.10+
Adds 1 - 39 Lightning Damage

Sharp Large Charm of Sustenance
Large Charm
Required Level: 34
Fingerprint: 0x86929178
Item Level: 80
Version: Expansion 1.10+
+6 to Maximum Damage
+29 to Attack Rating
+23 to Life

Super Healing Potion
Version: Expansion 1.10+
Replenish Life +320

Full Rejuvenation Potion
Version: Expansion 1.10+
Replenishes Mana 100%
Replenishes Health 100%

Nef Rune
Required Level: 13
Version: Expansion 1.10+
Weapons: Knockback
Armor: +30 Defense vs. Missile
Shields: +30 Defense vs. Missile

Dream
Great Helm
IoJahPul
Defense: 239
Durability: 25 of 40
Required Level: 65
Required Strength: 63
Fingerprint: 0x829a6074
Item Level: 55
Version: Expansion 1.10+
10% Chance to cast level 15 Confuse when struck
Level 15 Holy Shock Aura When Equipped
+25% Faster Hit Recovery
+30% Enhanced Defense
+197 Defense
+10 to Vitality
Increase Maximum Life 5%
+45 to Mana (Based on Character Level)
All Resistances +13
15% Better Chance of Getting Magic Items
3 Sockets (3 used)
Socketed: Io Rune
Socketed: Jah Rune
Socketed: Pul Rune

Io Rune
Required Level: 35
Version: Expansion 1.10+
Weapons: +10 to Vitality
Armor: +10 to Vitality
Shields: +10 to Vitality

Jah Rune
Required Level: 65
Version: Expansion 1.10+
Weapons: Ignore Target's Defense
Armor: Increase Maximum Life 5%
Shields: +50 to Life

Pul Rune
Required Level: 45
Version: Expansion 1.10+
Weapons: +75% Damage to Demons
+100 to Attack Rating against Demons
Armor: +30% Enhanced Defense
Shields: +30% Enhanced Defense

Mara's Kaleidoscope
Amulet
Required Level: 67
Fingerprint: 0xc663bf72
Item Level: **
Version: Expansion 1.10+
+2 to All Skills
All Stats +5
All Resistances +27

Treachery
Dusk Shroud
ShaelThulLem
Defense: 429
Durability: 12 of 20
Required Level: 49
Required Strength: 77
Fingerprint: 0x4e99db06
Item Level: 85
Version: Expansion 1.10+
5% Chance to cast level 15 Fade when struck
25% Chance to cast level 15 Venom on striking
+2 to Assassin Skill Levels
+45% Increased Attack Speed
+20% Faster Hit Recovery
Cold Resist +30%
50% Extra Gold from Monsters
3 Sockets (3 used)
Socketed: Shael Rune
Socketed: Thul Rune
Socketed: Lem Rune

Shael Rune
Required Level: 29
Version: Expansion 1.10+
Weapons: +20% Increased Attack Speed
Armor: +20% Faster Hit Recovery
Shields: +20% Faster Block Rate

Thul Rune
Required Level: 23
Version: Expansion 1.10+
Weapons: Adds 3 - 14 Cold Damage Over 3 Secs (75 Frames)
Armor: Cold Resist +30%
Shields: Cold Resist +35%

Lem Rune
Required Level: 43
Version: Expansion 1.10+
Weapons: 75% Extra Gold from Monsters
Armor: 50% Extra Gold from Monsters
Shields: 50% Extra Gold from Monsters

Death Grasp
Ring
Required Level: 65
Fingerprint: 0x5ac40667
Item Level: 80
Version: Expansion 1.10+
+4 to Minimum Damage
Adds 50 Poison Damage Over 3 Secs (75 Frames)
8% Life stolen per hit
+17 Maximum Stamina
All Resistances +7
Lightning Resist +27%

Raven Frost
Ring
Required Level: 45
Fingerprint: 0xec37e90d
Item Level: 85
Version: Expansion 1.10+
+241 to Attack Rating
Adds 15 - 45 Cold Damage Over 4 Secs (100 Frames)
+18 to Dexterity
+40 to Mana
Cold Absorb 20%
Cannot Be Frozen

Nosferatu's Coil
Vampirefang Belt
Defense: 56
Durability: 10 of 14
Required Level: 51
Required Strength: 50
Fingerprint: 0x74dcce96
Item Level: 87
Version: Expansion 1.10+
+10% Increased Attack Speed
7% Life stolen per hit
Slows Target by 10%
+15 to Strength
+2 to Mana after each Kill
-3 to Light Radius

Aldur's Advance
Battle Boots
Defense: 44
Durability: 11 of 18
Required Level: 45
Required Strength: 95
Fingerprint: 0x5a69c310
Item Level: 80
Version: Expansion 1.10+
Indestructible
+40% Faster Run/Walk
+50 to Life
+180 Maximum Stamina
Heal Stamina Plus 32%
Fire Resist +41%
10% Damage Taken Goes To Mana
Set (2 items): +15 to Dexterity
Set (3 items): +15 to Dexterity
Set (4 items): +15 to Dexterity


Lava Gout
Battle Gauntlets
Defense: 126
Durability: 36 of 38
Required Level: 42
Required Strength: **
Fingerprint: 0x62e6f825
Item Level: 85
Version: Expansion 1.10+
2% Chance to cast level 10 Enchant on striking
+20% Increased Attack Speed
Adds 13 - 46 Fire Damage
+163% Enhanced Defense
Fire Resist +24%
Half Freeze Duration
+20 Maximum Durability

Super Healing Potion
Version: Expansion 1.10+
Replenish Life +320

Full Rejuvenation Potion
Version: Expansion 1.10+
Replenishes Mana 100%
Replenishes Health 100%

Full Rejuvenation Potion
Version: Expansion 1.10+
Replenishes Mana 100%
Replenishes Health 100%

Full Rejuvenation Potion
Version: Expansion 1.10+
Replenishes Mana 100%
Replenishes Health 100%

Super Healing Potion
Version: Expansion 1.10+
Replenish Life +320

Super Healing Potion
Version: Expansion 1.10+
Replenish Life +320

Full Rejuvenation Potion
Version: Expansion 1.10+
Replenishes Mana 100%
Replenishes Health 100%

Full Rejuvenation Potion
Version: Expansion 1.10+
Replenishes Mana 100%
Replenishes Health 100%

Full Rejuvenation Potion
Version: Expansion 1.10+
Replenishes Mana 100%
Replenishes Health 100%

Full Rejuvenation Potion
Version: Expansion 1.10+
Replenishes Mana 100%
Replenishes Health 100%

Death
Colossus Blade
HelElVexOrtGul
One Hand Damage: 154 - 404
Two Hand Damage: 362 - 717
Indestructible
Required Level: 63
Required Strength: 144
Required Dexterity: 80
Fingerprint: 0xec06ee43
Item Level: 86
Version: Expansion 1.10+
100% Chance to cast level 44 Chain Lightning when you Die
25% Chance to cast level 18 Glacial Spike on attack
Indestructible
317% Enhanced Damage
20% Bonus to Attack Rating
+50 to Attack Rating
Adds 1 - 50 Lightning Damage
7% Mana stolen per hit
50% Chance of Crushing Blow
36% Deadly Strike (Based on Character Level)
+1 to Light Radius
Level 22 Blood Golem (15/15 Charges)
Requirements -20%
Ethereal
5 Sockets (5 used)
Socketed: Hel Rune
Socketed: El Rune
Socketed: Vex Rune
Socketed: Ort Rune
Socketed: Gul Rune

Hel Rune
Version: Expansion 1.10+
Weapons: Requirements -20%
Armor: Requirements -15%
Shields: Requirements -15%

El Rune
Required Level: 11
Version: Expansion 1.10+
Weapons: +50 to Attack Rating
+1 to Light Radius
Armor: +15 Defense
+1 to Light Radius
Shields: +15 Defense
+1 to Light Radius

Vex Rune
Required Level: 55
Version: Expansion 1.10+
Weapons: 7% Mana stolen per hit
Armor: +5% to Maximum Fire Resist
Shields: +5% to Maximum Fire Resist

Ort Rune
Required Level: 21
Version: Expansion 1.10+
Weapons: Adds 1 - 50 Lightning Damage
Armor: Lightning Resist +30%
Shields: Lightning Resist +35%

Gul Rune
Required Level: 53
Version: Expansion 1.10+
Weapons: 20% Bonus to Attack Rating
Armor: +5% to Maximum Poison Resist
Shields: +5% to Maximum Poison Resist

Perfect Diamond
Required Level: 18
Version: Expansion 1.10+
Weapons: +68% Damage to Undead
Armor: +100 to Attack Rating
Shields: Cold Resist +19%
Lightning Resist +19%
Fire Resist +19%
Poison Resist +19%

Full Rejuvenation Potion
Version: Expansion 1.10+
Replenishes Mana 100%
Replenishes Health 100%

Rejuvenation Potion
Version: Expansion 1.10+
Replenishes Mana 35%
Replenishes Health 35%

Full Rejuvenation Potion
Version: Expansion 1.10+
Replenishes Mana 100%
Replenishes Health 100%

Full Rejuvenation Potion
Version: Expansion 1.10+
Replenishes Mana 100%
Replenishes Health 100%

Merciless Grand Scepter
Grand Scepter
One Hand Damage: 15 - 34
Durability: 59 of 60
Required Level: 30
Required Strength: 37
Fingerprint: 0x6a88bd21
Item Level: 45
Version: Expansion 1.10+
91% Enhanced Damage
+150% Damage to Undead
+3 to Redemption (Paladin Only)
+1 to Conviction (Paladin Only)
+2 to Vigor (Paladin Only)

Spirit
Sacred Rondache
TalThulOrtAmn
Defense: 146
Chance to Block: 0
Durability: 68 of 68
Required Level: 52
Required Strength: 109
Fingerprint: 0x5fb0495b
Item Level: 79
Version: Expansion 1.10+
+2 to All Skills
+32% Faster Cast Rate
+55% Faster Hit Recovery
+250 Defense vs. Missile
+22 to Vitality
+106 to Mana
Cold Resist +35%
All Resistances +40
Lightning Resist +35%
Poison Resist +35%
+5 Magic Absorb
Attacker Takes Damage of 14
4 Sockets (4 used)
Socketed: Tal Rune
Socketed: Thul Rune
Socketed: Ort Rune
Socketed: Amn Rune

Tal Rune
Required Level: 17
Version: Expansion 1.10+
Weapons: Adds 75 Poison Damage Over 5 Secs (125 Frames)
Armor: Poison Resist +30%
Shields: Poison Resist +35%

Thul Rune
Required Level: 23
Version: Expansion 1.10+
Weapons: Adds 3 - 14 Cold Damage Over 3 Secs (75 Frames)
Armor: Cold Resist +30%
Shields: Cold Resist +35%

Ort Rune
Required Level: 21
Version: Expansion 1.10+
Weapons: Adds 1 - 50 Lightning Damage
Armor: Lightning Resist +30%
Shields: Lightning Resist +35%

Amn Rune
Required Level: 25
Version: Expansion 1.10+
Weapons: 7% Life stolen per hit
Armor: Attacker Takes Damage of 14
Shields: Attacker Takes Damage of 14

Mercenary:

Name:       Bill
Race:       Barbarian
Type:       1hs-Normal
Experience: 47379010
Level:      73
Dead?:      false

            Naked/Gear
Strength:   186/206
Dexterity:  119/149
HP:         1233/1306
Defense:    1034/2833
AR:         1375/28875

Fire:       193/153/93
Cold:       193/153/93
Lightning:  193/153/93
Poison:    193/153/93

Arreat's Face
Slayer Guard
Defense: 310
Durability: 55 of 55
Required Level: 42
Required Strength: 118
Fingerprint: 0xf97d7834
Item Level: **
Version: Expansion 1.10+
+2 to Combat Skills (Barbarian Only)
+2 to Barbarian Skill Levels
+15% Increased Attack Speed
+30% Faster Hit Recovery
+6 to Maximum Damage
20% Bonus to Attack Rating
6% Life stolen per hit
+157% Enhanced Defense
+20 to Strength
+20 to Dexterity
All Resistances +30
1 Sockets (1 used)
Socketed: Carmine Jewel of Fervor

Carmine Jewel of Fervor
Jewel
Required Level: 31
Fingerprint: 0xe15d80ee
Item Level: 80
Version: Expansion 1.10+
+15% Increased Attack Speed
+6 to Maximum Damage


Fortitude
Superior Dusk Shroud
ElSolDolLo
Defense: 1489
Durability: 12 of 20
Required Level: 59
Required Strength: 77
Fingerprint: 0x9372e96
Item Level: 80
Version: Expansion 1.10+
20% Chance to cast level 15 Chilling Armor when struck
+25% Faster Cast Rate
300% Enhanced Damage
+215% Enhanced Defense
+15 Defense
+73 to Life (Based on Character Level)
Replenish Life +7
+5% to Maximum Lightning Resist
All Resistances +28
Damage Reduced by 7
12% Damage Taken Goes To Mana
+1 to Light Radius
4 Sockets (4 used)
Socketed: El Rune
Socketed: Sol Rune
Socketed: Dol Rune
Socketed: Lo Rune

El Rune
Required Level: 11
Version: Expansion 1.10+
Weapons: +50 to Attack Rating
+1 to Light Radius
Armor: +15 Defense
+1 to Light Radius
Shields: +15 Defense
+1 to Light Radius

Sol Rune
Required Level: 27
Version: Expansion 1.10+
Weapons: +9 to Minimum Damage
Armor: Damage Reduced by 7
Shields: Damage Reduced by 7

Dol Rune
Required Level: 31
Version: Expansion 1.10+
Weapons: Hit Causes Monster to Flee 25%
Armor: Replenish Life +7
Shields: Replenish Life +7

Lo Rune
Required Level: 59
Version: Expansion 1.10+
Weapons: 20% Deadly Strike
Armor: +5% to Maximum Lightning Resist
Shields: +5% to Maximum Lightning Resist


Destruction
Colossus Blade
VexLoBerJahKo
One Hand Damage: 112 - 292
Two Hand Damage: 261 - 517
Durability: 35 of 50
Required Level: 65
Required Strength: 189
Required Dexterity: 110
Fingerprint: 0x49cbedbf
Item Level: 86
Version: Expansion 1.10+
23% Chance to cast level 12 Volcano on striking
5% Chance to cast level 23 Molten Boulder on striking
100% Chance to cast level 45 Meteor when you Die
15% Chance to cast level 22 Nova on attack
350% Enhanced Damage
Ignore Target's Defense
Adds 100 - 180 Magic Damage
7% Mana stolen per hit
20% Chance of Crushing Blow
20% Deadly Strike
Prevent Monster Heal
+10 to Dexterity
5 Sockets (5 used)
Socketed: Vex Rune
Socketed: Lo Rune
Socketed: Ber Rune
Socketed: Jah Rune
Socketed: Ko Rune

Vex Rune
Required Level: 55
Version: Expansion 1.10+
Weapons: 7% Mana stolen per hit
Armor: +5% to Maximum Fire Resist
Shields: +5% to Maximum Fire Resist

Lo Rune
Required Level: 59
Version: Expansion 1.10+
Weapons: 20% Deadly Strike
Armor: +5% to Maximum Lightning Resist
Shields: +5% to Maximum Lightning Resist

Ber Rune
Required Level: 63
Version: Expansion 1.10+
Weapons: 20% Chance of Crushing Blow
Armor: Damage Reduced by 8%
Shields: Damage Reduced by 8%

Jah Rune
Required Level: 65
Version: Expansion 1.10+
Weapons: Ignore Target's Defense
Armor: Increase Maximum Life 5%
Shields: +50 to Life

Ko Rune
Required Level: 39
Version: Expansion 1.10+
Weapons: +10 to Dexterity
Armor: +10 to Dexterity
Shields: +10 to Dexterity

Great progress. Love the detailed write-ups.

So Grumpy's got Res Lightning and Res Fire maxed. I was planning on going Res Cold with remaining skill points, but then realized with Dream, Salvation would double dip as a synergy to both Vengeance and Holy Shock. However, the latter only adds about 32 lightning damage. I was wondering if anyone knew, or had a decent Vengeance calculator to see if this would be more or less than the 4% difference I'd get from boosting Res Cold. I guess Res Cold also comes with the passive bonus, but do you really need cold resistance?
 
Grumpy has continued on, still occasionally taking a dirt nap. But this is always when Fade...um fades and I don't catch it in the middle of a battle, usually with a group of elemental foes like Scarabs. So he's taken to, what I consider, fairly cheap tactics, to prevent such things from happening.

I'm also kind of enjoying this go around because putting the procs on the merc helps move a lot of the noise away from my character. This is especially helpful using the stupid stupid Paladin and his left click mechanics. Then I can move out if it becomes too hectic. I found a merc upgrade in the Stony Field, but decided to stick with regular Bill. We made it through Act I, though Bill was a little worse for wear. Kinda funny Andy gave me something I just traded for.

I bothered with Radamant as undead are not so annoying with Redemption, and the skill point helps. Rest of Act II was a blur. I'm probably blocking it out because of the multiple Scarab Death's I suffered as Fade wore off. Arcane Sanctuary and physical immunes in general are such a breeze now, it's amazing compared to Pestilence. I have to say I'm really enjoying Vengeance, likely because Death is actually a pretty good weapon for it. This drop in Tal Rasha's Tomb was hilarious for multiple reasons. During that session I was already running RoF SuperChests, but was frustrated by lack of drops. I didn't want to play Grumpy cause I didn't have time for getting to and killing Duriel. But after being bored with RoF I figured I could at least get started on the map. Also before I finished setting up Grumpy's gear, I wanted to do Dream helm and Dragon armor for laughs but I couldn't find a Sur. I even did dedicated LK runs to try to get one. Anyway, I had to give up on Duriel during that play session and took him down on the next go with only giving Bill a couple purples. It seems he suffered a lot this time.

So Grumpy is fully geared and rolling through p3 Hell at the moment. He's quite enjoyable, although I wish I wasn't so Fade dependent.

I still hate beginning of Act III. These Flayers are so hard to target with all the crap on screen.
And I got one of those stupid maps where Great Marsh has nothing to do with the Flay Jungle. It wasn't even a three way intersection, literally half the Spider Forest Map between the transition zones.
Can't wait for Kurast.
Pretend you are doing full clears with your character. That way the game thinks giving you that bad map layout doesn't hurt you, so it won't.

Hope you'll be in Kurast soon !!!
I finally got out of the wilderness and have scavenged the heart from the Sewers.
Wish I had more playing time, but hopefully he'll get moving more soon. I love Act IV.
 
So it's been a while since I've updated on my progress here. I've dug through my photolog, and unfortunately since Grumpy is such a glass cannon, there aren't a whole lot of fancy images in the journal.

Act III was obviously annoying until getting away from all of the flayers and forests. From here he got a couple nice set drops in the Flayer Jungle and Sewers. Really don't remember much else, aside from missing a lot of waypoints and pushing on to Meph. The lack of resists when Fade kept...fading in and out got quite annoying, and of course happened right before engaging him. But Vengence ripped through him so fast after a few whacks over the head, he was nothing but a pile of loot and some foul smelling gas.

Act IV got hairy at the Plains of Despair with gloams layered on top of spawners. The gloams were killing me when Fade was gone, and the spawners were the usual bane of this single target attackers existence. We let Bill do some of the heavy lifting as this doorway had two spawner bosspacks on the opposite side, unfortunately I wasn't able to get their mods. The rest of the way was a bit more of a sprint. Had nice large things in the River of Flame. Hephasto died amazingly fast (I forgot to comment on Izual too, this was easiest the fastest Izual fight I've ever participated in). Hellforge was relatively generous with an Ist. And somehow the only pic of the entire Chaos Sanctuary I have is this. I'm pretty sure I killed Diablo because the next time I played we were in Act V.

Early Act V was more of a hike I don't remember much of it except for not finding waypoints, and having to stand in fire regularly to proc Fade. Also, Repemption on switch was great for Skeleton Archers. And for some reason I have this screenshot of Bill dispatching a leaper boss while I cower in safety. Things were rolling until Anya needed to be rescued, which was ironic since I was really looking forward to that extra resistance. Here I died because the plethora of ranged attackers with no where to duck out of the way for relief. I also had spearwomen that just swarm you out of nowhere, And then my computer crashed, so I took a break for a while.

The return wasn't any easier, but we were at least triumpant. The continuation wasn't any easier. First was a bunch of Archers on our way down to the Glacial Trail. Here the confuse proc from Dream was a lifesaver. Then I ended up creating a stair trap at the entrance to the Glacial Trail running away from a nasty Ghost bosspack, that had a bunch of support from Gargantuans and Serpents. I used the stairs to my advantage repeatedly merc bombing them while Bill eventually got rid of most of the Ghosts, and we prevailed. The Ancients were our next stop and were surprisingly easy. Once they were separated, which is actually quite difficult to do with a Barb merc, Grumpy easily took them down going toe to toe.

The trek down to Baal was a cakewalk with, I think, poison skeletal mages being the hardest roll. No stair traps, and his early waves were easy with Redemption to negate the ressurectors. The pair was surprisingly sturdy against Lister and Company being able to stand up to three minions at a time. And as with all bosses, killing Baal was a simple as namelocking him and waiting until he exploded. A giant Deckard Cain congratulated us and the rest is history.

No time for gear/stats and cows, but that'll be a fun story in the next post.

* * *

So the final stop was, as always, The Secret Cow Level. I originally gave it a go a players 3, but Grumpy and Bill were eventually swallowed by Cows. On the second try, we were successful, but the beginning was precarious at best. Unfortunately, the whole run through did not get recorded due to a technical error, but nothing exciting happened after the stopping point. I have to say, the CTC Glacial Spike from Death was likely a major contributing factor to completing this task.

Code:
Name:       Grumpy
Class:      Paladin
Experience: 1018619602
Level:      84

            Naked/Gear
Strength:   163/186
Dexterity:  100/123
Vitality:   227/242
Energy:     15/20
HP:         887/1089
Mana:       139/231
Stamina:    374/571
Defense:    25/1070
AR:         485/19320

Fire:       148/108/48
Cold:       143/103/43
Lightning:  126/86/26
Poison:     116/76/16

MF:         15       Block:      19
GF:         50
FR/W:       40
FHR:        57
IAS:        75
FCR:        0

Sacrifice: 1/3
Smite: 0/0
Holy Bolt: 0/0
Zeal: 1/3
Charge: 0/0
Vengeance: 20/22
Blessed Hammer: 0/0
Conversion: 0/0
Holy Shield: 0/0
Fist of the Heavens: 0/0

Might: 1/3
Holy Fire: 1/3
Thorns: 1/3
Blessed Aim: 0/0
Concentration: 0/0
Holy Freeze: 1/3
Holy Shock: 0/0
Sanctuary: 1/3
Fanaticism: 0/0
Conviction: 20/22

Prayer: 0/0
Resist Fire: 20/22
Defiance: 0/0
Resist Cold: 7/9
Cleansing: 0/0
Resist Lightning: 20/22
Vigor: 0/4*on switch
Meditation: 0/0
Redemption: 0/5*on switch
Salvation: 1/3

Gear:
Code:
Lava Gout
Battle Gauntlets
Defense: 126
Durability: 24 of 38
Required Level: 42
Required Strength: **
Fingerprint: 0x62e6f825
Item Level: 85
Version: Expansion 1.10+
2% Chance to cast level 10 Enchant on striking
+20% Increased Attack Speed
Adds 13 - 46 Fire Damage
+163% Enhanced Defense
Fire Resist +24%
Half Freeze Duration
+20 Maximum Durability

Death
Colossus Blade
HelElVexOrtGul
One Hand Damage: 154 - 404
Two Hand Damage: 362 - 717
Indestructible
Required Level: 63
Required Strength: 144
Required Dexterity: 80
Fingerprint: 0xec06ee43
Item Level: 86
Version: Expansion 1.10+
100% Chance to cast level 44 Chain Lightning when you Die
25% Chance to cast level 18 Glacial Spike on attack
Indestructible
317% Enhanced Damage
20% Bonus to Attack Rating
+50 to Attack Rating
Adds 1 - 50 Lightning Damage
7% Mana stolen per hit
50% Chance of Crushing Blow
42% Deadly Strike (Based on Character Level)
+1 to Light Radius
Level 22 Blood Golem (15/15 Charges)
Requirements -20%
Ethereal

Aldur's Advance
Battle Boots
Defense: 44
Durability: 11 of 18
Required Level: 45
Required Strength: 95
Fingerprint: 0x5a69c310
Item Level: 80
Version: Expansion 1.10+
Indestructible
+40% Faster Run/Walk
+50 to Life
+180 Maximum Stamina
Heal Stamina Plus 32%
Fire Resist +41%
10% Damage Taken Goes To Mana
Set (2 items): +15 to Dexterity
Set (3 items): +15 to Dexterity
Set (4 items): +15 to Dexterity


Raven Frost
Ring
Required Level: 45
Fingerprint: 0xec37e90d
Item Level: 85
Version: Expansion 1.10+
+241 to Attack Rating
Adds 15 - 45 Cold Damage Over 4 Secs (100 Frames)
+18 to Dexterity
+40 to Mana
Cold Absorb 20%
Cannot Be Frozen

Nosferatu's Coil
Vampirefang Belt
Defense: 56
Durability: 3 of 14
Required Level: 51
Required Strength: 50
Fingerprint: 0x74dcce96
Item Level: 87
Version: Expansion 1.10+
+10% Increased Attack Speed
7% Life stolen per hit
Slows Target by 10%
+15 to Strength
+2 to Mana after each Kill
-3 to Light Radius

Mara's Kaleidoscope
Amulet
Required Level: 67
Fingerprint: 0xc663bf72
Item Level: **
Version: Expansion 1.10+
+2 to All Skills
All Stats +5
All Resistances +27

Death Grasp
Ring
Required Level: 65
Fingerprint: 0x5ac40667
Item Level: 80
Version: Expansion 1.10+
+4 to Minimum Damage
Adds 50 Poison Damage Over 3 Secs (75 Frames)
8% Life stolen per hit
+17 Maximum Stamina
All Resistances +7
Lightning Resist +27%

Treachery
Dusk Shroud
ShaelThulLem
Defense: 429
Durability: 8 of 20
Required Level: 49
Required Strength: 77
Fingerprint: 0x4e99db06
Item Level: 85
Version: Expansion 1.10+
5% Chance to cast level 15 Fade when struck
25% Chance to cast level 15 Venom on striking
+2 to Assassin Skill Levels
+45% Increased Attack Speed
+20% Faster Hit Recovery
Cold Resist +30%
50% Extra Gold from Monsters

Dream
Great Helm
IoJahPul
Defense: 239
Durability: 26 of 40
Required Level: 65
Required Strength: 63
Fingerprint: 0x829a6074
Item Level: 55
Version: Expansion 1.10+
10% Chance to cast level 15 Confuse when struck
Level 15 Holy Shock Aura When Equipped
+25% Faster Hit Recovery
+30% Enhanced Defense
+197 Defense
+10 to Vitality
Increase Maximum Life 5%
+52 to Mana (Based on Character Level)
All Resistances +13
15% Better Chance of Getting Magic Items

Switch:
Merciless Grand Scepter
Grand Scepter
One Hand Damage: 15 - 34
Durability: 60 of 60
Required Level: 30
Required Strength: 37
Fingerprint: 0x6a88bd21
Item Level: 45
Version: Expansion 1.10+
91% Enhanced Damage
+150% Damage to Undead
+3 to Redemption (Paladin Only)
+1 to Conviction (Paladin Only)
+2 to Vigor (Paladin Only)

Spirit
Sacred Rondache
TalThulOrtAmn
Defense: 146
Chance to Block: 0
Durability: 68 of 68
Required Level: 52
Required Strength: 109
Fingerprint: 0x5fb0495b
Item Level: 79
Version: Expansion 1.10+
+2 to All Skills
+32% Faster Cast Rate
+55% Faster Hit Recovery
+250 Defense vs. Missile
+22 to Vitality
+106 to Mana
Cold Resist +35%
All Resistances +40
Lightning Resist +35%
Poison Resist +35%
+5 Magic Absorb
Attacker Takes Damage of 14


Charms:
Code:
Garnet Small Charm of Vita
Small Charm
Required Level: 39
Fingerprint: 0x7d11bf15
Item Level: 80
Version: Expansion 1.10+
+17 to Life
Fire Resist +8%

Emerald Grand Charm of Sustenance
Grand Charm
Required Level: 37
Fingerprint: 0x88c10c62
Item Level: 80
Version: Expansion 1.10+
+27 to Life
Poison Resist +30%

Sapphire Grand Charm of Balance
Grand Charm
Required Level: 22
Fingerprint: 0x539b6c5c
Item Level: 85
Version: Expansion 1.10+
+12% Faster Hit Recovery
Cold Resist +27%

Sapphire Small Charm of Vita
Small Charm
Required Level: 39
Fingerprint: 0x1ebc445b
Item Level: 80
Version: Expansion 1.10+
+20 to Life
Cold Resist +11%

Shocking Large Charm of Strength
Large Charm
Required Level: 60
Fingerprint: 0x891b9efe
Item Level: 85
Version: Expansion 1.10+
Adds 1 - 80 Lightning Damage
+3 to Strength

Coral Grand Charm of Sustenance
Grand Charm
Required Level: 53
Fingerprint: 0x4df628c1
Item Level: 80
Version: Expansion 1.10+
+32 to Life
Lightning Resist +24%

Emerald Small Charm of Sustenance
Small Charm
Required Level: 32
Fingerprint: 0x6bf094d2
Item Level: 80
Version: Expansion 1.10+
+13 to Life
Poison Resist +11%

Shimmering Large Charm of Incineration
Large Charm
Required Level: 26
Fingerprint: 0xe261e512
Item Level: 80
Version: Expansion 1.10+
Adds 7 - 16 Fire Damage
All Resistances +8

Arcing Small Charm
Small Charm
Required Level: 57
Fingerprint: 0x3585c8e8
Item Level: 85
Version: Expansion 1.10+
Adds 1 - 39 Lightning Damage

Sharp Large Charm of Sustenance
Large Charm
Required Level: 34
Fingerprint: 0x86929178
Item Level: 80
Version: Expansion 1.10+
+6 to Maximum Damage
+29 to Attack Rating
+23 to Life

Bloody Small Charm of Quality
Small Charm
Required Level: 50
Fingerprint: 0x4a226ad
Item Level: **
Version: Expansion
Adds 3 - 3 Damage

Glowing Small Charm of Vita
Small Charm
Required Level: 39
Fingerprint: 0xe026f5f6
Item Level: 87
Version: Expansion 1.10+
Adds 1 - 13 Lightning Damage
+20 to Life

Bill:
Code:
Mercenary:

Name:       Bill
Race:       Barbarian
Type:       1hs-Normal
Experience: 72003250
Level:      84
Dead?:      false

            Naked/Gear
Strength:   207/227
Dexterity:  134/164
HP:         1602/1686
Defense:    1483/3282
AR:         2177/45717

Fire:       210/170/110
Cold:       210/170/110
Lightning:  210/170/110
Poison:    210/170/110

Arreat's Face
Slayer Guard
Defense: 310
Durability: 55 of 55
Required Level: 42
Required Strength: 118
Fingerprint: 0xf97d7834
Item Level: **
Version: Expansion 1.10+
+2 to Combat Skills (Barbarian Only)
+2 to Barbarian Skill Levels
+15% Increased Attack Speed
+30% Faster Hit Recovery
+6 to Maximum Damage
20% Bonus to Attack Rating
6% Life stolen per hit
+157% Enhanced Defense
+20 to Strength
+20 to Dexterity
All Resistances +30
1 Sockets (1 used)
Socketed: Carmine Jewel of Fervor

Carmine Jewel of Fervor
Jewel
Required Level: 31
Fingerprint: 0xe15d80ee
Item Level: 80
Version: Expansion 1.10+
+15% Increased Attack Speed
+6 to Maximum Damage


Fortitude
Superior Dusk Shroud
ElSolDolLo
Defense: 1489
Durability: 12 of 20
Required Level: 59
Required Strength: 77
Fingerprint: 0x9372e96
Item Level: 80
Version: Expansion 1.10+
20% Chance to cast level 15 Chilling Armor when struck
+25% Faster Cast Rate
300% Enhanced Damage
+215% Enhanced Defense
+15 Defense
+84 to Life (Based on Character Level)
Replenish Life +7
+5% to Maximum Lightning Resist
All Resistances +28
Damage Reduced by 7
12% Damage Taken Goes To Mana
+1 to Light Radius
4 Sockets (4 used)
Socketed: El Rune
Socketed: Sol Rune
Socketed: Dol Rune
Socketed: Lo Rune

El Rune
Required Level: 11
Version: Expansion 1.10+
Weapons: +50 to Attack Rating
+1 to Light Radius
Armor: +15 Defense
+1 to Light Radius
Shields: +15 Defense
+1 to Light Radius

Sol Rune
Required Level: 27
Version: Expansion 1.10+
Weapons: +9 to Minimum Damage
Armor: Damage Reduced by 7
Shields: Damage Reduced by 7

Dol Rune
Required Level: 31
Version: Expansion 1.10+
Weapons: Hit Causes Monster to Flee 25%
Armor: Replenish Life +7
Shields: Replenish Life +7

Lo Rune
Required Level: 59
Version: Expansion 1.10+
Weapons: 20% Deadly Strike
Armor: +5% to Maximum Lightning Resist
Shields: +5% to Maximum Lightning Resist


Destruction
Colossus Blade
VexLoBerJahKo
One Hand Damage: 112 - 292
Two Hand Damage: 261 - 517
Durability: 35 of 50
Required Level: 65
Required Strength: 189
Required Dexterity: 110
Fingerprint: 0x49cbedbf
Item Level: 86
Version: Expansion 1.10+
23% Chance to cast level 12 Volcano on striking
5% Chance to cast level 23 Molten Boulder on striking
100% Chance to cast level 45 Meteor when you Die
15% Chance to cast level 22 Nova on attack
350% Enhanced Damage
Ignore Target's Defense
Adds 100 - 180 Magic Damage
7% Mana stolen per hit
20% Chance of Crushing Blow
20% Deadly Strike
Prevent Monster Heal
+10 to Dexterity
So that's Grumpy. He was quite fun especially against big enemies, which he just tore through. If I had it to do over again, I probably would have gone for max Res without Fade procs. I'd likely have to sacrifice attack speed by switching in a Chains of Honor, or ditch the Dream helm for a Kira's, which was the original plan before Doc stumbled upon that Jah rune. He will likely be converted into a Hammerdin so I can test one out on RoF runs in the near future.

Congrats on the Pat !!! Very well done .
I really enjoy reading these write ups good job sir!
I've had spotty time to play here and there and getting closed to finishing up Famine, but the writeups take more time than I have available right now.

Just wanted to pop in and say I started twinking Sneezy through Normal a bit last night and he's looking quite dapper in his get up of Rattlecage and dual Bloodletters. I'll have to get a pic up when i get home.
Screenshot646.jpg
Nice project and writeup Brak and going for 6+ years. That's dedication.

The purple hue is showing Sneezy's sensitive side only a Rattlecage can provide.
Thanks!
Though I'd argue it taking that long shows more of a lack of dedication
 
Don't have time for a write up, but here is Famine's Cow video. You can pretty readily see she primarily functioned as a caster watching that action that would help mop up cows when there were only a few stragglers left. I really don't think I geared her very well, but it was just difficult to balance everything she needed. Also sorc has too many annoying prebuffs that I refused to deal with.


* * *

Seems I am going to have to put this together piecemeal as I don't have time to sit down and do a proper write up. So here I'll post Famine's gear and stats. As I said she ended up just being a bit confused. I originally wanted to go all in with ES, but then I wouldn't have any offensive skillpoints aside from Enchant, and that seemed just too weak. Also prebuffing sucks. If I had it to do again, I'd probably remove the Leaf prebuff staff for CTA and Spirit. Her life pool was just too low for any reasonable combat (did I mention she died a lot?)

For skills, after maxing out Firewall, Enchant, Warmth and Mastery, I stuck a point in Frozen Armor and spent the rest of her skills pumping Static for range. This did fit the theme of Famine softening up enemies for our super buff merc, Torkel, to smack down. This is her battle stat screen
Screenshot652.jpg
Prebuff screen
Lightning tab

For her gear I was originally planning so put some nice Res/IAS jewels into her circlet to make it interesting and unique. Then I realized she had enough resistance already (mostly because I only had one fire skiller lol), so she ended up with a kinda not that amazing helm in the end. The 30% IAS did get her past a couple breakpoints, but she still swings a sword SOOOO SLOOOOOOOOW *SWOOOSH*

Code:
Volcanic Circlet of the Squid
Circlet
Defense: 28
Durability: 28 of 35
Required Level: 45
Fingerprint: 0x8b702f59
Item Level: 85
Version: Expansion 1.10+
+3 to Fire Skills (Sorceress Only)
+30% Increased Attack Speed
+7 Defense
+80 to Life
+25 Maximum Stamina
2 Sockets (2 used)

Mara's Kaleidoscope
Amulet
Required Level: 67
Fingerprint: 0xc663bf72
Item Level: **
Version: Expansion 1.10+
+2 to All Skills
All Stats +5
All Resistances +27

Chains of Honor
Archon Plate
DolUmBerIst
Defense: 843
Durability: 54 of 60
Required Level: 63
Required Strength: 103
Fingerprint: 0x3a3db8b8
Item Level: 85
Version: Expansion 1.10+
+2 to All Skills
+200% Damage to Demons
+100% Damage to Undead
8% Life stolen per hit
+70% Enhanced Defense
+20 to Strength
Replenish Life +7
All Resistances +65
Damage Reduced by 8%
25% Better Chance of Getting Magic Items

Magefist
Light Gauntlets
Defense: 24
Durability: 17 of 18
Required Level: 23
Required Strength: 45
Fingerprint: 0x77246769
Item Level: 80
Version: Expansion 1.10+
+1 to Fire Skills
+20% Faster Cast Rate
Adds 1 - 6 Fire Damage
+22% Enhanced Defense
+10 Defense
Regenerate Mana 25%

Arachnid Mesh
Spiderweb Sash
Defense: 129
Durability: 7 of 12
Required Level: 80
Required Strength: 50
Fingerprint: 0x9330c1f3
Item Level: 87
Version: Expansion 1.10+
+1 to All Skills
+20% Faster Cast Rate
Slows Target by 10%
+105% Enhanced Defense
Increase Maximum Mana 5%
Level 3 Venom (11/11 Charges)

Aldur's Advance
Battle Boots
Defense: 44
Durability: 11 of 18
Required Level: 45
Required Strength: 95
Fingerprint: 0x5a69c310
Item Level: 80
Version: Expansion 1.10+
Indestructible
+40% Faster Run/Walk
+50 to Life
+180 Maximum Stamina
Heal Stamina Plus 32%
Fire Resist +41%
10% Damage Taken Goes To Mana

The Stone of Jordan
Ring
Required Level: 29
Fingerprint: 0x4b0e27dd
Item Level: 85
Version: Expansion 1.10+
+1 to All Skills
Adds 1 - 12 Lightning Damage
+20 to Mana
Increase Maximum Mana 25%

Raven Frost
Ring
Required Level: 45
Fingerprint: 0xec37e90d
Item Level: 85
Version: Expansion 1.10+
+241 to Attack Rating
Adds 15 - 45 Cold Damage Over 4 Secs (100 Frames)
+18 to Dexterity
+40 to Mana
Cold Absorb 20%
Cannot Be Frozen

Destruction
Colossus Blade
VexLoBerJahKo
One Hand Damage: 112 - 292
Two Hand Damage: 261 - 517
Durability: 24 of 50
Required Level: 65
Required Strength: 189
Required Dexterity: 110
Fingerprint: 0x49cbedbf
Item Level: 86
Version: Expansion 1.10+
23% Chance to cast level 12 Volcano on striking
5% Chance to cast level 23 Molten Boulder on striking
100% Chance to cast level 45 Meteor when you Die
15% Chance to cast level 22 Nova on attack
350% Enhanced Damage
Ignore Target's Defense
Adds 100 - 180 Magic Damage
7% Mana stolen per hit
20% Chance of Crushing Blow
20% Deadly Strike
Prevent Monster Heal
+10 to Dexterity

Switch:
Leaf
Jo Staff
TirRal
Two Hand Damage: 6 - 21
Durability: 20 of 20
Required Level: 19
Required Strength: 25
Fingerprint: 0xba790c8c
Item Level: 81
Version: Expansion 1.10+
+3 to Fire Skills
Adds 5 - 30 Fire Damage
+3 to Inferno (Sorceress Only)
+3 to Warmth (Sorceress Only)
+3 to Fire Bolt (Sorceress Only)
+3 to Enchant (Sorceress Only)
+168 Defense (Based on Character Level)
Cold Resist +33%
+2 to Mana after each Kill

Merc:
Code:
 Death
Colossus Blade
HelElVexOrtGul
One Hand Damage: 154 - 404
Two Hand Damage: 362 - 717
Indestructible
Required Level: 63
Required Strength: 144
Required Dexterity: 80
Fingerprint: 0xec06ee43
Item Level: 86
Version: Expansion 1.10+
100% Chance to cast level 44 Chain Lightning when you Die
25% Chance to cast level 18 Glacial Spike on attack
Indestructible
317% Enhanced Damage
20% Bonus to Attack Rating
+50 to Attack Rating
Adds 1 - 50 Lightning Damage
7% Mana stolen per hit
50% Chance of Crushing Blow
42% Deadly Strike (Based on Character Level)
+1 to Light Radius
Level 22 Blood Golem (15/15 Charges)
Requirements -20%
Ethereal

Arreat's Face
Slayer Guard
Defense: 310
Durability: 55 of 55
Required Level: 42
Required Strength: 118
Fingerprint: 0xf97d7834
Item Level: **
Version: Expansion 1.10+
+2 to Combat Skills (Barbarian Only)
+2 to Barbarian Skill Levels
+15% Increased Attack Speed
+30% Faster Hit Recovery
+6 to Maximum Damage
20% Bonus to Attack Rating
6% Life stolen per hit
+157% Enhanced Defense
+20 to Strength
+20 to Dexterity
All Resistances +30

Fortitude
Superior Dusk Shroud
ElSolDolLo
Defense: 1489
Durability: 12 of 20
Required Level: 59
Required Strength: 77
Fingerprint: 0x9372e96
Item Level: 80
Version: Expansion 1.10+
20% Chance to cast level 15 Chilling Armor when struck
+25% Faster Cast Rate
300% Enhanced Damage
+215% Enhanced Defense
+15 Defense
+84 to Life (Based on Character Level)
Replenish Life +7
+5% to Maximum Lightning Resist
All Resistances +28
Damage Reduced by 7
12% Damage Taken Goes To Mana
+1 to Light Radius

Charms:
Code:
 Burning Grand Charm of Sustenance
Grand Charm
Required Level: 42
Fingerprint: 0x1d93318e
Item Level: 80
Version: Expansion 1.10+
+1 to Fire Skills (Sorceress Only)
+28 to Life

Coral Grand Charm of Balance
Grand Charm
Required Level: 15
Fingerprint: 0xa3424b77
Item Level: 80
Version: Expansion 1.10+
+12% Faster Hit Recovery
Lightning Resist +23%

Emerald Grand Charm of Sustenance
Grand Charm
Required Level: 37
Fingerprint: 0x88c10c62
Item Level: 80
Version: Expansion 1.10+
+27 to Life
Poison Resist +30%

Shimmering Grand Charm of Pestilence
Grand Charm
Required Level: 27
Fingerprint: 0x37c6ee34
Item Level: 80
Version: Expansion 1.10+
Adds 25 Poison Damage Over 5 Secs (125 Frames)
All Resistances +13

Shimmering Large Charm of Incineration
Large Charm
Required Level: 26
Fingerprint: 0xe261e512
Item Level: 80
Version: Expansion 1.10+
Adds 7 - 16 Fire Damage
All Resistances +8

Snowy Small Charm of Vita
Small Charm
Required Level: 39
Fingerprint: 0x63b6194b
Item Level: 85
Version: Expansion 1.10+
Adds 2 Cold Damage Over 1 Secs (25 Frames)
+20 to Life

Sapphire Small Charm of Vita
Small Charm
Required Level: 39
Fingerprint: 0x1ebc445b
Item Level: 80
Version: Expansion 1.10+
+20 to Life
Cold Resist +11%

Amber Small Charm of Strength
Small Charm
Required Level: 32
Fingerprint: 0xaf5aeb71
Item Level: **
Version: Expansion 1.10+
+1 to Strength
Lightning Resist +11%

Cobalt Small Charm of Sustenance
Small Charm
Required Level: 20
Fingerprint: 0xaac77f9c
Item Level: 85
Version: Expansion 1.10+
+13 to Life
Cold Resist +9%

Shimmering Small Charm of the Icicle
Small Charm
Required Level: 25
Fingerprint: 0x8bf39a09
Item Level: 80
Version: Expansion 1.10+
Adds 2 - 4 Cold Damage Over 1 Secs (25 Frames)
All Resistances +4

Emerald Small Charm of Sustenance
Small Charm
Required Level: 32
Fingerprint: 0x6bf094d2
Item Level: 80
Version: Expansion 1.10+
+13 to Life
Poison Resist +11%

Cobalt Small Charm of Sustenance
Small Charm
Required Level: 20
Fingerprint: 0x3f398593
Item Level: 80
Version: Expansion 1.10+
+11 to Life
Cold Resist +8%
 
Diablo 4 Interactive Map
PurePremium
Estimated market value
Low
High