Introduction
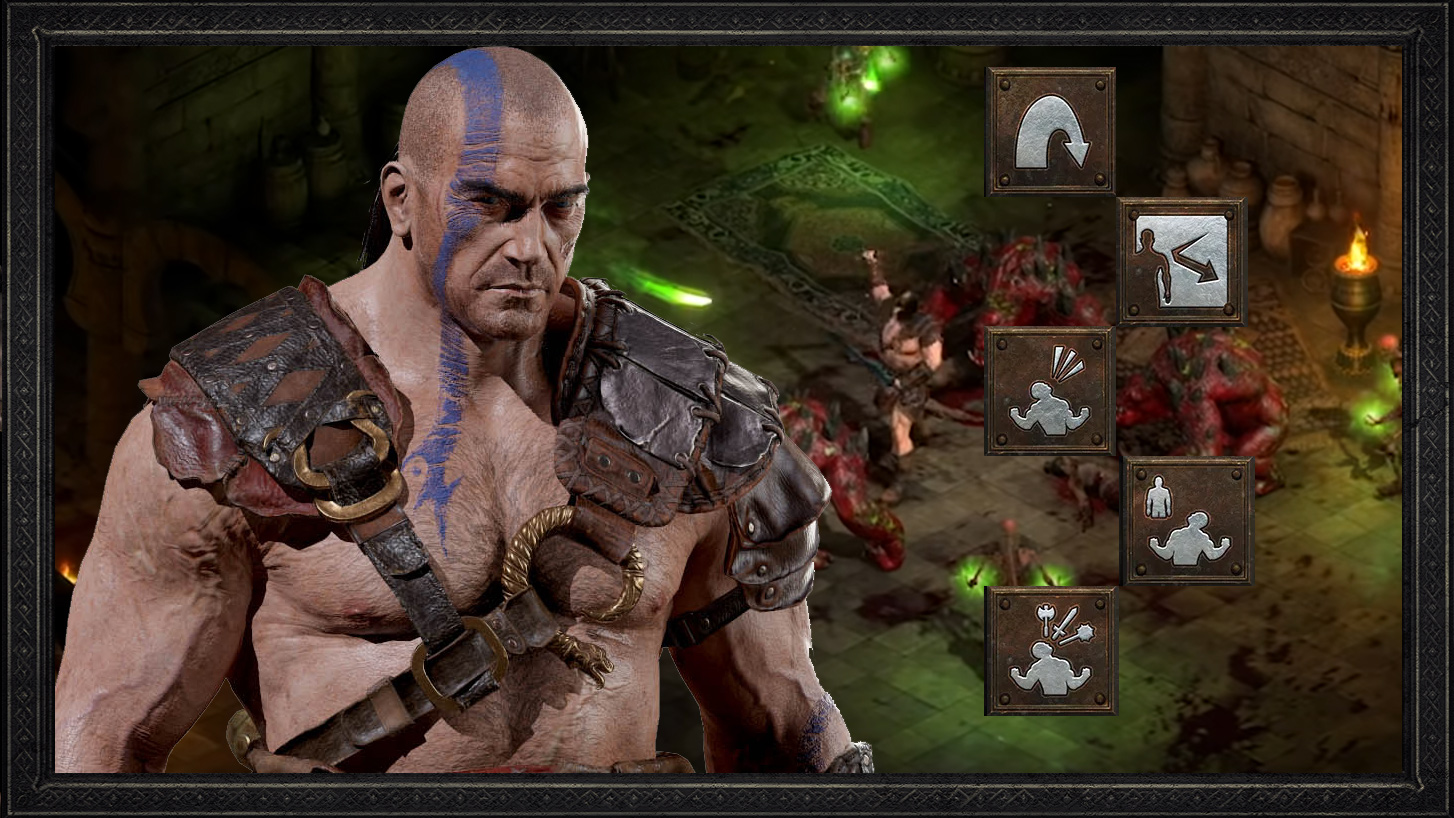
Welcome to the Diablo 2 Barbarian Guide which is a guide to help you get started with the class.
The Barbarian is a great character with good gear, but as a starter character, he is one of the hardest. My first ever character was a Barbarian, and I think I got stuck somewhere around Act 4 on my first playthrough. Poor equipment and skill points everywhere didn’t make it easy. This guide should help you avoid the same mistakes.
This guide is derived from Nightfish’s Hardcore Berserker guide, which I thoroughly recommend reading. As this is a starter build for new players however it is targeted at softcore play and I have made it a bit more general, including both Concentrate and Whirlwind options.
In Diablo 2 it is all about the weapon for Barbarians, and finding something that can take you through Hell is not necessarily easy. For this reason, we are going to ignore Frenzy and Double Swing builds, as finding one decent weapon is much easier than finding two. Our main focus will be finding a big hurty two-handed weapon and using War Cry to stun enemies. That opens up several end-game skills to us, but we are going to leave the final skill choice until we have settled on a weapon.
Abbreviations
MF – Increased Chance to find Magic Items
MPK – +X to Mana per Kill
IAS – Increased Attack Speed
FRW – Faster Run / Walk
FHR – Faster Hit Recovery
%DR – Percentile Damage Reduction
WW – Whirlwind
BO – Battle Orders
BC – Battle Command
WC – War Cry
The Weapon
What weapon you manage to find determines the build. As an endgame weapon we are looking for, in order of priority:
- Elite base
- Enhanced Damage – As much as possible, 200%+ if possible.
- Crushing Blow
- Increased Attack Speed (IAS)
- Mana / Life Stolen per Hit
Two-handed Weapon vs. One-handed & Shield
We’re going with a high damage two-handed weapon on our Barbarian. The reason for this is simple: We want to deal a lot of damage, and thus we need a weapon with high base damage. Remember, all the Enhanced Damage (ED) from the weapon itself, other gear, skills and strength bonus gets applied to the base damage of the weapon. That is why we don’t want a one-handed weapon.
Base types
There are a lot of good Mauls for this build. The advantage they have is they require no Dexterity investment. Strength requirements are higher, but that boosts their damage too, so it isn’t really a disadvantage.
Polearms have great range but have a high Dexterity requirement. However, there are two very viable runewords that need to be made in polearms that suit the Berserker and Concentrate builds.
Swords are much faster than other weapons for Whirlwind, but also require an investment in Dexterity.
Staves can also be used. Although the range isn’t great, they have very low Strength and Dexterity requirements.
Speed
Berserk and Concentrate use the total Increased Attack Speed from your weapon and Equipment. The table below shows the amount required for most of the popular two-handed weapons. Attack speeds are shown in frames, there are 25 frames in one second, so a 13 frame attack is a bit slower than twice a second. If you are adding IAS from your equipment or by socketing, make sure it does something.
| Weapon | Thunder Maul | Glorious Axe Ogre Maul Decapitator Cryptic Axe Colossus Voulge | Great Poleaxe | Thresher | Highland Blade | Feral Axe | Champion Sword |
| attack speed [frames] | IAS | IAS | IAS | IAS | IAS | IAS | IAS |
| 23 | 0 | ||||||
| 22 | 4 | ||||||
| 21 | 8 | 0 | |||||
| 20 | 13 | 2 | |||||
| 19 | 19 | 7 | |||||
| 18 | 24 | 11 | 0 | ||||
| 17 | 34 | 19 | 7 | 0 | 0 | ||
| 16 | 46 | 29 | 15 | 4 | 3 | 0 | 0 |
| 15 | 58 | 39 | 23 | 10 | 9 | 5 | 4 |
| 14 | 78 | 54 | 35 | 20 | 19 | 14 | 13 |
| 13 | 105* | 75 | 52 | 34 | 30 | 26 | 23 |
| 12 | 152* | 109 | 78 | 54 | 48 | 44 | 39 |
| 11 | 232* | 163* | 117 | 83 | 72 | 70 | 60 |
| 10 | 434* | 280* | 194 | 138 | 117 | 117 | 99 |
* Breakpoint not applicable for Concentrate with Mauls
Whirlwind is a bit simpler as only the IAS on the weapon counts. In practice however this means it is more difficult to find a suitable weapon. This table shows the amount of IAS you need on the weapon to hit the fastest whirlwind speed:
| Weapon | IAS |
| Ogre Maul | 70 |
| Stalagmite | 70 |
| Champion Axe | 50 |
| Colossus Sword | 45 |
| Feral Axe | 45 |
| Colossus Blade | 40 |
| Balrog Blade | 35 |
| Highland Blade | 30 |
| Champion Sword | 25 |
There is also an online calculator for all these weapon speeds and more, if you want to try different weapons.
Weapons To Look For
These weapons should be findable without excessive effort. It isn’t an exhaustive list, there are others that will work, just follow the guidelines above.
Savage Polearm – Cube Recipe: Diamond (any quality) + 1 Staff (any type and quality) + 1 Kris (any quality) + 1 Belt (any type and quality)
This Cube recipe is great in Normal and into early Nightmare, it creates a polearm with 66-80% Enhanced Damage. It rolls different base types, keep some of the best ones so you can use them as you progress. Partizan is the best base you can get from this recipe.
Oath (4 Socket Swords / Axes: Shael + Pul + Mal + Lum)
You can make this in any of the two handed swords (except Legend Sword as it can’t get four sockets). Pick up any plain Balrog Blade, Champion Sword, Highland Blade or Feral Axe – If you find one of these bases it will get 4 sockets from Larzuk. This Runeword has the indestructible mod, making it in an Ethereal base takes it from good to awesome. As this has 50% IAS, it is the best choice for the Whirlwind build, but is excellent for Berserk or Concentrate too.
Insight (4 Socket Polearms / Staves: Ral + Tir + Tal + Sol)
Often seen as a mercenary weapon, this has good damage and a Critical Strike bonus. Thresher or Great Poleaxe are good bases, but some of the staves work well too, like Elder Staff or Shillelagh. The Meditation aura means you will never run out of mana, which is great for the Berserk build.
Obedience (5 socket Polearms: Hel + Ko + Thul + Eth + Fal)
Huge (370%) damage, faster hit recovery, crushing blow, resists and even -20% to requirements to make the polearm required stats more manageable. The only thing it lacks is IAS, which makes it useless for Whirlwind, but it is a great weapon for the Berserk and Concentrate builds.
Crescent Moon (3 Socket Axes / Swords / Polearms: Shael + Um + Tir)
The IAS on this isn’t enough to make it a Whirlwind weapon, but the most interesting thing on this weapon is the chance to cast Static Field. This won’t be triggered by Whirlwind, but can be by Berserk or Concentrate.
Honor (5 Socket Melee Weapons: 5 Socket Melee Weapons)
The damage is a bit low but it is somewhat compensated by the Deadly Strike and other mods. Berserk and Concentrate only.
Bonesnap (Normal Unique Maul)
Big damage and Crushing Blow, and even some resists. You can upgrade it as you go and it will see your Concentrator or Berserker through the game.
Steeldriver (Normal Unique Great Maul)
Good damage, IAS and hugely reduced requirements. Another one that if you find it early enough can be upgraded to get you through the entire game.
Bloodtree Stump (Exceptional Unique War Club)
Great Crushing Blow, good damage and some resists, the only thing that is missing is some IAS.
Ribcracker (Exceptional Unique Quarterstaff)
Nightfish’s favourite weapon. Good damage and crushing blow. It has 50 IAS which means, if you socket it with a Shael rune, it will hit the fastest whirlwind speed. The only downside is the range is short, but it works well for all the builds.
Immortal King’s Stone Crusher (Elite Set Ogre Maul)
As an elite item this is somewhat more difficult to find. It is still possible it will drop, and it is a great weapon, especially if you picked up any other parts of the Immortal King set from Nightmare Mephisto. Works for all builds.
Rare
Rares cannot get Crushing Blow, but they can get other good mods. Finding something great is fairly difficult, but keep picking them up and identifying them, you may get lucky. Check against the desirable mods above, can potentially work for all builds.
Upgrading Unique Weapons
In Diablo 2 all equipment has three quality variants, which increase their damage: Normal, Exceptional, Elite.
If you find a Normal or Exceptional Unique you can upgrade it using these Horadric Cube recipes:
- 1 Ral Rune + 1 Sol Rune + 1 Perfect Emerald + Normal Unique Weapon = Exceptional Version of Weapon
- 1 Lum Rune + 1 Pul Rune + 1 Perfect Emerald + Exceptional Unique Weapon = Elite Version of Weapon
Note that the stat and level requirements will also change, here are the numbers for the ones you are most likely to upgrade:
| Unique Name | Quality | Base Name | Level | Strength | Dexterity |
| Steeldriver | Exceptional | Martel de Fer | 34 | 85 | n/a |
| Steeldriver | Elite | Thunder Maul | 77 | 127 | n/a |
| Bonesnap | Exceptional | War Club | 30 | 124 | n/a |
| Bonesnap | Elite | Ogre Maul | 63 | 225 | n/a |
| Bloodtree Stump | Elite | Thunder Maul | 72 | 253 | n/a |
| Ribcracker | Elite | Stalagmite | 56 | 63 | 35 |
Rare weapons and Unique Armour can also be upgraded, check Horadric Cube Recipes page for more information.
Skills
Now we have a weapon, we need to work out what to do with it. This guide allows for three different attack skills, dependent on the weapon, but the core build is always the same.
For all Builds:
Base Build – Warcries
| Skill Points and Notes | Icon |
|---|---|
| Battle Orders – 20 Points |  |
| War Cry – 20 points |  |
| Howl – 1 Point
|  |
| Shout – 1 Point
|  |
| Battle Command – 1 Point |  |
| Taunt – 1 Point |  |
| Battle Cry – 1 Point |  |
| Find Potion – 0-1 |  |
| Find Item – 0-1 |  |
Base Build – Combat Masteries
| Mastery of Choices– 1+ | |
| Iron Skin – 1 Point |  |
| Natural Resistance – 1-3Point |  |
| Increased Stamina – 1 Point |  |
| Increased Speed – 1 Point |  |
Base Build – Combat Skills
| Leap – 1 Point |  |
| Leap Attack – 1 Point |  |
| Bash – 1 Point |  |
| Stun – 1 Point |  |
| Concentrate – 1 Point |  |
| Berserk – 1 Point |  |
Berserk Build
| Berserk – 20 Points |  |
| Howl – 20 Points |  |
Whirlwind Build
| Whirlwind – 20 Points |  |
| Weapon Mastery (Choose type depending on preferred weapon)- 20 Points |
Concentrate Build
| Concentrate – 20 Points |  |
| Weapon Mastery (Choose type depending on preferred weapon)- 20 Points |
Skill Discussion
Berserk: Berserk deals magic damage. That means we won’t be able to leech life (life tap doesn’t work either) or mana, something we’ll have to consider later on when we pick our gear. The good thing about berserk is that it deals quite a lot of damage. The bad thing is that it lowers our defence to zero, something we’ll compensate for with War Cry. Even if you go for the Concentrate or Whirlwind builds, you still want at least one point here to deal with those pesky Physical Immunes.
Concentrate: Concentrate doesn’t do as much damage as Berserk, but it is an uninterruptible attack. As it does Physical Damage, you can leech with it. Berserkers will still need to use this skill for Magic immunes.
Whirlwind: This is probably the skill most people identify with the Barbarian in Diablo 2, but it is only a good choice if you can find a suitable weapon. A single point can be useful even for Berserk or Concentrate builds as it allows you to whirl through monster packs and (potentially) out of trouble,
War Cry: In normal you might actually be able to damage monsters with this skill, but don’t forget that the main point is to stun your enemies. At level 21 it stuns for a full 5 seconds which is pretty good. Just make sure you recast it before the duration runs out. It doesn’t matter much if our defence is zero if everything is stunned. It does not work on bosses or champions most of the time, though. (It works on lister’s minions)
Battle Orders: Well, not much to say about this one. At high levels it doubles your life and mana. This works on items that give you + life and + mana, but not on items that increase your vitality, energy or on items that give you X life or mana per level. (In other words, it works on the +14 life small charm that you just found but it doesn’t work on duriel’s shell or verdungo’s belt).
Howl: Another awesome skill. Don’t underestimate it. With this you’ll be able to scare a lot of enemies at high levels. Now why is this a good thing? Well, if you meet boss packs you can send the minions running and just deal with the boss. This is especially handy if you meet multiple packs with dangerous mods. 20 points is more useful here for the Berserk build, but Concentrators or Whirlwinders just need the single point as a pre-requisite.
Battle Cry: Even though we left it at 1 we’ll cast it frequently. -50% Defence will ensure that you hit if you’re AR is low and -25% target damage will help you survive if you forget to recast war cry in time, or if war cry doesn’t work on your target.
Leap Attack: Great skill for jumping over things. Very useful in act 3 and in the arcane sanctuary. Later on it will help you escape when surrounded. A well spent skill point.
Battle Command: Another no-brainer. +1 to all skills, no reason why we shouldn’t spend one point here. Make sure you cast this war cry before casting shout and battle orders.
Increased Stamina & Speed: I’m going to differ from Nightfish here and say these are worth a point. It is really tedious or even dangerous to be moving slowly. One of the best and easiest to find Unique boots for this build (Goblin Toe) have no faster run / walk bonus, so this helps offset it if you find them.
Find Item: A point in Find Item can be useful, although you can also get the skill on the Heart Carver unique Rondel. Find Potion is a pre-requisite but not really useful – Find Item also drops potions.
Natural Resistances: At first glance it looks like an awesome skill and it is useful, but be careful not to spend too many points. If you find a few + skills items you’ll notice that the “hard” points you spent actually don’t do a lot for you, due to the diminishing returns. Put a single point here and keep a few spare for when you have your final gear, then you can decide if you need to invest more.
Which build to choose
As discussed in the Berserk notes above, items with steal life / mana per hit (leech) do not work with Berserk. This impacts survivability, but makes selecting equipment a bit easier.
If you find or manage to gather the runes and base for a weapon that meets the Whirlwind requirements above, I suggest to go with that. If you have only found one of the slower weapons, you need to pick between Berserk or Concentrate. Choosing between them really comes down to what the rest of your equipment looks like and personal preference. If you have Life Stolen per Hit, Concentrate is possibly easier to play, but can feel slow.
Other Equipment
As this is intended for untwinked play you won’t find any mention of high level items here. But we can’t make do without putting some effort into getting good items. The better your gear, the better your odds of beating the game.
What to look for in your equipment
In order of priority:
Resistances – Even with Natural Resistance, in the later part of the game you will still need more resists from your gear. If you can get 75 to all resists great, but you don’t need it. Remember you can boost poison or cold resistances temporarily using potions. Aim for the following as a minimum in Hell:
50 fire resist
20+ cold resist
75 lightning resist
20+ poison resist
% Damage Reduction (Especially for Berserkers) – Reduces the physical damage you take
Attack Rating (AR) – Increases your chance to hit, you should aim for 5000 minimum, 7000+ is better
% Life stolen per hit (Whirlwind or Concentrate only) – Commonly known as life leech. A percentage of the physical damage you deal replenishes your life bulb. As Berserk does Magic Damage, this won’t work for Berserkers.
% Mana stolen per hit (Whirlwind or Concentrate only) – Commonly known as mana leech. A percentage of the physical damage you deal replenishes your mana bulb. Again, won’t work for Berserkers.
% Damage goes to mana (mainly for Berserkers) – As Berserkers can’t leech back to refill their mana, they need another solution. If you can get this mod on your gear it can quickly refill your mana bulb.
Mana per kill (mainly for Berserkers) – You can also get a fixed amount of mana back after each kill. This is available on some equipment and Aureolic Jewels.
Increased Attack Speed (IAS) – Already discussed in the weapon section, can also be found on Gloves (20%), Jewels of Fervor (15%) and some Armour.
Faster Hit Recovery (FHR) – Aim for either 27% or 48% breakpoints
Defense (mainly for Concentrate, useless for Berserk) – Don’t go out of your way to get it, but as Concentrate gives you a defense boost it is worth if for this build.
+ Skills – It is not that +Skills are not useful, it is just other things are more so.
Cannot be frozen – Nice, but not necessary and difficult to find without a shield.
You should aim to be in your endgame gear before you enter The Monastery in Act 1 Hell. All Set and Unique items below can be found from Nightmare Mephisto. The runes drop from The Countess in Hell. Look for bases for runewords from late Nightmare.
Body Armour
Duress (3 Socket Body Armor: Shael + Um + Thul)
This armour is more offensive with damage and Crushing Blow. It has a bit of resists and faster hit recovery. If you have your resists covered elsewhere, it is a great choice.
Lionheart (3 Socket Body Armor: Hel + Lum + Fal)
Resists, stats and even a bit of damage. Great value armor.
Treachery (3 Socket Body Armor: Shael + Thul + Lem)
This is really an Assassin armour, but it is also great for Concentrators and Berserkers. It has a huge 45% IAS, Faster Hit Recovery and chance to cast fade, which will boost all your resistances by 60% and even give you 15% damage reduction when it triggers.
Smoke (2 Socket Body Armor: Nef + Lum)
If you are in need of resists, this armour gives you 50% and a bit of FHR. If you have the resists covered elsewhere, there are better options.
Duriel’s Shell (Exceptional Unique Cuirass)
Nice resists and defence as well as a strength bonus. This is one of the only places you are likely to find the Cannot be Frozen mod for this build. Can be upgraded for more defence, but don’t do it if you are a Berserker.
Shaftstop (Exceptional Unique Mesh Armour)
The 30% damage reduction alone makes this a useful armour. The defence is also good, so is worth considering to upgrade if you are using Concentrate.
Helm
Guillaume’s Face (Set Winged Helm)
With 35% Crushing Blow this is a great offensive helm. Also has other nice mods like Faster Hit Recovery and Strength, but lacks resists.
Rockstopper (Exceptional Unique Sallet)
Nice defensive helm with Damage Reduction, Faster Hit Recovery and resists.
Rare Circlet
Rare circlets can be great, keeping picking these up or gambling for them.
Belt, Boots and Gloves
Goblin Toe (Normal Unique Light Plated Boots)
25% Crushing Blow but not a lot else. If you find a pair, at least keep them in your stash for boss fights.
String of Ears (Exceptional Unique Demonhide Sash)
Up to 15% Damage Reduction and Life Stolen per hit, this is the best belt for Concentrate and Whirlwind builds.
Nightsmoke (Normal Unique Belt)
10% to all Resists and a huge 50% Damage to Mana, this will pretty much solve your mana problems for the Berserker build. Upgrade it with the Horadric Cube to get another row of potions.
Laying of Hands (Set Bramble Mitts)
20% IAS, 50% Fire Resist and an enormous 350% damage to Demons. This is the best choice of gloves for almost any melee build.
Rare Belt / Boots / Gloves
Rare boots can be the best in the game, gloves and belts can also be grat choices if you can’t find the items mentioned above. Look for:
- Resists – All items
- IAS – Gloves
- Faster Run/Walk – Boots
- Faster Hit Recovery – Belt / Boots
Jewelry
Angelic Wings and Angelic Halo (Set Amulet and Ring)
These are very easy to find, when you wear the ring with the amulet it gives you a huge Attack Rating boost. You can double this up with two rings, The amulet also includes 20% Damage to Mana. Two rings plus the amulet should be the default setup for the Berserker. Whirlwind and Concentrate Barbs should also use this setup if possible, but may need the second ring slot to cover other gaps.
Rare Ring
This is only really for Whirlwind or Concentrate Barbarians who can’t find Mana / Life Stolen per hit elsewhere in their equipment. Also look for Attack Rating, Mana and Resists.
Switch Weapons
Heart Carver (Exceptional Unique Rondel)
If you find one of these you can save putting any points into Find item as it offers +4 to both Find Item and Find Potion. If you are using a Maul be careful of the 58 Dexterity requirement.
+3 Warcry Weapons
Magic (blue named) weapons and get the Echoing prefix which gives +3 to Warcries. A pair of these and switch will boost all your Warcries by +6, increasing your life, mana and the duration it lasts. You can buy these from vendors in Nightmare.
Charms
Pick up all charms and identify them. Keep any resistance charms that you find to begin with, keep them in your inventory and upgrade them as you go. You should aim for Grand Charms of 20% or better, Large Charms of 10% or better and Small Charms of 5% or better. If they give resistance to all elements,keep lower charms, too. Also look for Life, Mana or Attack Rating, all of these can make a significant difference to your character.
Socketing
Your first quest in Act 5 allows you to socket an item. As the last reward comes very late in the game, you can count on two opportunities. For a two handed build, you have three slots you can socket – Helm, Armour and Weapon. Consider carefully what you will socket, you should not socket anything other than your endgame equipment.
Weapon is the first item to socket. If you have found a nice base that you know will give you the correct number of sockets for a runeword, use Larzuk to socket it. If you have a Unique weapon, it will get one socket. Socket with a Shael rune if you need the IAS or a damage jewel if you find a nice one and don’t need the IAS.
The second socket goes in either the Helm or the Armour. I don’t recommend using it to socket an armour for a runeword, find a socketed base instead. Socket an endgame rare, set or unique and add an IAS jewel if you need one or a jewel or rune to add to your resists if you don’t.
Stat Points
As you play through Normal and Nightmare difficulties, keep at least 50 points unspent. There is nothing more annoying than finding a great weapon and not being able to equip it. By the time you enter Hell, you should have your end game weapon and spend any leftover points in Vitality.
Strength: Enough to equip your weapon and armour
Dexterity: Enough to equip your weapon, this will need no points if you use a Maul.
Vitality: All the rest
Energy: None
Respecs
Diablo two offers three opportunities to respec the skills and points of the character, once the Den of Evil quest is completed in Act 1. Save those respecs, you may need them if you find a great weapon later in Hell difficulty.
Mercenary
There is really only one choice for this buld, the Act 2 Desert Mercenary. You want an offensive one hired in Nightmare difficulty. This one has the Might aura, which increases your damage.
Mercenaries do not use up durability, so ethereal items are best for them. They need some Life Stolen Per hit to keep them alive, especially in later difficulties. After that, Resists and Faster Hit Recovery. If you can get it Cannot Be Frozen is great.
Weapons – Savage Polearm, Insight, Obedience, Honor. Make the runewords in Ethereal bases is possible.
Helm – Anything with % Life Stolen Per Hit, unless it is already covered by the weapon or armour. Circlets can work for this.
Armour – Pretty much the same choices that you want for yourself – Duriel’s Shell, Treachery, Lionheart, Shaftstop all work well.
Hotkeys
It is highly recommended to re-assign the default hotkeys to the letter keys. I normally assign buffing skills to the top row, secondary skills to the second and primary attacks to the bottom, for example:
1 – Health Potion
2 – Rejuvenation Potion
3 – Rejuvenation Potion
4 – Mana Potion
Q – Battle Command
W – Shout (unless you are a Berserker)
E – Battle Orders
R –
A – Find Item
S – Battle Cry
D – Howl
F –
Z – Whirlwind
X – Concentrate
C – Berserk
V – War Cry
H – Town Portal
Space – Swap weapons
F1, F2 etc – Character Screen, Inventory etc.
Walkthrough
Normal Difficulty
The walkthrough assumes solo playthrough, if you play in a multiplayer game or use the /playersX command in Single Player, you will end up at a higher level than given for each area..
Unless this guide specifically tells you not to, save all your quest rewards. You can spend the skill and stat points, but we need to save things like Imbues, sockets and respecs for later.
Act I: The Sightless Eye
We start off in a wet temperate landscape. You can talk to the NPCs if you like, then step out onto The Blood Moor.
Early gameplay with the Barbarian is pretty simple – Take your sword and sick ’em with the pointy end. Only spend your stat points when you actually need them. As a rough target, 36 Strength is as far as you need to go in Act I. Put the rest of the points in Vitality, but try and keep some in reserve for when you find a weapon upgrade. Put a point in Bash as soon as you level. Easier monsters use Normal Attack on, Unique ones like Corpsefire get Bashed. You won’t have enough mana to use it all the time.
Collect everything you can. Keep potions until you can’t hold more. Sell weapons and any armour you don’t need for gold. Wands, Scepters and Throwing Knives can be a good source of income, but don’t waste money buying Scrolls of Identify just yet. Keep transferring the gold to your stash as you don’t want to lose it if you die. Keep all chipped gems for now. Buy a Tome of Identify and Tome of Town Portal from Akara early on, that will stop your inventory being full of scrolls. Check all weapons to see if they can increase your damage. Keep an eye out for items with Life or Mana Stolen per hit, Cathan’s Seal set ring is a good way to get this early on.
Clear out all the caves and areas (a “Full Clear”), leave no monster alive! Once you have defeated Blood Raven, speak to Kashya and get a Rogue Mercenary. Buy her a Long Bow with three sockets from Gheed and put any chipped emeralds you have found in it. If you have found any Jewels of Envy, put them in her helm or armour.
Put a point in Leap when you get to Level 6, also Howl and Shout. Do not put any points into a Weapon Mastery just yet – You need to know what weapon you will be using first.
Once you have rescued him he will identify items for free, so get him to ID anything you have stored away and sell it for gold. Tristram is filled with boss packs, so this is a good place to level a bit and find some items in the early game.
By now you are probably starting to wonder what you are going to do with all those gems and gold you have picked up. The chipped emeralds and rubies are probably already in your mercenaries bow. Visit Charsi and shop for Ring Mail with three sockets. You may have to leave the Rogue Encampment and revisit her until she shows you one. They cost about 3600 gold. Socket it with chipped topazes. This will mean you find more magic items, which means more chances of finding the weapons and armour you need. Find a helm with two sockets and put chipped topazes in that too. If you already have a bow full of emeralds or rubies, you can sell the rest. Hang on to the diamonds for the Savage Polearm recipe and topazes though.
Proceed down all five levels of her tower and kill her. This is an optional quest, but killing her will drop some runes. We don’t really need them for now, but the experience is worthwhile.
Proceed onwards and get the Outer Cloister Waypoint. Go back to the Tamoe Highland and find The Pit. Clearing it out should get you to level 12. Put a point into Increased Stamina. You can put a point into Find Potion and Find Item now if you want to use it.
If you have spare gold, you can visit Gheed and gamble for boots and gloves. Look out for rare boots with resists and/or faster run/walk. Boots and gloves can also get Increased Chance of Magic Items, you want those too.
Time to push on through the Monastery and towards Andariel. But then Deckard Cain probably told you that already. Keep killing as much as possible, open all the chests and caskets, these can be a good source for chipped gems.
When you get to the Catacombs level 4, clear out the outer room but do not go through the big doors just yet. It is time to fight Andariel, but you need a bit of prep first. Take a Town Portal back to Akara and buy eight Antidote potions. Drink four yourself and feed four to your rogue mercenary. Fill up your belt with health potions. Then back through the town portal and keep progressing down the room. Andariel will come at you, spraying poison everywhere. Keep bashing her and feed yourself potions as often as you need to keep your life up, and she will soon be dead.
Pick up her drops and go back to town. Talk to Warriv and we are off to Act II
Act 2: The Secret of the Vizjerei
Level 16 – 18 – The Cube and The Staff
We are in the desert and it is time for shopping again. Sell any items you found and go and visit Fara, you are after a three socketed Breast Plate. Put three more chipped topazes in it, or Flawed if you have any. Take all the gear of your mercenary and go and hire an Offensive mercenary from Greiz. Put the old armour and helm on him and go and buy him a weapon. He can use spear or polearm type weapons. Just give him something with as much damage as you can.
You can also look for glove and boot upgrades too. When you are done, head to the sewers and deal with Radament. Then off to the Dry Hills for the Horadric Cube.
Once you have the cube you can use it to cube up some of your chipped topazes and sapphires to flawed, or flawed to normal. Buy new armour and re-socket with better gems if you can. Cube 3x rejuvenation potions to a Full Rejuvenation potion and start cubing Savage polearms for the mercenary and yourself too (see weapon section).
Continue on and collect the amulet and staff and cube a Horadric Staff. Put points into Battle Cry, using this will increase your chance to hit. Put a point into Concentrate, this will be your main attack now. Put a point in Leap Attack and Stone Skin too.
Level 19 – 22 – The Summoner and Duriel
Clear out all the paths to the summoner then proceed to the Canyon of The Magi. Clear out all the false tombs for loot and experience, then prepare for Duriel.
Duriel is a tough boss and the area to fight him in is small. You should be about level 22, maybe a bit higher. Chug a few thawing potions before you go in. The same strategy as Andariel, keep hitting him and chugging potions at the same time.
Act 3: The Infernal Gate
Level 23 – 24
Welcome to the jungle. The first part of this act is a bit of a maze that many players hate. The great thing is that Leap Attack can leap over the rivers – Just shift + right-click empty ground and you will sail right over.
Put a point in Battle Orders as soon as you hit level 24 and put another point in each time you level. Also, put a point in Increased Speed.
By now you should know what is worth collecting and selling for gold. Keep gambling for gloves and boots, you can try circlets too if you have enough money. Upgrade your gemmed armour as you get better gems. The act boss, Mephisto isn’t that hard. Even your merc may survive if you are lucky.
Act 4: The Harrowing
Levels 25 – 27
We are in an Angelic outpost in Hell. The monsters can be tougher here, by now you should have at least 60 Strength – buy a plated belt for four rows of potions.
Kill Izual and collect the skill points from Tyrael. Even if you are thinking you will use Concentrate, I suggest that you hold off adding more points just yet. You can get Whirlwind and Berserk at level 30, try them before you make a decision.
Take out Hephasto and collect your Hellforge. The gems are probably going to be more interesting than the runes, once again you can upgrade the gems in your armour. Enter the Chaos Sanctuary, clear each of the tree arms and kill the seal bosses in turn. Then it is time for Diablo.
Diablo is going to be a tough fight and you can’t rely on the merc. Diablo is quick and has high damaging attacks. Cast Battle Orders, and then wade in and start whacking away.
Act V: Lord of Destruction
Levels 28 – 30
Tyrael has sent you and your trusty mercenary to relieve the siege on Harrogath and save the world. This act is the biggest yet so, when you are ready, leave the gate and start climbing the mountain. The Bloody Foothills is a great place to level for a bit, so take the time to re-run it if you want to. When you are ready, carry on up the mountain and rescue the Barbarians then Anya.
As soon as you hit level 30 put a point in Berserk and Whirlwind if you think you have a suitable weapon. Put a point in Natural Resistance, War Cry and Battle Command too. Cast Battle Command before you cast Battle orders. Try and keep Battle Orders active at all times, this gets much easier as it gets more points into it.
Basic gameplay is now:
- Cast Battle Command, Shout and Battle Orders. Keep re-casting this before Battle Orders wears off.
- When you get close to the monsters, War Cry to stun them (you will see swirlies around their heads), then hit them with your main attack.
- Repeat the War Cry if the stun wears off, keep hitting them until they are dead.
Put points into War Cry and Battle Orders as you level. Leave Berserk / Whirlwind / Concentrate at one point for now.
If you haven’t levelled much you will get to The Arreat Summit around level 32. Stock up on potions, including a few big purples as you can’t town portal back for more during this fight, this will mean you have to start again. Click the altar, then run away. Your goal is to separate them, you don’t want to take them on all together. Run around in circles, hack away at one, run again if you have to.
Once you have cleared out the Worldstone Keep it is time to face Baal. But you have to get through his minion waves first. Clear some space in the Throne of Destruction in case you need to retreat. The first two waves should pose no problem. The last three waves are harder, make sure you use your warcry to stun the monsters before you hit them. Baal is hard to kill, but not as dangerous as Diablo. You may need to return to town to restock on potions and revive your mercenary, but be patient and you will be talking to Tyrael and completing Normal difficulty. Congratulations Slayer!
Level 36 – 45 – Level Up
Then I recommend levelling up a bit before you move to Nightmare, somewhere in the region of 40-45 is good, personally I always level to 45. Running Baals minion waves should be fairly easy and gives experience, but leave out Baal himself as he takes too long to kill. If you are playing on Battle.net, you should be able to join a Normal Baal Runs game, but avoid the temptation to rush through the Nightmare difficulty with other players, you won’t learn the mechanics of the game this way. In Single Player you can use the /playersX command to ramp up the experience and the difficulty, but try /players3 before going to /players5 or higher. Just press Enter and type it into a chat window.
Nightmare Difficulty
The main objective for Nightmare is to gather gear you will need to survive Hell. Despite the name, most players find it easier than Normal, at least for the first few acts.
Keep splitting the Skill points between Battle Orders and War Cry until you have at least 12 points in each. After that, you can also start putting points into your primary attack if you want.
Keep gambling for belts, boots, and gloves. Keep on your helm and armour with the topazes. You should be aiming for a helm with 2x Perfect Topaz and a 4 socket armour, like a Gothic Plate, with 4x Perfect Topaz.
Change your Desert Mercenary to an Offensive one as soon as you get to Act 2. Take his equipment off first though or you will lose it.
When you have killed Nightmare Mephisto, you need to start running him to improve your gear. You can get rare items and all the set and unique items listed from him with a bit of patience.
Once again you may need to level up a bit before entering Hell, I suggest around level 75.
Hell Difficulty
Hell is a step up in difficulty. The main focus now is simply survival, so you are going to get rid of most of your magic find gear. You know the quests now, so get fully equipped and step out onto The Blood Moor.
If you have found a decent base for either Armour or Weapon and want to improve on what you got from Mephisto, get to the Countess and start running her for runes. If you are in Single Player, you want to do this at /players1. She should take that long to drop you what you need, she also gives good experience.
Now you need to commit to your end-game weapon and attack method. You should have all your final gear now and your Magic Find items are in one of your shared stash tabs. If you need to use a respec, now is the time to do it. Visit Akara and be careful when you start re-assigning Skill and Stat points.
Final Tips:
- Keep Battle Orders active.
- Keep your enemies stunned with War Cry
- Look after your Mercenary. If he dies the Might aura vanishes, which will significantly reduce your damage.
- Check monster Immunities in Hell. Use Berserk for Physical Immunes and Concentrate for Magic Immunes.
- Be patient, take it slowly. Most deaths are caused by rushing into things.
Good Luck!
Hotkeys
It is highly recommended to re-assign the default hotkeys to the letter keys. I normally assign buffing skills to the top row, secondary skills to the second and primary attacks to the bottom, for example:
1 – Health Potion
2 – Rejuvenation Potion
3 – Rejuvenation Potion
4 – Mana Potion
Q – Battle Command
W – Shout (unless you are a Berserker)
E – Battle Orders
A – Find Item
S – Battle Cry
D – Howl
Z – Whirlwind
X – Concentrate
C – Berserk
V – War Cry
H – Town Portal
Space – Swap weapons
F1, F2 etc – Character Screen, Inventory etc.
Credits and further Reading
Thanks to Nightfish who was a big help to me when I started playing. Make sure you read his Hardcore Berserker guide too.
Guide to Untwinked Single pass Early Game Magic Finding by jiansonz is a big influence on the Normal walkthrough.


Loading new replies...