- Mar 14, 2020
- 1,923
- 2,640
- 113
@Luhkoh nice progress! And that's a nice chippie reroll, but it may be worth to keep using the chipped/flawed diamonds until you get a Partizan and reroll that also for when the merc gets stronger. The extra damage will likely help in later Normal and A1 NM.
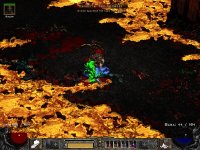
I have quite a bit of progress to report for Orange, who is at the Docks, deciding how to spend her NM personalization before progressing. As noted in my last update, for the start of A1, resists were quite good, made even better by this Amber (11) SC found right out the gate to nearly max lightning resist. We kept it at p3 or p5, except for Countess and Andy's level, dropping to p3 when I knew there would be LIs. The lightning immune bosses were not uncommon, and with nasty mods took some care (here's one example and another that was PI and amp to boot).
That screenshot also shows a use of respec, to grab a maxed Valk. The merc was just too squishy to tank LIs with such low damage and life leech. After having to hit and run Blood Raven with CS after the merc had been overwhelmed by skeletons and zombies at p3, I knew it was time to pull the trigger, keeping jab to contribute a little pit for the LIs. This resulted in only 8 points less in the Power Strike synergy because I rebalanced out of Decoy and the 3 I'd put in Impale. So a bit weaker LS and CS, but much stronger on net.
Unsurprisingly, progress was MUCH smoother with the Valk to occupy monsters, although it takes some maneuvering, and often just recasting, to get her at the front of the engagement instead of the merc). And that first boss delivered my first elite magic spear, which was became this:
.jpg")
Not too bad, at least having some enhanced damage. The merc became sturdier after that, with two runes going into his 2os blood helm to max cold and poison (which were below 50). Careful progress led her to the Cain rescue, and Griswold was really tough coming way out to east and bringing the amp with extra fast right into that fixed champ pack and another boss pack that came over. It was probably the most challenging Tristram clear I've had in a long time! Akara's reward was promptly sold.
I was a bit worried about dark archers in the Pit, especially with amp or aura, but decided to keep it at p3. This lass greeted Orange right at the entrance. Thankfully it was a round layout, rather than the "u" that is a dead end at each arm. So I was able to go back and forth to draw out the minions before tackling the boss solo. After that, it was uneventful to Pitspawn, who forced a retreat before getting a smaller group isolated with the boss. I had picked up a plain Coronet by this point, so decided to chance an Imbue with solid results:
.jpg")
No + skills, but the resists are nice, with an increase over current caster craft mask to lightning, major bump for cold freeing up some charms in favor of vita SCs, and poison increased once it got Larzuk treatment at the end of the Act and the 15 IAS/22 PR jewel. Only fire dropped a little. Oh, and Andy was easy with nothing of note dropping.
A2 was taken on p3 until the Tombs. But first we did some crafting, with only the caster armor an upgrade, but a welcome one with the FHR, LR and mana boost! I really value FHR, and the armor allowed Orange to get the 52 FHR breakpoint with a plain 5 FHR SC, the two resist GCs and the 10 FHR from the belt. An LI Unravaller Champ pack greeted Orange as a stair trap in the Halls with another boss in the doorway to the west, but we were able to steer around them and get a foothold to the south and then clear that way to come at the Champ pack from the east.
Progress was steady, but slow, due to quite some LI boss packs, with quite a few times 3 overlapping packs, and one time 4. I won't bore with all the sceenshots, but will highlight two encounters.
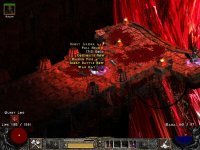
First, in the Palace Cellars, we saw Fanatacism and a lot of skeleton archers flying our way, amp triggered, and Lehoras dropped immediately. We retreated, TPed to remove amp, and tried again with some Decoy scouting, Lehoras dropped immediately, again, as a Blunderbore pack came charging through. Thankfully the Blunderbore pack had followed out of fanaticism range, so the Valk and Orange took at the pack and then whittled down the boss. I now surmised that there were two archer packs, so left Lehoras down and made multiple approaches with walls as cover, finding a third archer pack, but eventually taking them out separately (boss 1 taken down, boss 2 missed the screen but you can see the fanatcism aura in the other pic, and boss 3 ). It took about 10 minutes to work through the archer packs.
Second, in one of the False Tombs, coincidentally I took a screenshot to show a tactic when LIs and mixed in with non-LIs, which is get in a doorway and poke over the Valk's shoulder with LS to whittle down the non-LIs, which allowed a retreat into the hallway to let the LI beetles through 2-3 at a time and a Decoy blocking the door to keep from getting overwhelmed. Suddenly, amp triggered and champ beetle charged to ward the door from the north. After a quick retreat, we regrouped and learned there were also two Blunderbore packs back there, one of them an LI boss. And it turned out there had been two beetle champ packs, the second of which pushed the crew back after it charged through after the LI amp Blunderbore had been taken down. Fun times! (boss 1, boss 2, beetle pack).
Then onto the True Tomb, and Duriel went down meekly, with Orange just shy of level 83:
.jpg")
In terms of item upgrades, we rolled this caster ring before tackling the Canyon and Tombs, with the FR a nice improvement over the unnecessary cold resist on the prior one.
And the drops that make for the decision: a non-eth Superior (15% ED) Thresher that will get 5os from Larzuk, and a 3os non-eth Thresher. I have Fal/Ko for Obedience and an Um for Crescent Moon. Obedience seems like the clear winner, with higher ED (on top of the 15% for Superior base), some fire damage, AR FHR and resists allowing other uses for the helm sockets. Because LIs are the issue here, the static from Crescent Moon seems less helpful, and the ITD isn't as clear an improvement with Enchant's AR boost. Open wounds would be helpful, but only LI/PIs really make it needed given CS making short work on PIs.
So I think that I'm going to pull the trigger on Obedience and may get some progress into A3 this afternoon. We've full cleared so far, so I will try to keep that up, but will likely drop to p1 from here on out to keep things moving.
Orange, Level 82, and Lehoras the A2 HF Merc, A3 Hell, Kurast Docks
I have quite a bit of progress to report for Orange, who is at the Docks, deciding how to spend her NM personalization before progressing. As noted in my last update, for the start of A1, resists were quite good, made even better by this Amber (11) SC found right out the gate to nearly max lightning resist. We kept it at p3 or p5, except for Countess and Andy's level, dropping to p3 when I knew there would be LIs. The lightning immune bosses were not uncommon, and with nasty mods took some care (here's one example and another that was PI and amp to boot).
That screenshot also shows a use of respec, to grab a maxed Valk. The merc was just too squishy to tank LIs with such low damage and life leech. After having to hit and run Blood Raven with CS after the merc had been overwhelmed by skeletons and zombies at p3, I knew it was time to pull the trigger, keeping jab to contribute a little pit for the LIs. This resulted in only 8 points less in the Power Strike synergy because I rebalanced out of Decoy and the 3 I'd put in Impale. So a bit weaker LS and CS, but much stronger on net.
Unsurprisingly, progress was MUCH smoother with the Valk to occupy monsters, although it takes some maneuvering, and often just recasting, to get her at the front of the engagement instead of the merc). And that first boss delivered my first elite magic spear, which was became this:
Not too bad, at least having some enhanced damage. The merc became sturdier after that, with two runes going into his 2os blood helm to max cold and poison (which were below 50). Careful progress led her to the Cain rescue, and Griswold was really tough coming way out to east and bringing the amp with extra fast right into that fixed champ pack and another boss pack that came over. It was probably the most challenging Tristram clear I've had in a long time! Akara's reward was promptly sold.
I was a bit worried about dark archers in the Pit, especially with amp or aura, but decided to keep it at p3. This lass greeted Orange right at the entrance. Thankfully it was a round layout, rather than the "u" that is a dead end at each arm. So I was able to go back and forth to draw out the minions before tackling the boss solo. After that, it was uneventful to Pitspawn, who forced a retreat before getting a smaller group isolated with the boss. I had picked up a plain Coronet by this point, so decided to chance an Imbue with solid results:
No + skills, but the resists are nice, with an increase over current caster craft mask to lightning, major bump for cold freeing up some charms in favor of vita SCs, and poison increased once it got Larzuk treatment at the end of the Act and the 15 IAS/22 PR jewel. Only fire dropped a little. Oh, and Andy was easy with nothing of note dropping.
A2 was taken on p3 until the Tombs. But first we did some crafting, with only the caster armor an upgrade, but a welcome one with the FHR, LR and mana boost! I really value FHR, and the armor allowed Orange to get the 52 FHR breakpoint with a plain 5 FHR SC, the two resist GCs and the 10 FHR from the belt. An LI Unravaller Champ pack greeted Orange as a stair trap in the Halls with another boss in the doorway to the west, but we were able to steer around them and get a foothold to the south and then clear that way to come at the Champ pack from the east.
Progress was steady, but slow, due to quite some LI boss packs, with quite a few times 3 overlapping packs, and one time 4. I won't bore with all the sceenshots, but will highlight two encounters.
First, in the Palace Cellars, we saw Fanatacism and a lot of skeleton archers flying our way, amp triggered, and Lehoras dropped immediately. We retreated, TPed to remove amp, and tried again with some Decoy scouting, Lehoras dropped immediately, again, as a Blunderbore pack came charging through. Thankfully the Blunderbore pack had followed out of fanaticism range, so the Valk and Orange took at the pack and then whittled down the boss. I now surmised that there were two archer packs, so left Lehoras down and made multiple approaches with walls as cover, finding a third archer pack, but eventually taking them out separately (boss 1 taken down, boss 2 missed the screen but you can see the fanatcism aura in the other pic, and boss 3 ). It took about 10 minutes to work through the archer packs.
Second, in one of the False Tombs, coincidentally I took a screenshot to show a tactic when LIs and mixed in with non-LIs, which is get in a doorway and poke over the Valk's shoulder with LS to whittle down the non-LIs, which allowed a retreat into the hallway to let the LI beetles through 2-3 at a time and a Decoy blocking the door to keep from getting overwhelmed. Suddenly, amp triggered and champ beetle charged to ward the door from the north. After a quick retreat, we regrouped and learned there were also two Blunderbore packs back there, one of them an LI boss. And it turned out there had been two beetle champ packs, the second of which pushed the crew back after it charged through after the LI amp Blunderbore had been taken down. Fun times! (boss 1, boss 2, beetle pack).
Then onto the True Tomb, and Duriel went down meekly, with Orange just shy of level 83:
In terms of item upgrades, we rolled this caster ring before tackling the Canyon and Tombs, with the FR a nice improvement over the unnecessary cold resist on the prior one.
And the drops that make for the decision: a non-eth Superior (15% ED) Thresher that will get 5os from Larzuk, and a 3os non-eth Thresher. I have Fal/Ko for Obedience and an Um for Crescent Moon. Obedience seems like the clear winner, with higher ED (on top of the 15% for Superior base), some fire damage, AR FHR and resists allowing other uses for the helm sockets. Because LIs are the issue here, the static from Crescent Moon seems less helpful, and the ITD isn't as clear an improvement with Enchant's AR boost. Open wounds would be helpful, but only LI/PIs really make it needed given CS making short work on PIs.
So I think that I'm going to pull the trigger on Obedience and may get some progress into A3 this afternoon. We've full cleared so far, so I will try to keep that up, but will likely drop to p1 from here on out to keep things moving.
Orange, Level 82, and Lehoras the A2 HF Merc, A3 Hell, Kurast Docks

.jpg")
.jpg")
.jpg")


 .
.


 Google